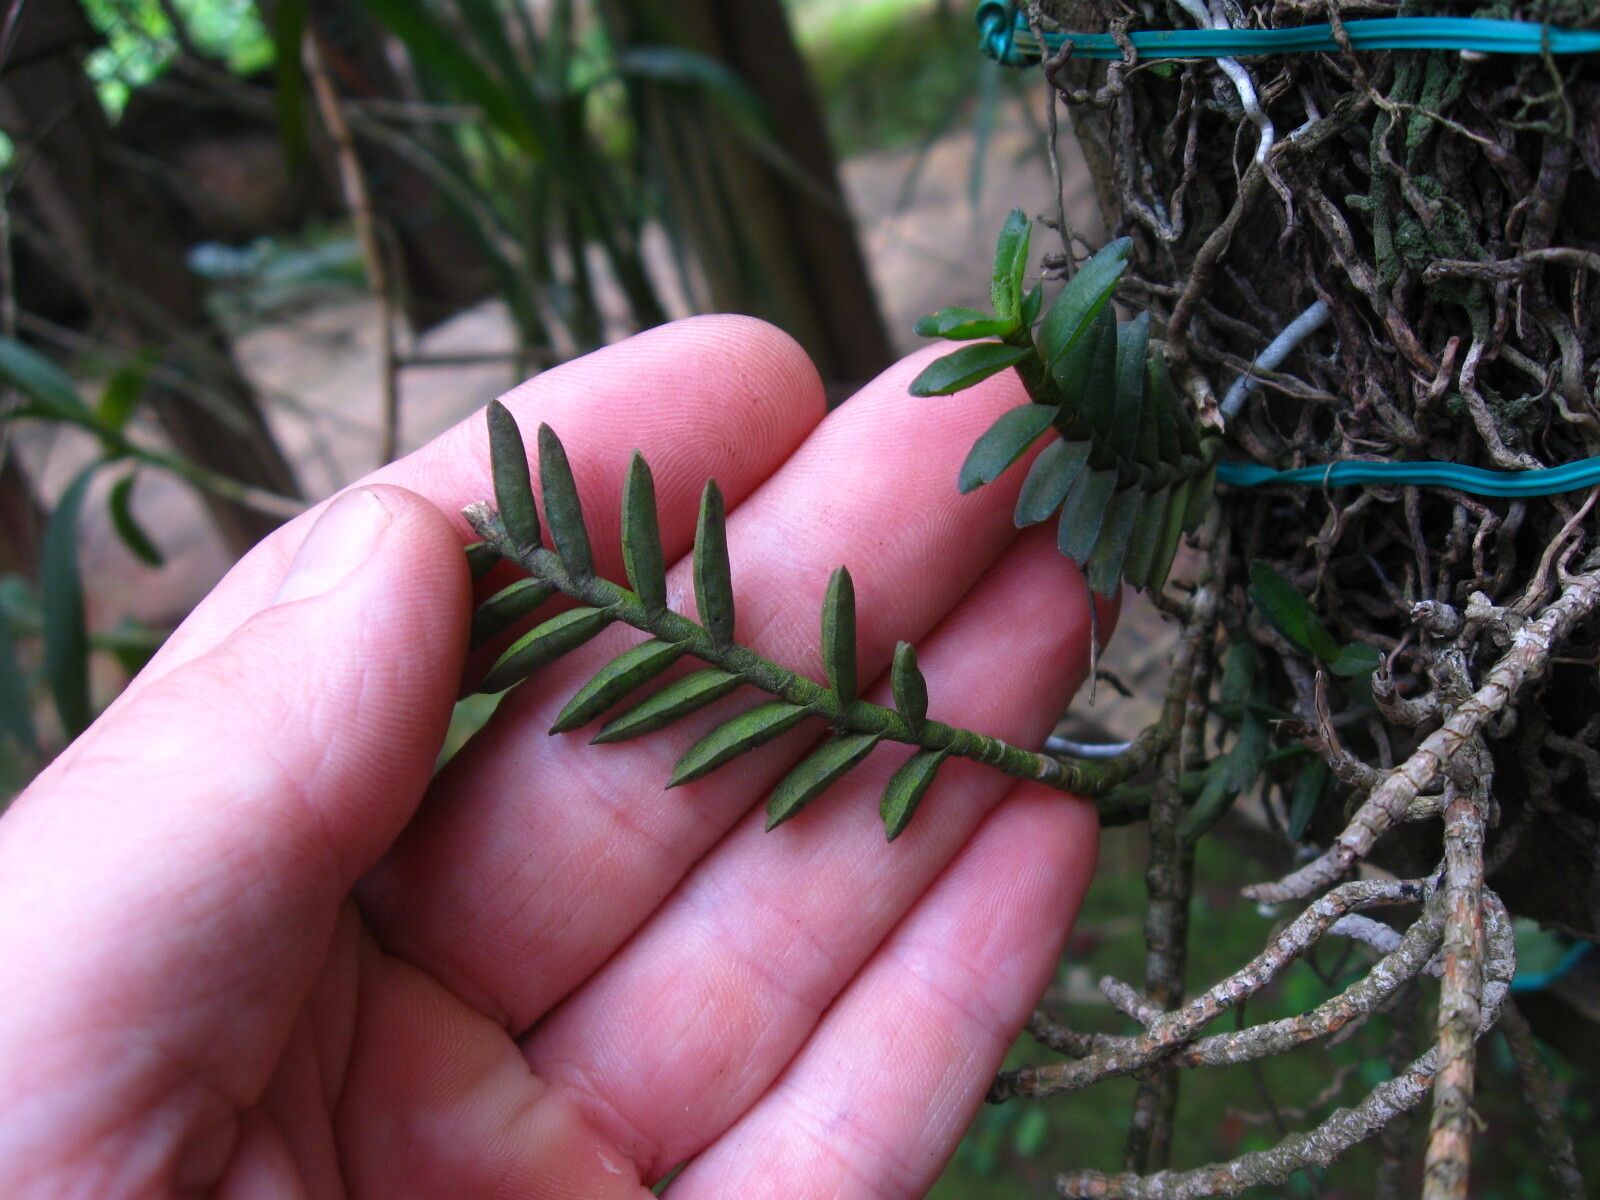
Oh, Tridactyle laurentii! If you’ve ever seen one of these beauties gracing a windowsill, you’ve probably been captivated by its unique, almost sculptural foliage. It’s one of those plants that brings a touch of the exotic indoors, and I can tell you, propagating your own is incredibly rewarding. Turning a single plant into a whole family feels like a little bit of magic.
Now, is it easy for beginners? Honestly, Tridactyle laurentii can be a bit of a… well, let’s call it a “picky grower” sometimes. It’s not usually the first plant I’d hand to someone just starting their green journey, but with a little patience and understanding, you can absolutely have success!
The Best Time to Start
For Tridactyle laurentii, your best bet is to propagate during its active growing season. Think late spring through mid-summer. This is when the plant has plenty of energy to recover from cuttings and to focus on root development. Avoid propagating when the plant is stressed from extreme heat, drought, or during its dormant period in winter.
Supplies You’ll Need
Here’s what I always have on hand when I’m ready to get propagating:
- Sharp Pruning Shears or a Clean Knife: For making clean cuts on stems.
- Rooting Hormone (Optional but Recommended): A powder or gel that encourages root development.
- Well-Draining Potting Mix: I like a blend of regular potting soil with perlite or coarse sand for excellent drainage. A cactus/succulent mix works well too.
- Small Pots or Seedling Trays: Clean containers are key to preventing disease.
- Clear Plastic Bag or Dome: To create a humid environment for cuttings.
- Spray Bottle: For misting.
- Labeling Stakes: To remember what you’ve planted and when!
Propagation Methods
Tridactyle laurentii can be coaxed into new life through a couple of reliable methods. I find stem cuttings to be the most straightforward, but division is also a great option if your plant is already a bit bushy.
Stem Cuttings
- Take Your Cuttings: Using your clean shears or knife, select a healthy stem that’s not flowering. Make a clean cut just below a leaf node (where a leaf meets the stem). Aim for cuttings that are about 3-5 inches long. Remove the lower leaves, leaving just a couple at the top.
- Apply Rooting Hormone: If you’re using it, dip the cut end of the stem into the rooting hormone, tapping off any excess.
- Plant Your Cuttings: Fill your small pots or trays with your well-draining mix. Make a small hole in the center with your finger or a pencil. Gently insert the cut end of the stem into the hole, ensuring the leaf nodes you cleared are below the soil surface. Firm the soil gently around the stem.
- Create Humidity: Water the soil lightly. Then, cover the pot with a clear plastic bag, or place it inside a propagator with a clear lid. This traps moisture and creates a mini-greenhouse effect.
Division
This is a great method if your plant has produced offsets or has grown a bit crowded.
- Remove from Pot: Gently unpot your Tridactyle laurentii.
- Inspect the Roots: Carefully loosen the soil around the root ball. You’re looking for natural divisions where smaller plantlets are attached to the main root system, or where a new stem is emerging from the base with its own roots.
- Separate the Divisions: Use your fingers or a clean knife to gently separate the offsets from the mother plant. Try to ensure each division has a good amount of roots attached.
- Pot Up: Pot each division into its own container filled with your well-draining potting mix, just as you would a mature plant. Water lightly.
The “Secret Sauce” (Pro Tips)
These are the little things that can make a big difference:
- Don’t Let Leaves Touch the Water (or Wet Soil for Too Long): Whether you try water propagation (which I generally avoid for this plant as it can lead to rot) or damp soil, ensure the leaves of your cuttings aren’t sitting in water or constantly wet soil. This is a recipe for fungal issues and rot. Only leaves above the waterline for water propagation, and ensure your soil is airy for cuttings.
- Bottom Heat is Your Friend: If you have a heat mat designed for seedlings, place your pots on it. This gentle warmth encourages root formation much faster than just ambient room temperature. It’s like giving the roots a cozy spot to get started.
- Patience is Key with Tridactyle: Seriously. These can be slowpokes. Don’t despair if you don’t see new growth immediately. Allow several weeks, even a couple of months, before assuming a cutting hasn’t taken. Keep the humidity up and the soil consistently, but not soggy, moist.
Aftercare & Troubleshooting
Once you start seeing new leaf growth emerging from your cutting or division, that’s a great sign! It means roots have likely formed.
- Gradual Acclimation: If you used a plastic bag, gradually start opening it over a week or so to let the new plant get used to the drier air before removing it completely.
- Continue Watering: Keep the soil lightly moist, similar to how you’d water a young, established plant. Avoid letting it dry out completely or become waterlogged.
- Bright, Indirect Light: Place your new propagation in bright, indirect light. Direct sun can scorch delicate new leaves.
- Watch for Rot: The most common sign of failure is rot, which usually appears as mushy, dark stems or leaves that quickly turn yellow and fall off. This is often due to overwatering or insufficient drainage. If you see this, sadly, that cutting is likely lost. It’s better to have slightly drier soil than overly wet soil when propagating.
A Bit of Green Thumb Encouragement
Propagating Tridactyle laurentii might take a little extra care, but the joy of nurturing a new plant from a piece of the old is truly special. Be patient with yourself and the plant. Each attempt is a learning experience. Enjoy the process, celebrate the small victories, and soon you’ll have a lovely collection to admire! Happy growing!
Resource: