Hey there, fellow plant lovers! It’s so lovely to chat with you today about a plant that brings a special kind of magic to the garden: Odontites recordonii, often known by its common name, Red Bartsia. I’ve been growing and fussing over these beauties for two decades, and let me tell you, the reward of seeing them take hold and thrive from a tiny cutting is something truly special.
Why Propagate Odontites recordonii?
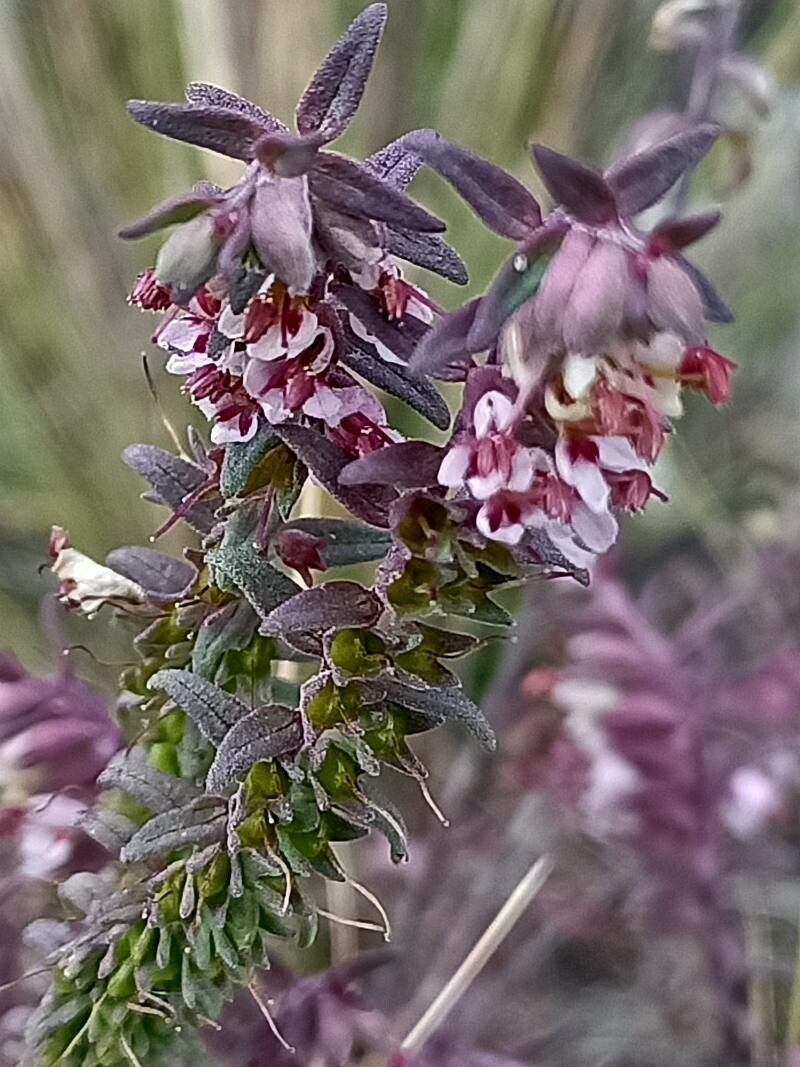
Odontites recordonii is a charming little annual, often overlooked but oh-so-worth-it. Its delicate, upright stems are adorned with tiny, pretty flowers that range from soft pink to vibrant red, attracting all sorts of beneficial pollinators to your patch. Propagating it is a wonderful way to fill your garden borders with its cheerful presence or share its charm with friends. Now, I’ll be honest, it’s not the absolute easiest plant for a complete beginner, but with a little patience and these tips, you’ll be well on your way!
The Best Time to Start
For Odontites recordonii, the sweet spot for propagation is late spring to early summer, as the plant is actively growing. You’re looking for healthy, young stems that haven’t yet started to flower heavily. This is when they have the most energy to put into forming new roots.
Supplies You’ll Need
Before we get our hands dirty, let’s gather our tools:
- Sharp Pruning Shears or a Knife: Cleanliness is key to prevent disease.
- Rooting Hormone (Optional but Recommended): A good quality rooting powder or gel will give your cuttings a significant boost.
- Small Pots or Seed Trays: Clean, with drainage holes!
- Well-Draining Potting Mix: I like a 50/50 blend of regular potting soil and perlite. It keeps things airy.
- Watering Can or Spray Bottle: For gentle watering.
- Clear Plastic Bags or a Propagator: To create a humid environment.
- Labels and a Waterproof Marker: To keep track of what’s what!
Propagation Methods: Stem Cuttings
Stem cuttings are my go-to method for Odontites recordonii. They’re straightforward and usually yield great results.
- Take Your Cuttings: Using your clean shears, select a healthy stem from a mature plant. Cut a section about 4-6 inches long. Look for a stem that has at least a few sets of leaves.
- Prepare the Cuttings: Remove the lower leaves from the bottom half of the cutting. This is crucial because any leaves submerged in water or soil can rot. You want to expose nodes, which are the little bumps where leaves emerge – this is where roots will form.
- Apply Rooting Hormone: Dip the cut end of each prepared cutting into your rooting hormone. Tap off any excess; you don’t need a thick coating.
- Plant Your Cuttings: Fill your pots or trays with your well-draining mix. Make a small hole in the soil with your finger or a pencil. Gently insert the cut end of the cutting into the hole, ensuring the nodes are buried. Firm the soil gently around the cutting.
- Water Gently: Water thoroughly but gently, making sure the soil is moist but not waterlogged. A spray bottle is great for this initial watering.
- Create Humidity: Cover the pots loosely with a clear plastic bag or place them in a propagator. This traps moisture and mimics the humid environment cuttings crave. Ensure the leaves don’t touch the plastic.
The “Secret Sauce” (Pro Tips)
Here are a few things I’ve learned over the years that really help:
- Bottom Heat is Your Friend: If you have a propagation mat, placing your pots on it can significantly speed up root development. It’s like giving your cuttings a cozy, warm hug from below.
- Don’t Be Afraid to Pinch: Once your cuttings have started to root and you see some new growth, you can pinch off the very tip of the stem. This encourages the plant to branch out, leading to a bushier, more robust plant.
- Patience with the ‘Wiggle Test’: When you think your cuttings might be rooted, give them a very gentle tug. If there’s resistance, you’ve got roots! Don’t be alarmed if it takes a few weeks. Some plants are slower to the draw than others.
Aftercare & Troubleshooting
Once roots have formed, it’s time for their next stage.
- Gradual Acclimation: Slowly remove the plastic or open the propagator vents over a few days to help your new plants adjust to normal humidity.
- Move to Brighter Light: Once they’re settled, move them to a spot with bright, indirect light. Avoid harsh, direct sun initially.
- Watering: Keep the soil consistently moist but never soggy. Finger test the soil an inch down – if it feels dry, it’s time to water.
- Signs of Trouble:
- Wilting: This can be a sign of not enough water, or sometimes, if the cutting is already stressed.
- Rotting or Black Stems: This is usually a sign of too much moisture and poor drainage, or the cutting was unhealthy to begin with. Sadly, these cuttings are usually lost.
- No New Growth: This can mean it hasn’t rooted yet, or it’s just taking its sweet time. Keep an eye on it!
Keep Growing!
Propagating Odontites recordonii is a journey, not a race. There will be times when things don’t go quite as planned, and that’s perfectly okay. Every cutting is a learning experience. So, be patient, enjoy the process of nurturing these little green shoots, and soon you’ll be rewarded with a delightful display of color in your garden. Happy growing!
Resource: