Oh, hello there! Come on in, pull up a chair. I’ve got a fresh pot of coffee brewing, and I’m just itching to chat about one of my favorite little green wonders: Monarrhenus salicifolius. I’ve been growing these beauties for years, and let me tell you, there’s something incredibly satisfying about coaxing a brand new plant into existence from a tiny piece of an old one.
Why Grow and Propagate Monarrhenus salicifolius?
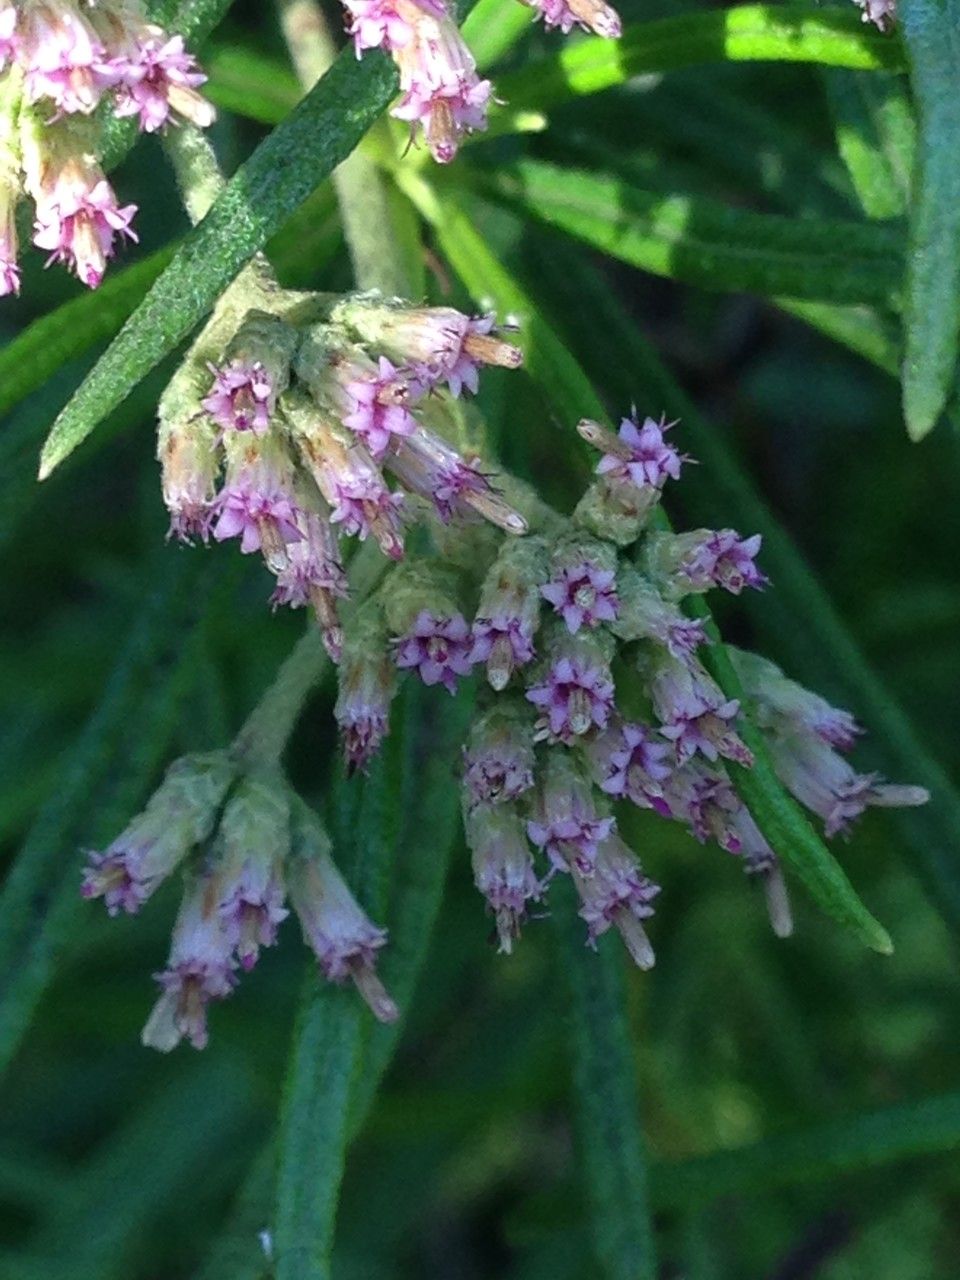
Monarrhenus salicifolius, with its delicate, almost willow-like leaves and charming, subtle blooms, brings a lovely, understated elegance to any space. It’s like a breath of fresh air, really. And propagating it? It’s a fantastic way to expand your collection, share with friends (who won’t love a gifted plant?), or even just to satisfy that innate gardener’s urge to create. Now, for the beginner gardener, I’d say Monarrhenus is moderately easy to propagate. It requires a little attention to detail, but it’s absolutely achievable. I wouldn’t call it a beginner’s nightmare, but let’s just say a little patience goes a long way.
When is the Best Time to Start?
My personal favorite time to get started with propagating Monarrhenus salicifolius is during its active growing season. Think late spring to early summer. This is when the plant is full of vigor, producing new shoots and leaves. The cuttings taken now have the best chance of developing roots quickly. Trying to propagate when the plant is dormant, say in the dead of winter, is just setting yourself up for disappointment. We want those happy, energized cuttings!
Supplies You’ll Need
Gathering your tools beforehand makes the whole process so much smoother. Here’s what I usually have on hand:
- Sharp, clean pruning shears or a sharp knife: Essential for making clean cuts on the parent plant and your cuttings. Sterilize them, please! A quick wipe with rubbing alcohol does the trick.
- Rooting hormone (optional, but recommended): This little powder or gel can give your cuttings a significant boost, encouraging faster and more robust root development.
- Small pots or seed trays: For your propagating cuttings. Drainage holes are non-negotiable!
- A well-draining potting mix: I find a mix of peat moss, perlite, and a little bit of coarse sand works wonders. You want something that drains freely but still holds a little moisture. A store-bought seed starting mix is also a good option.
- A clear plastic bag or a propagation dome: To create a humid environment around your cuttings.
- Water: Of course! For watering and, if you choose, for water propagation.
- A spray bottle: For gentle misting.
Propagation Methods
Let’s get our hands dirty! Here are the methods that work best for Monarrhenus salicifolius.
Stem Cuttings
This is my go-to method for Monarrhenus.
- Select your cutting: Look for a healthy, non-flowering stem that’s about 4-6 inches long. You want a piece that’s relatively firm but still flexible – not too woody, and definitely not a brand new, soft tip.
- Make the cut: Using your sterilized shears or knife, make a clean cut just below a leaf node. A leaf node is that little bump on the stem where a leaf attaches. This is where the magic of root development happens.
- Prepare the cutting: Carefully remove the lower leaves from the stem, leaving just a few at the top. This prevents them from rotting once you plant the cutting. If any of the remaining leaves are very large, you can snip them in half to reduce water loss.
- Apply rooting hormone (optional): Dip the cut end of the stem into your rooting hormone, tapping off any excess.
- Plant your cutting: Make a small hole in your prepared potting mix with a pencil or your finger. Gently insert the cut end of the stem, making sure the leaf nodes are below the soil surface. Firm the soil gently around the cutting to ensure good contact.
- Water and cover: Water the potting mix thoroughly but gently until you see water draining from the bottom of the pot. Then, cover the pot with a clear plastic bag or place it under a propagation dome to create that crucial humid microclimate. You can prop up the bag with a few sticks if it looks like it might touch the leaves.
Water Propagation
If you’re feeling a bit more adventurous, or just want to watch the roots grow, water propagation can be quite rewarding.
- Select and prepare your cutting: Follow steps 1-3 from the stem cutting method.
- Place in water: Find a clean glass jar or vase and fill it with fresh, lukewarm water. Place your prepared cutting in the water, ensuring that no leaves are submerged. Leaves in the water will rot quickly and can take your whole cutting down with them.
- Find a good spot: Place the jar in a location that receives bright, indirect light. Avoid direct sun, which can overheat the water and scorch the leaves.
- Change the water: This is key! Change the water every 2-3 days, or whenever it starts to look cloudy. This keeps the water fresh and oxygenated, preventing bacterial growth.
The “Secret Sauce” (Pro Tips)
Now for a few things I’ve learned over the years that make a real difference.
- Bottom heat is your friend: If you’re using stem cuttings and want to speed things up, popping your pot onto a gentle seedling heat mat can work wonders. It encourages root formation from below, giving your cuttings that extra push. Just make sure the heat isn’t too intense – think lukewarm bathwater warm, not hot tub hot.
- Don’t be afraid to mist: While the humidity under the plastic is vital, a gentle misting of the leaves with plain water every few days can also keep them plump and happy, especially if the environment is a bit on the dry side.
- Patience with the leaves: This goes back to the water propagation, but it’s a general principle. Keep those leaves high and dry! Any leaf that dips into the soil or water is a potential entry point for rot. Be ruthless in trimming them off if they’re in the way.
Aftercare & Troubleshooting
Once you see those tiny white roots peeking out from the bottom of the pot, or a good cluster developing in your water jar, it’s time for the next phase!
- Potting up (from water): If you propagated in water, gently transplant your rooted cutting into a small pot filled with your well-draining potting mix. Treat it like a delicate seedling, watering it in lightly.
- General watering: For newly potted cuttings, water them in well and then let the top inch of soil dry out before watering again. The key is consistently moist, not waterlogged.
- Acclimatization: If your cuttings were under a dome or bag, gradually acclimate them to normal room humidity over a week or so. Start by lifting the lid for an hour or two each day, then increase the time.
- Signs of failure: The most common issue is rot. If your cutting turns mushy, black, or starts to disintegrate, it’s usually a sign of too much moisture and not enough airflow, or the presence of bacteria. Unfortunately, at this point, it’s usually best to compost it and start again. Another sign of trouble is wilting that doesn’t recover after watering – this can indicate the roots haven’t taken hold, or the cutting is simply too dry.
Keep Growing!
This whole process of propagation is really a beautiful exercise in patience and observation. You might have a few that don’t make it – and that’s perfectly okay! Every gardener experiences it. But when you see those first roots emerge, or a new leaf unfurl on your propagated plant, well, it’s a feeling like no other. Don’t be discouraged, just keep trying. Enjoy the journey, and happy growing!
Resource:
https://identify.plantnet.org/k-world-flora/species/Monarrhenus%20salicifolius%20Cass./data