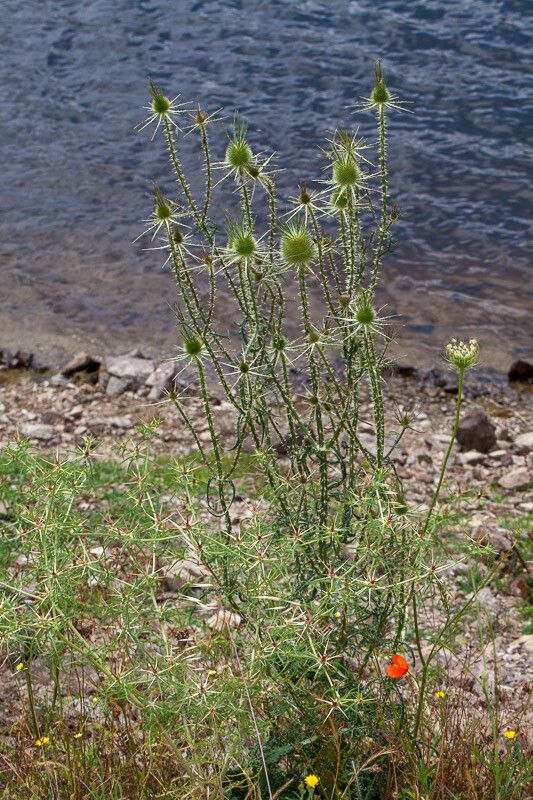
Hello there! It’s so lovely to connect with you today. If you’ve ever admired those majestic, spiky seed heads of Dipsacus ferox adorning a garden, you’re not alone. I’ve spent two decades utterly charmed by this plant – its architectural beauty in the landscape and the way it beckons pollinators are simply superb. Propagating Dipsacus ferox, often called Wild Teasel, is a truly rewarding endeavor, and I’m happy to share how I bring more of this beauty into my own garden. For beginners, I’d say it’s moderately straightforward, not overly fussy if you give it a little attention.
The Best Time to Start
The sweet spot for propagating Dipsacus ferox is typically in late spring to early summer. This is when the plant is actively growing and has plenty of energy to invest in developing new roots. You can even look for healthy shoots emerging from the base of established plants. Harvesting seeds is another excellent option, but we’ll focus on vegetative propagation today.
Supplies You’ll Need
Gathering your tools beforehand makes the whole process much smoother. Here’s what I usually have on hand:
- Sharp pruning shears or a clean knife: For taking cuttings. Sterilize them with rubbing alcohol between cuts to prevent disease spread.
- Well-draining potting mix: A good seedling mix or a blend of equal parts peat moss and perlite works wonderfully.
- Rooting hormone (optional but helpful): This can give your cuttings a little boost. Look for one formulated for herbaceous cuttings.
- Small pots or trays with drainage holes: Clean them thoroughly before use.
- A spray bottle: For misting cuttings.
- Plastic bags or a propagator lid: To create a humid environment.
Propagation Methods
I’ve found success with a couple of methods for Dipsacus ferox:
Stem Cuttings
This is my go-to for increasing my stock.
- Select healthy shoots: Look for vigorous stems that are about 4-6 inches long and haven’t yet flowered. Gently snap or cut a healthy stem from the parent plant, just below a leaf node (where a leaf joins the stem).
- Prepare the cutting: Remove the lower leaves, leaving just a few at the top. This prevents them from rotting in the soil. If your cutting is long, you can cut it in half to create more potential plants.
- Apply rooting hormone (if using): Dip the cut end of the stem into the rooting hormone powder, tapping off any excess.
- Plant the cuttings: Insert the cut end into your prepared potting mix, ensuring it’s firm and upright. Water gently but thoroughly.
- Create humidity: Cover the pot with a plastic bag or pop on a propagator lid. This is crucial to keep moisture levels high for the cuttings. Place it in a bright spot, but away from direct, scorching sunlight.
Division (for established clumps)
If you have a mature clump of Dipsacus ferox, dividing it is a fantastic way to get multiple plants.
- Dig carefully: In late spring, when new growth is starting, gently dig up the entire clump. Try to disturb the roots as little as possible.
- Separate the divisions: You can usually gently pull or twist sections of the clump apart. Each section should have at least a few healthy roots and some shoots. If the roots are tangled, you might need to use a clean spade or a sharp knife to divide them.
- Replant immediately: Plant each division into its new spot in the garden or in individual pots filled with good soil. Water them in well.
The “Secret Sauce” (Pro Tips)
Here are a couple of things I’ve learned over the years that really make a difference:
- When propagating from cuttings, don’t let the leaves truly touch the soil mix. Having them hover just above or having the lower leaf nodes exposed allows the cutting to “breathe” a bit and reduces the risk of rot setting in right at the point of contact.
- For stem cuttings, bottom heat can be a wonderful accelerator. Placing your pots on a heat mat specifically designed for plant propagation can significantly speed up the rooting process. It encourages those roots to form a bit more eagerly.
Aftercare & Troubleshooting
Once your cuttings have developed roots – you might see new leaf growth or feel gentle resistance when you give them a light tug – it’s time to introduce them to slightly less humid conditions. Gradually remove the plastic bag or propagator lid over a few days to acclimatize them. Continue to keep the soil consistently moist but not waterlogged.
The most common issue you’ll encounter is rot. If your cuttings turn black or mushy, it’s usually a sign of too much moisture and not enough air circulation. Discard any rotted cuttings and check your watering regime. Sometimes, cuttings just don’t take, and that’s perfectly normal in the plant propagation world! Don’t get discouraged; just try again.
A Encouraging Closing
Building your own collection of Dipsacus ferox from scratch is incredibly satisfying. It’s a journey of patience and observation. So embrace the process, learn from each attempt, and soon you’ll have your own magnificent teasel plants gracing your garden. Happy propagating!
Resource:
https://identify.plantnet.org/k-world-flora/species/Dipsacus%20ferox%20Loisel./data