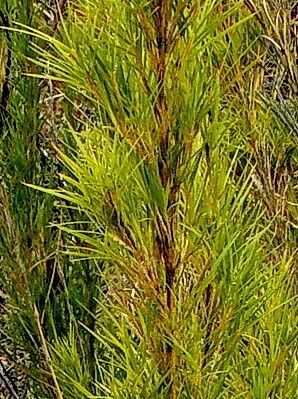
Oh, Chusquea pinifolia! Isn’t it just a dream? Those delicate, almost pine-needle-like leaves and that graceful, almost ethereal sway in the breeze. It’s one of those plants that just makes a garden sing. And the best part? You can easily multiply this beauty yourself! Seeing a little piece of green life sprout from a fragment of the parent plant is pure magic, and honestly, it’s a wonderfully rewarding feeling. For those new to the gardening world, Chusquea pinifolia can be a little quirky, but I promise, with a few pointers, you’ll be successful. Don’t let it intimidate you!
The Best Time to Start
When it comes to coaxing new life from Chusquea pinifolia, the sweet spot is late spring to early summer. This is when the plant is actively growing, sending out lovely new shoots. You’ll want to select stems that are firm but not yet woody – think tender and vibrant. Trying to propagate when the plant is dormant or stressed will make things a whole lot harder for everyone, including yourself.
Supplies You’ll Need
Here’s what I like to have on hand when I’m getting ready to propagate:
- Sharp Pruning Shears or a Clean Knife: For making nice, clean cuts.
- Rooting Hormone: A little boost helps, especially for trickier plants. Look for one with IBA.
- Well-Draining Potting Mix: A good base is perlite and peat moss mixed about 50/50. Some gardeners love a special succulent mix too.
- Small Pots or Seed Trays: Anything that can hold your cuttings and soil. Make sure they have drainage holes!
- Clear Plastic Bags or a Propagation Dome: To create a humid environment for those baby roots.
- Watering Can with a Fine Rose or a Spray Bottle: Gentle watering is key.
Propagation Methods
I find that propagating Chusquea pinifolia is best done through stem cuttings. It’s straightforward and usually yields great results.
- Take Your Cuttings: On a bright morning, after the dew has dried, use your sharp shears or knife to take stem cuttings that are about 4-6 inches long. Look for stems with several sets of leaves. Don’t take too many from one plant; be kind to your mother plant!
- Prepare the Cuttings: Gently remove the lower leaves from the cutting, leaving about two sets of leaves at the top. This prevents them from rotting in the soil.
- Dip in Rooting Hormone: Dip the cut end of the stem into your rooting hormone. Swirl it around gently to get a good coating. Tap off any excess.
- Plant Your Cuttings: Fill your pots or trays with your prepared potting mix. Make a little hole with your finger or a pencil. Carefully insert the cut end of the stem into the hole, making sure the rooting hormone stays on the cut end. Gently firm the soil around the base of the cutting.
- Water Gently: Water the soil thoroughly but avoidrenching it. You want the soil to be moist, not waterlogged.
- Create Humidity: Place the pots into a clear plastic bag, sealing it loosely, or place them under a propagation dome. You want to trap that humidity around your cuttings.
The “Secret Sauce” (Pro Tips)
Now, for a few tricks I’ve picked up along the way that can really make a difference:
- Bottom Heat is Your Friend: Pop your pots on a heat mat designed for propagation. This gentle warmth from below encourages root development like nothing else. Your cuttings will fork out roots much faster!
- Don’t Be Afraid of a Mist: Regularly mist your cuttings while they’re under cover, especially if you notice the inside of the bag or dome looking a bit dry. This keeps the leaves happy and hydrated.
- The “No Leaf in Water” Rule: If you ever try water propagation (which I sometimes do with Chusquea, but cuttings are generally more reliable), make absolutely sure that no leaves are submerged in the water. Any submerged leaves are a direct invitation for rot.
Aftercare & Troubleshooting
Once you’ve planted your cuttings, give them a nice spot in bright, indirect light. Avoid direct sun, which can scorch those delicate new leaves. Check the soil regularly. It should feel consistently moist but never soggy.
The first sign of success is when you see new leaf growth emerge from the top of the stem. You can also gently tug on a cutting – if it resists, you likely have roots! This can take anywhere from 4-8 weeks, sometimes longer. Be patient!
If your cuttings start to look limp and yellow, or if the stem turns mushy and dark at the soil line, that’s often a sign of rot. This is usually caused by too much moisture or poor air circulation. If you see this, try to salvage any healthy-looking cuttings and replant them in fresh, drier soil, ensuring better drainage and ventilation.
A Little Encouragement
Growing new plants from cuttings is such a rewarding journey. It’s about giving life, and it’s a practice that connects you deeply to the rhythm of nature. Don’t be discouraged if your first attempt isn’t a roaring success. Gardening is all about learning, adapting, and trying again. So, grab your shears, get your hands in the soil, and enjoy the wonderful process of bringing more of that Chusquea pinifolia beauty into your world! Happy propagating!
Resource:
https://identify.plantnet.org/k-world-flora/species/Chusquea%20pinifolia%20(Nees)%20Nees/data