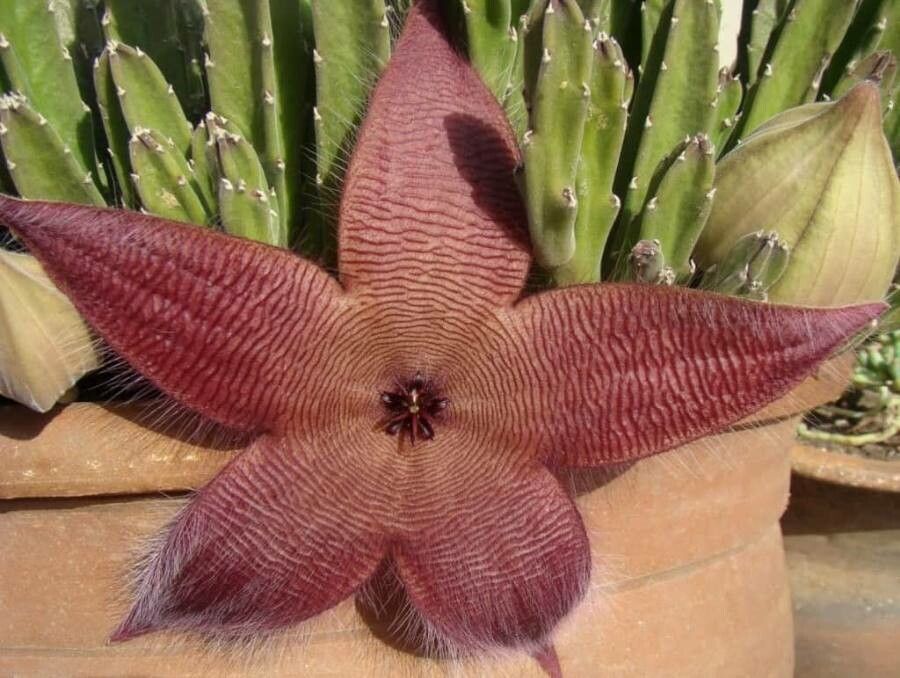
Ah, Stapelia hirsuta! Those wonderfully fuzzy, star-shaped blooms, often smelling a bit… well, earthy… but undeniably captivating. If you’ve ever marveled at a healthy specimen, you might be tempted to try your hand at propagating it. And let me tell you, it’s a journey well worth taking. For beginners, I’d say Stapelia is moderately easy. A little patience and attention, and you’ll be swimming in more of these unique beauties!
The Best Time to Start
The prime time to get your Stapelia cuttings rooted is during its active growing season. For most of us, that means late spring through summer. When the temperatures are warm and the days are long, the plant has the energy it needs to produce new roots and growth. Avoid trying this when it’s cold or the plant is dormant.
Supplies You’ll Need
Here’s what you’ll want to have on hand for your propagation adventure:
- Well-draining soil mix: A good blend of cactus or succulent soil mixed with perlite or pumice is ideal. Think sandy and gritty!
- Sharp, clean pruning shears or a knife: A clean cut is a happy cut.
- Rooting hormone (optional but helpful): This little boost can speed up root development. I like using the powder form.
- Clean pots or trays: Small pots are perfect for starting cuttings.
- Diluted liquid fertilizer (later on): For when your new babies are established.
- A trowel or dibber: For gently placing cuttings in the soil.
Propagation Methods
Stapelia hirsuta is a trooper when it comes to propagation, and stem cuttings are usually the easiest and most successful route.
Stem Cuttings:
- Take your cutting: Choose a healthy, mature stem. Using your sharp, clean shears or knife, make a clean cut about 4-6 inches long. Try to select a piece that has at least two good segments.
- Let it callus: This is a crucial step, my friends! Place your cutting in a dry, well-ventilated spot away from direct sunlight for several days to a week. You want the cut end to dry out and form a callous. This prevents rot when you plant it.
- Apply rooting hormone (optional): Once calloused, you can dip the cut end into your rooting hormone powder, tapping off any excess.
- Plant your cutting: Fill your clean pot with your well-draining soil mix. Make a hole in the center with your finger or a dibber, deep enough to secure the cutting. Gently insert the calloused end of the Stapelia cutting into the hole. Firm the soil around it, ensuring the cutting stands upright.
- Water sparingly: Wait a day or two after planting before giving it its first light watering. The goal is moist, not soggy, soil. We don’t want to invite rot right from the start!
The “Secret Sauce” (Pro Tips)
Now for a couple of little tricks I’ve learned over the years that can make a big difference:
- Think “warm bottom”: Stapelia roots love a little warmth to get going. If you have a heated propagator or can place your pots on a heat mat designed for seedlings, that’s fantastic! It really encourages those roots to sprout.
- Don’t bury leaf nodes too deep: When you’re planting your cutting, only bury the calloused (cut) end. If you cover too much of the stem or any leaf nodes by mistake, they have a higher chance of rotting before they can root. Keep it simple.
Aftercare & Troubleshooting
Once you’ve planted your cuttings, be patient! You won’t see roots overnight.
- Light: Place your pots in a bright location with indirect sunlight. As the plant establishes, you can gradually introduce it to more light, but avoid intense, direct sun while it’s still tender.
- Watering: Continue to water sparingly. Allow the soil to dry out somewhat between waterings. You’ll know your cutting is developing roots when you see new growth appearing, or if it feels more anchored when gently tugged (though don’t pull too hard!).
- Troubleshooting – Rot: The biggest enemy is rot. If you notice your cutting turning mushy, soft, or blackening, it’s likely succumbing to rot. This usually happens from overwatering or not letting the cutting callus properly.
- Troubleshooting – No Growth: If nothing happens after several weeks, don’t despair! Some cuttings are just slower than others. Ensure it’s still firm and hasn’t turned mushy. It might just be taking its sweet time.
A Encouraging Closing
Propagating Stapelia hirsuta is a delightful way to expand your collection or share these quirky plants with friends. Remember to be patient, observe your cuttings, and celebrate each little sign of progress. Happy propagating, and may your windowsill soon be dotted with your own beautiful, fuzzy stars!
Resource:
https://identify.plantnet.org/k-world-flora/species/Stapelia%20hirsuta%20L./data