Oh, hello there, fellow garden enthusiast! It’s so lovely to have you join me. Today, we’re diving into the wonderfully whimsical world of Adlumia fungosa, or as I affectionately call it, Allegheny Vine.
Introduction: Unveiling the Magic of Allegheny Vine
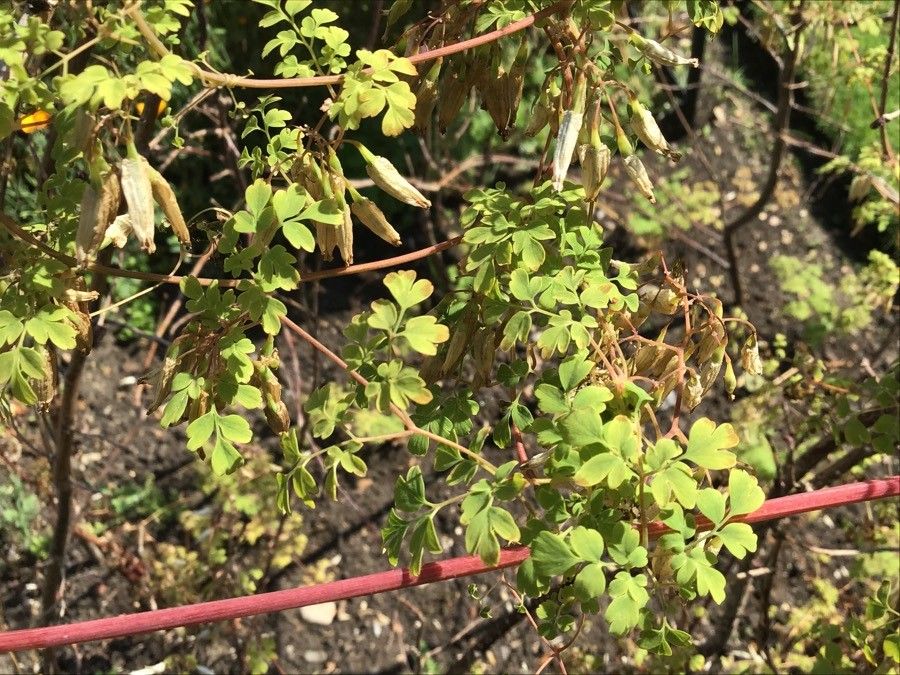
If you’re looking for a plant that brings an almost ethereal charm to your garden, Adlumia fungosa is your girl. Its delicate, fern-like foliage and nodding, petal-like flowers that resemble tiny puffballs are simply captivating. It’s a wonderful climber, perfect for draping over pergolas, scrambling up walls, or creating a semi-wild feel in a woodland garden. Propagating this beauty is a deeply satisfying endeavor, like unlocking a little piece of nature’s magic. While it has a reputation for being a bit particular, don’t let that deter you! With a little patience and the right approach, you’ll be well on your way to success. I’d say it’s moderately easy, a delightful challenge for anyone ready to step up their propagation game.
The Best Time to Start
For the highest chance of success, late spring or early summer is your golden window. This is when the plant is actively growing and has the most energy to put into developing new roots. You’re looking for young, actively growing stems that haven’t yet started to toughen up.
Supplies You’ll Need
Gathering your supplies beforehand makes the whole process smoother. Here’s what I always have on hand:
- Clean, sharp pruning shears or a sharp knife: For making clean cuts.
- Rooting hormone (optional but recommended for cuttings): A good quality powder or gel.
- Potting mix: A light, well-draining mix. I like a blend of peat moss, perlite, and a little compost.
- Small pots or seed trays: Sterilized, of course!
- Plastic bags or a propagation dome: To create a humid environment.
- Watering can with a fine rose: For gentle watering.
- Labels and a pen: To keep track of your efforts!
- If propagating from seed: A shallow tray and a fine misting spray bottle.
Propagation Methods: Bringing New Life
Adlumia fungosa can be propagated in a few ways, but stem cuttings and seeds are the most common and effective.
Stem Cuttings: The Quickest Route
This is usually my go-to method for Adlumia.
- Select Your Cuttings: In late spring or early summer, look for softwood cuttings. These are young, flexible shoots that are still green and pliable. Aim for pieces about 4-6 inches long. Pinch or cut them just below a leaf node (where a leaf attaches to the stem).
- Prepare the Cuttings: Gently remove the lower leaves from your cuttings, leaving just a few at the top. This reduces moisture loss and prevents leaves from rotting in the soil. Optionally, you can dip the cut end into rooting hormone, tapping off any excess.
- Planting: Fill your small pots with your prepared potting mix. Make a small hole in the center of the mix with your finger or a pencil. Insert the cut end of your Adlumia cutting into the hole. Gently firm the soil around it.
- Watering: Water your cuttings gently but thoroughly. You want the soil to be moist, but not waterlogged.
- Creating Humidity: This is crucial! Cover each pot with a clear plastic bag, ensuring the bag doesn’t touch the leaves too much, or place them under a propagation dome. This traps moisture in, creating a mini-greenhouse effect.
- Placement: Put your pots in a bright spot that receives indirect light. Avoid direct sun, which can scorch the young cuttings.
From Seed: A Patient Reward
If you’re starting from seed, patience is key.
- Sowing: You can sow Adlumia seeds in late winter or early spring. Fill a shallow seed tray with your potting mix.
- Sowing the Seeds: Lightly press the seeds onto the surface of the soil. They don’t need to be buried deeply. A light dusting of fine soil or vermiculite on top is sufficient.
- Watering: Mist the soil gently with your spray bottle to ensure it’s moist.
- Germination Conditions: Cover the tray with a clear lid or plastic wrap to maintain humidity. Place it in a cool spot that receives bright, indirect light. Some gardeners find that a period of cold stratification (leaving them in the fridge for a few weeks) can improve germination, though it’s not always strictly necessary.
- Patience: Germination can be slow and erratic. Don’t give up if nothing happens for a few weeks! Keep the soil consistently moist and the humidity high.
The “Secret Sauce” (Pro Tips)
Over the years, I’ve learned a few tricks that make a world of difference:
- Bottom Heat is Your Friend: For cuttings, placing your pots on a seedling heat mat can significantly speed up root development. The warmth encourages the plant to expend energy on rooting rather than just foliage growth.
- Don’t Fuss Too Much with Water Propagation: While some plants do wonderfully in water, I find Adlumia cuttings are much more prone to rot when left entirely in water. If you do try water, make sure absolutely no leaves are submerged. The stem should just be touching the water’s surface. I generally steer clear of this for Adlumia.
- Sterilization is Non-Negotiable: I can’t stress this enough. Cleanliness prevents disease. Always sterilize your pots, tools, and even your hands before you begin. A quick soak in a bleach solution or good old rubbing alcohol does wonders.
Aftercare & Troubleshooting
Once you see signs of new growth emerging from your cuttings (tiny leaves unfurling!), it’s a good indication that roots are forming.
- Acclimatizing: Gradually reduce the humidity over a week or two. Start by opening the plastic bags for a few hours each day, then remove them entirely.
- Potting Up: When your new plants have a decent root system (you might see them peeking out of the drainage holes), it’s time to gently pot them up into slightly larger containers with fresh potting mix.
- Watering: Water them as you would any young plant – keep the soil consistently moist but not soggy.
- Troubleshooting: The most common culprit for failure is rot. If your cuttings turn mushy and dark, or if seedlings damping off (wilting at the base), it’s usually due to overwatering and poor air circulation. Ensure your soil drains well and that you’re not keeping things too wet. Watch out for wilting leaves; this could mean too little water, but check the soil moisture first.
A Little Encouragement
Growing new plants is a journey of observation and learning. Some attempts will be more successful than others, and that’s perfectly okay. Be patient with yourself and with your Adlumia. Watch for the subtle signs of life, celebrate every tiny bit of progress, and most importantly, enjoy the rewarding process of bringing more of this beautiful vine into existence. Happy gardening!
Resource: