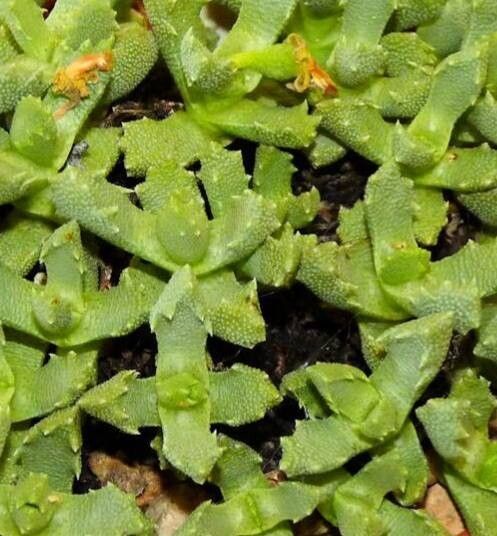
Oh, hello there! Come on in and pull up a chair. I see you’ve got your eye on Stomatium ermininum, a truly charming little succulent. You know, I’ve spent two decades with my hands in the dirt, and there’s something so special about coaxing new life from an existing plant. With Stomatium ermininum, it’s not just about adding to your collection; it’s about understanding the magic of growth. This little gem is a delightful addition to any sun-drenched windowsill or rock garden, and propagating it is a wonderfully rewarding endeavor. For beginners? I’d say it’s on the easier side, especially if you follow a few simple steps.
The Best Time to Start
The real sweet spot for propagating Stomatium ermininum is during its active growing season. For most of us, that means spring and early summer. You’ll see the plant really taking off then, producing new shoots and looking robust. Taking cuttings or dividing your plant when it’s energized means it has the best chance of establishing roots quickly. Avoid doing this when the plant is dormant or under stress.
Supplies You’ll Need
Gathering your tools beforehand makes the whole process so much smoother. Here’s what I usually have on hand:
- Gritty Potting Mix: A blend of cactus/succulent mix with extra perlite or pumice for excellent drainage. About a 2:1 ratio is a good starting point.
- Clean Pruning Shears or Sharp Knife: For making clean cuts. No crushing allowed!
- Rooting Hormone (Optional but Recommended): A simple powder or gel can give your cuttings a helpful boost.
- Small Pots or Trays: With drainage holes, of course.
- Plastic Baggies or Humidity Domes: For creating a mini-greenhouse effect.
- Spray Bottle: For lightly misting.
- Labels: To keep track of what you’ve propagated and when.
Propagation Methods
Stomatium ermininum is quite obliging and can be propagated in a couple of easy ways.
Stem Cuttings
This is my go-to method for this plant.
- Locate a healthy stem: Look for a stem that’s at least a few inches long and has at least a couple of sets of leaves. Gently wiggle it; if it feels firm, it’s a good candidate.
- Make the cut: Using your sterilized pruners or knife, make a clean cut just below a leaf node (where the leaves attach to the stem).
- Remove lower leaves: Gently pull off the bottom leaves. This will expose a bit more of the stem, which is where roots will form.
- Let it callous: This is crucial! Place the cutting in a dry, bright spot away from direct sun for 2-3 days. You’ll see the cut end dry and form a callus. This prevents rot when you plant it.
- Dip in rooting hormone (optional): If you’re using it, lightly dip the callused end into your rooting hormone. Tap off any excess.
- Plant the cutting: Fill your small pot with your gritty potting mix. Make a small hole in the center and insert the callused end of the cutting. Gently firm the soil around it.
- Water lightly: Give the soil a very light watering. You want it moist, not soggy.
- Create humidity: Cover the pot with a plastic baggie or a humidity dome. Make sure the leaves aren’t touching the plastic. Place it in a bright spot with indirect sunlight.
Division
If your Stomatium ermininum has become a bit crowded and is sending up new shoots from the base, division is a great option.
- Gently unpot the plant: Turn the pot on its side, hold the base of the plant firmly, and tap the bottom.
- Inspect the root ball: You’ll see where the main plant and its offshoots are rooted.
- Separate the divisions: Using your fingers or a clean knife, gently pull or cut apart the divisions. Try to ensure each division has some healthy roots attached.
- Allow to callous: If you had to make any significant cuts that severed roots, let those cut areas dry and callous for a day or two, just as you would with cuttings.
- Pot up the divisions: Plant each division in its own pot filled with your gritty potting mix.
- Water lightly: Give them a gentle drink.
- Provide bright, indirect light: Similar to cuttings, they need good light but no harsh sun initially.
The “Secret Sauce” (Pro Tips)
Here are a couple of things I’ve learned over the years that really make a difference:
- Bottom Heat is Your Friend: Especially for cuttings, placing the pot on a heat mat (a seedling heat mat works wonders) can significantly speed up root development. Succulents love a little warmth at their base.
- Don’t Drown Your Cuttings: This is probably the most common mistake. The callused end needs to dry out a bit. Once planted, only water when the soil is almost completely dry. Overwatering is the fast track to rot. For the humidity dome, lift it daily for a few minutes to allow for air circulation and prevent fungal issues.
Aftercare & Troubleshooting
Once you see little roots – and you’ll know because the cutting will feel a bit more secure when gently tugged – you can start to gradually acclimate your new plant.
- Reduce humidity: Slowly remove the baggie or humidity dome over a week or so, allowing the plant to adjust to ambient humidity.
- Increase light: Gradually introduce it to brighter light, but continue to avoid harsh, direct sun for the first month.
- Watering: Water as you would a mature Stomatium ermininum – deeply when the soil is dry.
Now, what if things don’t go as planned? The most common sign of failure is rot. If your cutting turns mushy or black, or if you notice a foul odor, it’s likely rotted. This is almost always due to overwatering or not letting the cutting callous properly. If you catch it early enough, you might be able to salvage a healthy section of the stem and try again.
A Encouraging Closing
Don’t be discouraged if your first attempt isn’t a howling success. Gardening is a journey, and every plant teaches us something new. Be patient, observe your little ones closely, and enjoy the incredible process of bringing new life into the world. Happy propagating!
Resource:
https://identify.plantnet.org/k-world-flora/species/Stomatium%20ermininum%20(Haw.)%20Schwantes/data