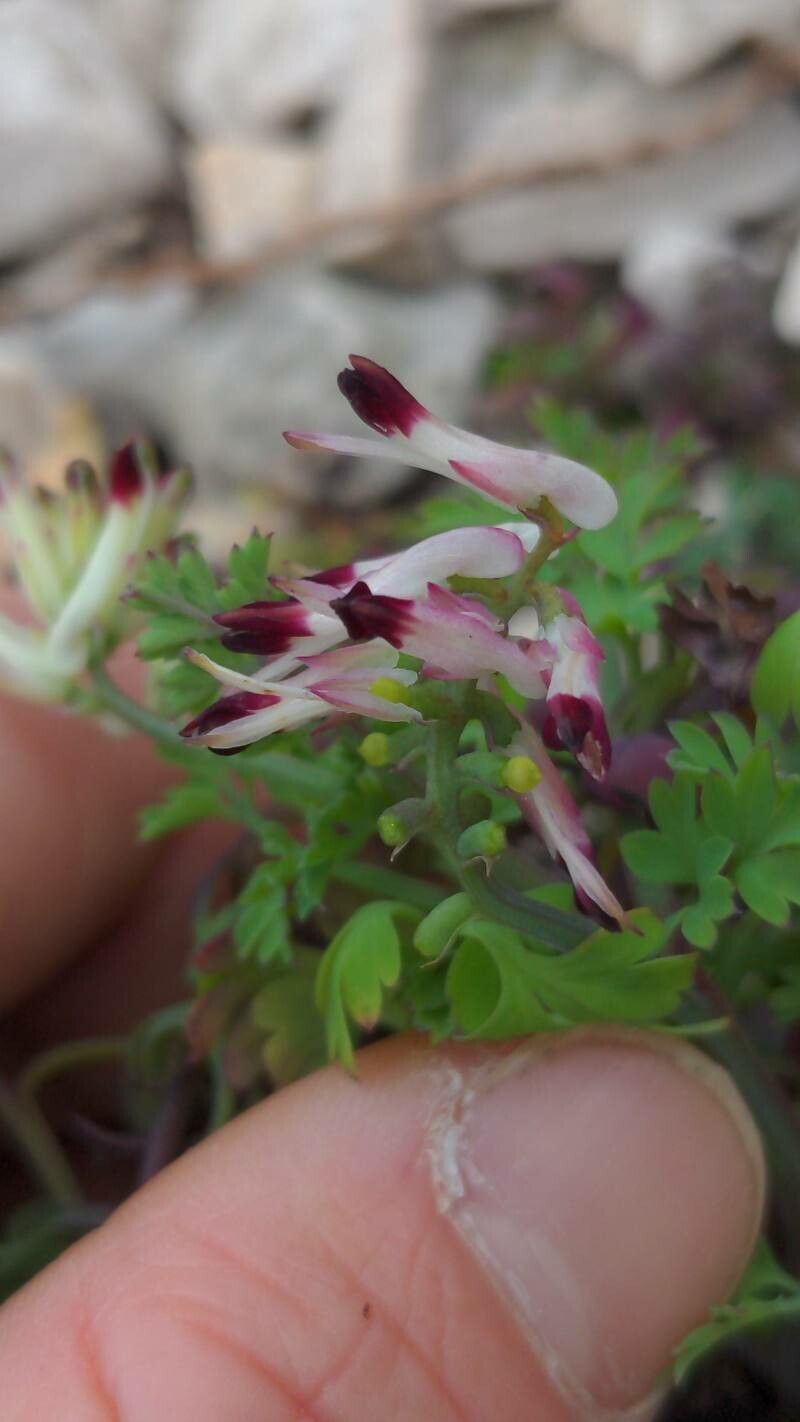
Hey there, fellow plant lovers! I’m so excited to chat with you today about a little gem in the garden: Fumaria flabellata. You might know it better by its common name, the Fan-leaf Fumitory. Its delicate, lacy foliage and often charming small flowers add such a beautiful touch of ephemeral beauty to a garden. Think of it as sweet lace for your borders!
Propagating plants is one of my absolute favorite things to do. It’s like unlocking a secret to more beauty, and the satisfaction of watching a tiny cutting or division grow into a full plant is just wonderful. Now, about Fumaria flabellata – I’d say it’s a moderately easy plant to propagate. It’s not quite as foolproof as, say, a spider plant, but with a little care and attention, you’ll be successful. It’s a rewarding challenge, I promise!
The Best Time to Start
For the absolute highest success rate with Fumaria flabellata, I’ve found that late spring to early summer is your golden window. This is when the plant is actively growing and has plenty of energy to put into developing new roots. You’re looking for those young, vigorous shoots that haven’t yet flowered – they have the best “oomph” for rooting.
Supplies You’ll Need
Before we get our hands dirty, let’s gather our tools:
- A sharp pair of pruning shears or scissors, sterilized with rubbing alcohol to prevent disease.
- A good quality, well-draining potting mix. I usually lean towards a mix of equal parts peat moss (or coco coir for sustainability) and perlite.
- Small pots or trays with drainage holes. Yogurt cups with holes poked in the bottom work in a pinch!
- A spray bottle filled with clean water.
- Optional, but helpful: Rooting hormone powder or gel. It’s not strictly necessary for Fumaria flabellata, but it can give those cuttings a nice little boost.
- A clear plastic bag or propagator lid to create a humid environment.
Propagation Methods
Fumaria flabellata can be propagated quite well through a couple of methods. Let’s dive into the most reliable ones.
Stem Cuttings
This is my go-to for increasing my collection.
- Select your cuttings: Look for healthy, non-flowering stems that are about 3-4 inches long. You want them to be somewhat firm but still pliable – not woody.
- Make the cut: Using your sterilized pruners, make a clean cut just below a leaf node (where a leaf attaches to the stem).
- Prepare the cutting: Gently remove the lower leaves, leaving just a couple at the very top. This is important because any leaves submerged in soil or water will just rot.
- Dip in rooting hormone (optional): If you’re using it, dip the cut end into the rooting hormone. Tap off any excess.
- Plant your cuttings: Fill your small pots with your prepared potting mix and lightly moisten it. Make a small hole in the center of the soil with your finger or a pencil. Insert the cutting, making sure the leaf nodes are buried. Gently firm the soil around the stem.
- Create humidity: Water the soil lightly and cover the pot with a plastic bag or propagator lid. Place it in a bright spot, but out of direct sunlight.
Division
If you have a mature clump of Fumaria flabellata, division is a fantastic and quick way to get new plants.
- Gently unearth the plant: Carefully dig up the existing plant. You often don’t need to remove it entirely from the ground if you’re careful, but lifting it slightly gives you more room to work.
- Identify natural divisions: Look for where the root ball naturally splits into smaller sections. You want each section to have some healthy roots and at least a couple of shoots.
- Separate with care: You can often gently pull the root balls apart with your hands. If they’re a bit stubborn, you can use a clean trowel or even a sharp knife to make the separation. Be as gentle as possible to avoid damaging the roots.
- Replant immediately: Replant the separated divisions into well-prepared soil, either back into the garden or into pots. Water them in well.
The “Secret Sauce” (Pro Tips)
Here are a couple of things I’ve learned over the years that really make a difference.
- Keep it humid, not wet: When misting your cuttings, aim for a fine mist. You want the surface of the soil lightly moist and the air around the cutting to be humid, but not waterlogged. Excess moisture is the fastest way to invite rot, and nobody wants that!
- Bottom heat can be a game-changer: If you have the space and the inclination, placing your propagation tray on a heat mat designed for plants can significantly speed up root development. It mimics spring soil temperatures and gives those little root initials a real kickstart. Just make sure to use a thermometer to keep the temperature consistent and not too hot.
Aftercare & Troubleshooting
Once your cuttings have struck root – you might see new growth appearing or feel a gentle tug when you lightly pull on the stem – it’s time for a little transition.
Gradually acclimate your new plants to normal room humidity by airing out the propagator for short periods each day. Once they are robust enough, you can remove the plastic cover. Continue to keep the soil consistently moist but not soggy. As they grow, you can pot them up into slightly larger containers.
The biggest thing to watch out for is rot. If your cuttings turn mushy or black, it’s a sign of too much moisture and/or poor air circulation. If this happens, don’t despair! Sometimes you can save a cutting by taking a fresh one from the original plant and trying again, perhaps with a bit less water or better drainage this time.
A Encouraging Closing
Remember, gardening is a journey, and propagation is a wonderful part of that. Be patient with your Fumaria flabellata cuttings. It might take a few weeks, or even a couple of months, to see significant root development. Enjoy the process, learn from each attempt, and soon you’ll have a whole host of these lovely plants to share or keep for yourself. Happy propagating!
Resource:
https://identify.plantnet.org/k-world-flora/species/Fumaria%20flabellata%20Gasp./data