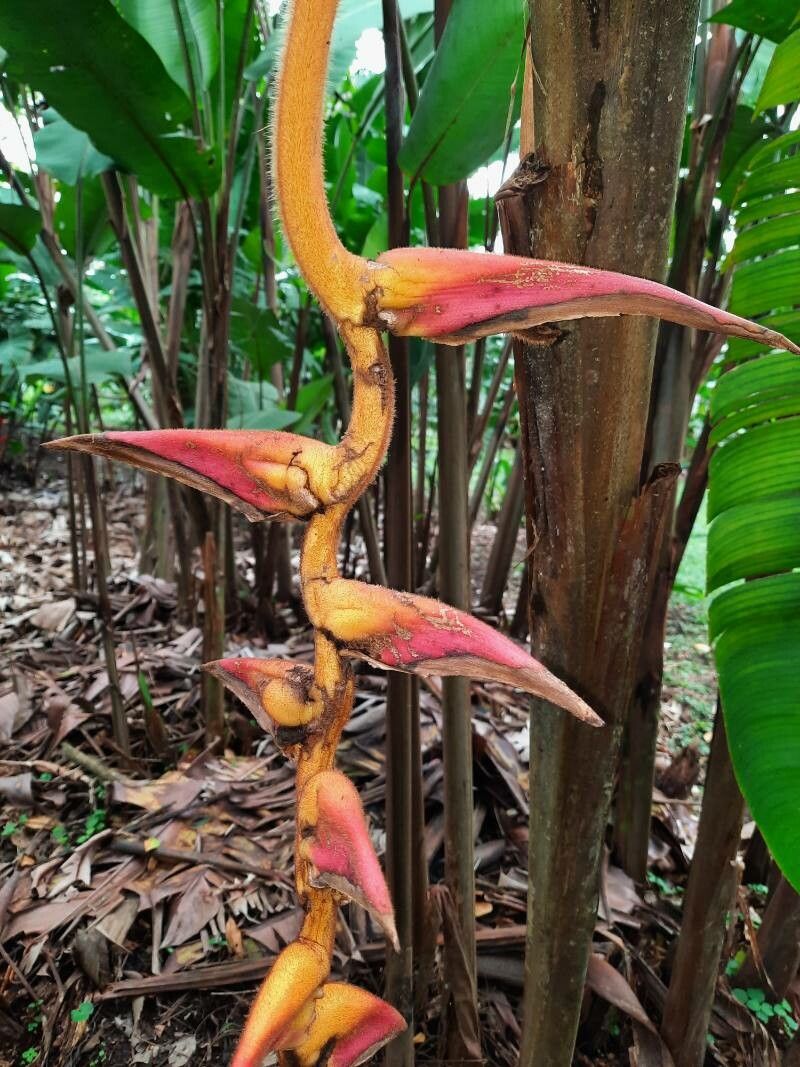
Oh, Heliconia pogonantha! Isn’t she a stunner? Those vibrant, almost otherworldly blooms just bring a smile to your face, don’t they? And the best part? Bringing that splash of tropical paradise into your own garden by propagating your own. It’s incredibly rewarding, like sharing a secret with nature. Now, for the good news: while it might sound a bit intimidating, propagating Heliconia pogonantha is actually quite manageable, even for those of you with just a few seasons under your belt.
The Best Time to Start
When it comes to getting new Heliconia pogonantha plants going, spring and early summer are your golden ticket. This is when the plant is bursting with energy, actively growing, and has plenty of reserves to put into developing new roots. You’ll have the most success if you can propagate while the plant is showing vigorous new growth, not when it’s stressed or dormant.
Supplies You’ll Need
Gathering your tools beforehand makes the whole process a breeze. Here’s what I always have on hand:
- Sharp pruning shears or a clean knife: For making clean cuts.
- Rooting hormone powder or gel: This really gives your cuttings a boost.
- A well-draining potting mix: I like a blend of good quality potting soil with added perlite or coarse sand. Something that won’t hold too much moisture.
- Small pots or containers: With drainage holes, of course!
- A plastic bag or propagation dome: To create a humid environment.
- Labels: Trust me, you’ll thank yourself later.
- Water: For keeping things moist but not soggy.
Propagation Methods
The most straightforward way to multiply your Heliconia pogonantha is through division, and it’s the method I recommend for most gardeners.
Division: Separating the Pups
- Wait for the right moment: The best time is after the plant has finished flowering for the season, or in the spring before new growth really takes off.
- Gently unearth your Heliconia: Carefully dig around the base of the mature plant. You want to expose the rhizomes, which are the thick, underground stems.
- Identify the ‘pups’: You’re looking for smaller shoots, or ‘pups’, that are emerging from the main rhizome. They should have their own developing roots and at least one or two small leaves.
- Make the cut: Using your clean pruning shears or knife, carefully separate the pup from the mother plant. Ensure each pup has a good portion of root attached. Sometimes, you might need to cut through a rhizome to achieve this.
- Plant them up: Pot each pup into its own container filled with your well-draining potting mix. Make sure the cut end of the rhizome is covered, and the leaves are above the soil line.
- Water gently: Water the newly potted pups thoroughly, but allow excess water to drain away.
Sometimes, you might also get lucky and be able to take stem cuttings, though this tends to be a bit less reliable for pogonantha compared to division.
Stem Cuttings (Use with caution and patience!)
- Select a healthy stem: Choose a non-flowering stem that is at least 6-8 inches long and has some healthy leaves.
- Make the cut: Using your sharp shears, make a clean cut just below a leaf node. Remove the lower leaves, leaving just a few at the top.
- Dip in rooting hormone: If using, dip the cut end of the stem into your rooting hormone.
- Plant the cutting: Insert the treated end into a pot filled with your well-draining mix. Make a small hole first to avoid rubbing off the hormone.
- Create humidity: Water gently and then cover the pot with a plastic bag or propagation dome to trap humidity. Place it in a warm spot with bright, indirect light.
The “Secret Sauce” (Pro Tips)
Here are a couple of things I’ve learned over the years that can really make a difference:
- Don’t be afraid of a clean cut: The cleaner your cut, the less chance of disease getting in. If you’re dividing, make sure those pups have some roots before you separate them. A cutting without roots is just a prayer!
- Bottom heat is your friend: Heliconias love warmth! If you’re having trouble with cuttings rooting, especially in cooler weather, placing your pots on a seedling heat mat can significantly speed things up and increase your success rate. It mimics the warm soil they’d find in their natural habitat.
Aftercare & Troubleshooting
Once your pups or cuttings are planted, keep the soil evenly moist, but never waterlogged. Think damp, like a wrung-out sponge. For cuttings, that humid environment is crucial. You might want to mist them occasionally.
You’ll know they’re happy and rooting when you see new leaf growth appearing. This can take anywhere from a few weeks to a couple of months.
Now, for the tricky part: what if things go wrong? The most common culprit is rot. If you see your cutting wilting and turning mushy, or if the base of your pup seems to be decaying, it’s usually a sign of too much moisture and poor drainage. Don’t be discouraged! You can try to salvage a healthy piece if possible, but often, it’s a sign to check your soil and watering habits. Sometimes, pests can be an issue too, so keep an eye out for any unwelcome visitors.
A Little Patience Goes a Long Way
Propagating plants is a journey, my friends. It requires a bit of observation, a dash of patience, and a whole lot of love. Don’t get discouraged if your first attempt isn’t perfect. Each plant you grow from a cutting or a division is a testament to your gardening passion. So go ahead, get your hands dirty, and enjoy the wonderful process of bringing more of these magnificent Heliconias into your world!
Resource:
https://identify.plantnet.org/k-world-flora/species/Heliconia%20pogonantha%20Cufod./data