Oh, hello there! Pull up a chair and let’s chat about a truly fascinating plant: Lecanopteris sinuosa, often called the Ant Fern or Elfin Fern. If you’re looking for a touch of the exotic in your home jungle, this is your fern! Its unique, bulbous rhizomes are a wonder to behold, and for me, propagating them is an absolute delight. It’s not a plant for the absolute beginner who’s never picked up a trowel, but with a little care and attention, you’ll find it quite achievable.
The Best Time to Start
Timing is everything in the garden, isn’t it? For Lecanopteris sinuosa, I’ve found the sweet spot is in late spring to early summer. This is when the plant is actively growing and has the most energy to put into developing new roots and shoots. Avoid propagation during its dormant period, as it will simply be too lethargic to get going. Look for healthy, vigorous growth to select your cuttings from.
Supplies You’ll Need
Before we get our hands dirty, let’s gather our tools. Having everything ready makes the process so much smoother.
- Sharp, sterile pruning shears or a knife: Cleanliness is key to preventing disease.
- A well-draining potting mix: I love a mix of equal parts orchid bark, perlite, and a good quality potting soil. You want good aeration for those rhizomes!
- Small pots or trays: Clean plastic pots are perfect.
- Rooting hormone (optional but recommended): A gentle powder will give your cuttings a boost.
- A spray bottle: For misting.
- Plastic wrap or a clear plastic bag: To create a humid environment.
- Labels and a marker: So you remember what you’ve propagated!
Propagation Methods
Lecanopteris sinuosa is best propagated by division or rhizome cuttings. Stem cuttings, as you might do with other plants, aren’t really their thing due to their unique rhizome structure.
1. Division: The Most Reliable Method
This is how I typically start new Ant Ferns. It’s like giving your existing plant a haircut and a roomy new apartment!
- Gently remove the plant from its pot. If it’s stuck, a little light tapping on the sides of the pot should help.
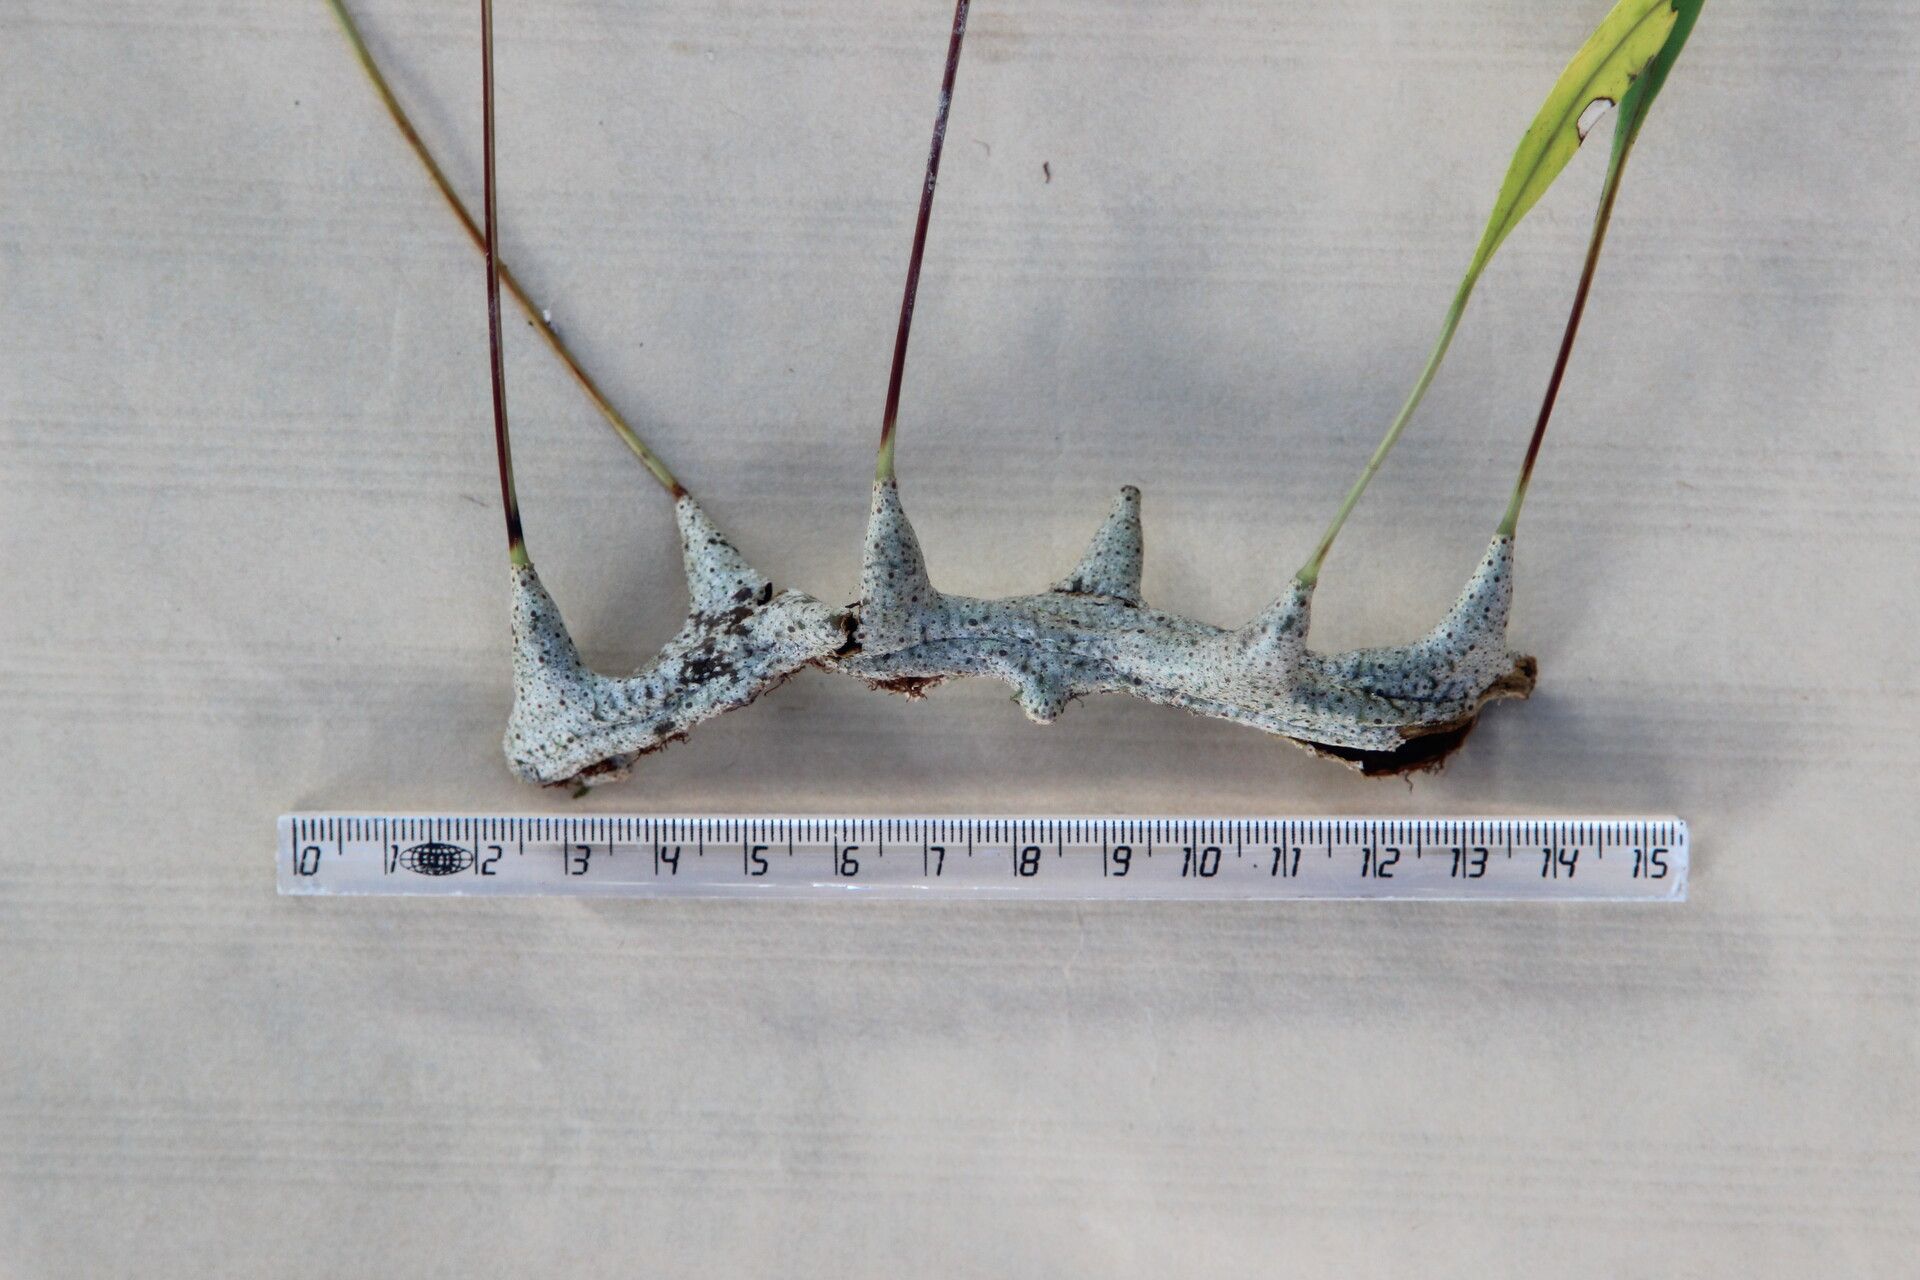
- Inspect the rhizomes. You’ll see the thick, creeping rhizomes. Look for sections that have at least one healthy growth point (a young leaf or shoot) and a good section of rhizome.
- Using your clean shears or knife, carefully separate a piece of the rhizome. Be patient; you want to make a clean cut. Ensure the piece you’re taking has some visible roots already attached if possible.
- Pot up the new division. Use your well-draining mix in a small pot. Gently place the rhizome so that the growth point is just above the soil surface. You can bury the rhizome slightly, but don’t suffocate it.
- Water lightly. You want the soil to be moist but not waterlogged.
- Create a humid microclimate. Cover the pot with a clear plastic bag or plastic wrap, securing it around the pot with a rubber band. This will help keep the humidity high, which ferns absolutely adore. Place it in bright, indirect light.
2. Rhizome Cuttings: For the Adventurous
This method is a bit more advanced, but when it works, it’s incredibly satisfying!
- Select a healthy rhizome section. Look for a piece of rhizome that is at least an inch or two long and has a growth bud or a small frond emerging.
- Carefully cut the rhizome section. Aim for a clean cut. You can even slice a longer rhizome into smaller, manageable pieces, each with a growth bud.
- Dust the cut end with rooting hormone (optional). This gives the cutting a lovely boost.
- Plant the cutting. Lay the rhizome cutting on the surface of your well-draining potting mix in a shallow pot or tray. You can bury it very lightly, ensuring the bud is exposed.
- Water gently and cover. Just like with division, water lightly and cover with plastic to maintain high humidity. Place in bright, indirect light.
The “Secret Sauce” (Pro Tips)
Here are a few little tricks I’ve picked up over the years that seem to make a world of difference:
- Don’t let the cut ends sit exposed for too long. Once you’ve made a cut, get that rhizome section potted up or covered as quickly as possible. They dry out so fast!
- Bottom heat is your friend. If you have a seedling heat mat, placing your pots on it can really speed up root development. It mimics the warmth of their natural habitat and gives those little roots a gentle nudge to grow.
- Observe, observe, observe! Don’t be afraid to peek under the plastic now and then (but not too often!). Look for tiny white root tips emerging from the soil or the start of new fronds unfurling. This lets you know things are going well.
Aftercare & Troubleshooting
Once you see signs of new growth—a tiny frond emerging or roots peeking out—it’s time to start weaning your new plant off its cover.
- Gradually introduce it to normal humidity. Start by opening the plastic bag a little each day for a week.
- Continue providing bright, indirect light. Avoid harsh, direct sun, which can scorch their delicate leaves.
- Water when the top inch of soil feels dry. It’s crucial not to overwater, as this is the quickest way to rot those precious new roots.
- Troubleshooting: The most common issue is rot. If you see mushy, discolored rhizome sections, or the plant looks generally unhealthy and limp, it’s likely due to too much moisture and poor air circulation. If rot sets in, you may need to cut away the affected parts with a clean blade and let the remaining healthy sections callus over before repotting in fresh, dry mix. It’s a tough lesson, but sometimes, you have to let go of a compromised piece. Don’t be discouraged; it happens to the best of us!
A Encouraging Closing
Growing plants is a journey, and propagation is one of the most rewarding parts of that journey. Be patient with your Lecanopteris sinuosa. It might take a few weeks, or even a couple of months, to see significant root development. Every new plant you nurture into existence is a little miracle, and a testament to your green thumb. So take a deep breath, enjoy the process, and get ready to expand your fern family! Happy propagating!
Resource: