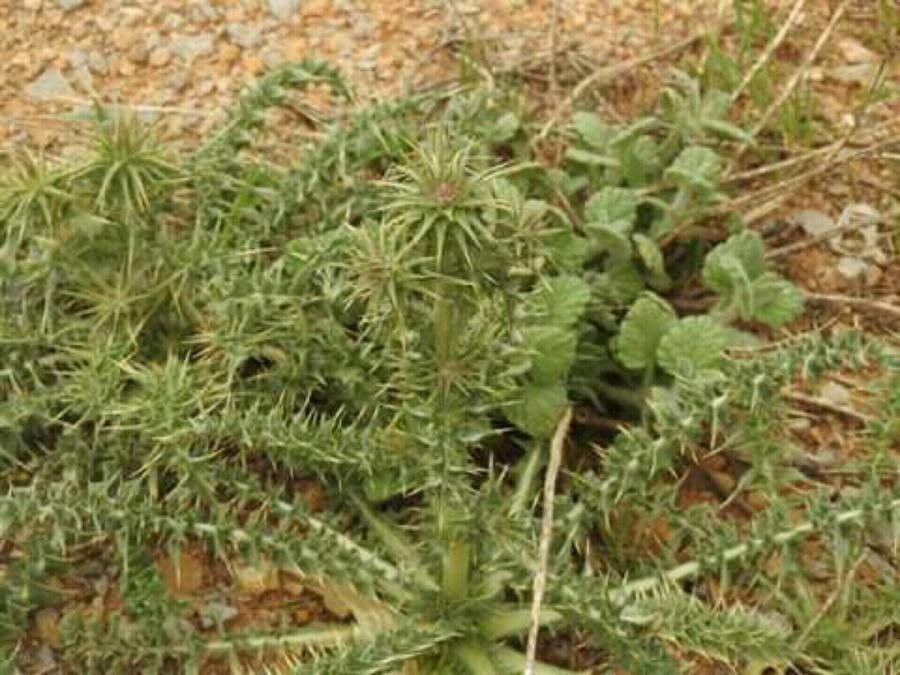
Oh, hello there! I’m so glad you’ve come by for a chat about Cousinia hermonis. It’s a truly special plant, a gem for any garden if you ask me. Those spiky, architectural leaves and delicate, thistle-like blooms are just stunning. Propagating it feels like unlocking a little bit of that magic for yourself, and it’s incredibly rewarding to watch those tiny bits of plant life spring into their own. Now, for beginners, I’ll be honest, Cousinia hermonis can be a wee bit of a challenge. It likes things just so. But with a little patience and the right approach, I promise, you can absolutely do it!
The Best Time to Start
For the highest success rate with Cousinia hermonis, I’ve found that early spring is your golden ticket. Think right after the last frost, when the plant is just starting to wake up and put on new growth. This gives the cuttings plenty of time to establish themselves before the heat of summer really kicks in. It’s like giving them a strong head start!
Supplies You’ll Need
Here’s what you’ll want to gather before you get your hands dirty:
- Sharp, clean pruning shears or a sharp knife: Cleanliness is key to preventing any nasty little infections.
- Potting mix: I prefer a well-draining, gritty mix. A good blend is equal parts perlite, coarse sand, and peat moss or coco coir. You want that water to drain away quickly!
- Small pots or seed trays: Make sure they have drainage holes.
- Rooting hormone (optional but recommended): This is especially helpful for Cousinia hermonis. Look for one containing IBA.
- Watering can with a fine rose or a spray bottle: Gentle watering is crucial.
- Labels and a marker: So you don’t forget what you’ve potted!
Propagation Methods
I’ve had the most luck with stem cuttings when it comes to Cousinia hermonis. Here’s how I do it:
- Take Your Cuttings: On a bright, but not scorching, morning, use your clean shears to take 4-6 inch cuttings from healthy, vigorous stems. Look for pieces that have not yet flowered. Make the cut just below a leaf node – that’s where the magic of root development happens. Remove the lower leaves, leaving just a few at the top.
- Prepare the Cuttings: If you’re using rooting hormone, dip the cut end into the powder or gel, tapping off any excess.
- Potting Up: Fill your small pots with your prepared gritty potting mix. Make a small hole in the center of the soil with a pencil or your finger.
- Insert the Cuttings: Gently place the cut end of each stem cutting into the hole, firming the soil around it.
- Water Gently: Water the soil thoroughly but gently. You don’t want to dislodge your cuttings.
The “Secret Sauce” (Pro Tips)
- Give Them a Warm Welcome: Cousinia hermonis love a bit of warmth from below. Placing your pots on a heated propagator mat can significantly speed up root formation. It really wakes up those dormant rooting hormones in the stem.
- Avoid Soggy Bottoms: This is perhaps the most important tip. I always err on the side of too dry rather than too wet when it comes to cuttings. If the soil stays waterlogged, rot is almost guaranteed. I often let the top inch of soil dry out a little before watering again. They prefer to be consistently moist, not soggy.
- Don’t Be Afraid to Experiment (a Little!): With some plants, I’ll try water propagation, but for Cousinia hermonis, I really find soil provides a more stable environment for those initial root hairs. Stick to the soil method for this one, I think you’ll be happier!
Aftercare & Troubleshooting
Once your cuttings are potted, place them in a bright spot OUT of direct sunlight. You can cover the pots with a clear plastic bag or a propagator lid to create a humid environment, but remember to open it for a few minutes each day to allow for air circulation. This helps prevent fungal diseases.
You’ll know your cuttings have successfully rooted when you see new leaf growth. Gently tugging on a cutting will also reveal resistance; if it budges easily, it hasn’t rooted yet.
The most common sign of failure is rot. If you see your cuttings turning black and mushy, it’s a sign of too much moisture and not enough airflow. You might also see cuttings that just seem to wilt and never perk up. Sometimes, despite our best efforts, they just don’t take. Don’t get discouraged!
A Encouraging Closing
Raising plants from cuttings is such a rewarding journey. It’s a little bit of patience, a dash of observation, and a whole lot of green-thumb magic. Be patient with your Cousinia hermonis cuttings. Watch them closely, give them what they need, and truly enjoy the process of bringing new life into your garden. Happy propagating!
Resource:
https://identify.plantnet.org/k-world-flora/species/Cousinia%20hermonis%20Boiss./data