Hello fellow garden enthusiasts!
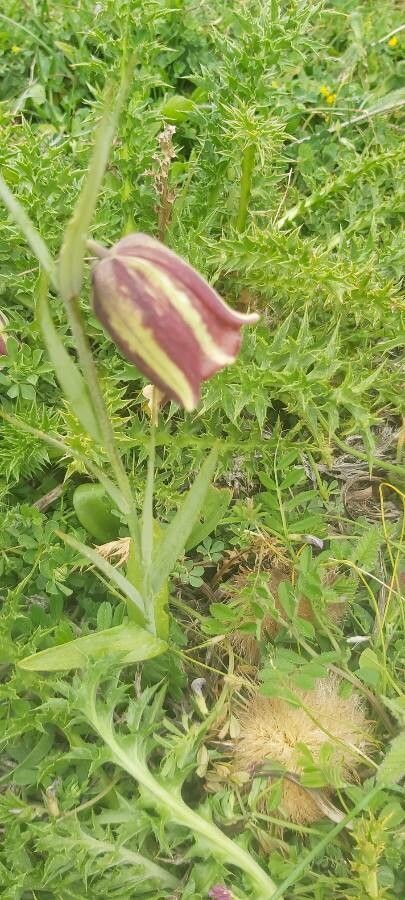
There’s something truly special about coaxing new life from an existing plant. It connects us to nature’s cycles and, let’s be honest, it’s a fantastic way to get more of those beloved blooms without breaking the bank. Today, we’re diving into the world of Fritillaria messanensis. If you’re not familiar, imagine a delicate, bell-shaped bloom, often with a dusky, muted beauty that just begs to be admired. It’s a plant that whispers elegance rather than shouts it. Propagating these beauties can be a tad challenging, but oh-so-rewarding. Think of it as a rewarding puzzle for the patient gardener.
The Best Time to Start
For Fritillaria messanensis, the golden rule is to work with your bulbs when they are dormant. This usually means late summer or early fall, after the foliage has completely died back. This is when the plant is resting and its energy isn’t focused on active growth, making it the perfect time to divide or collect offsets. Trying to propagate while it’s actively growing or flowering is like asking someone to run a marathon right after a big meal – not ideal for success!
Supplies You’ll Need
Here’s what I always have on hand when I’m ready to propagate my Fritillaria:
- Sharp, clean pruning shears or a small knife: Sterilization is key to preventing disease. A quick dip in rubbing alcohol works wonders.
- Well-draining potting mix: A mix designed for bulbs or succulents is usually a good bet. I often add extra perlite or coarse sand to ensure excellent drainage.
- Small pots or seed trays: Whatever you choose, make sure they have drainage holes.
- Label and waterproof marker: Trust me, you’ll forget what you planted and when!
- Optional: Rooting hormone powder: While not always strictly necessary for bulb offsets, it can give a little boost.
- Optional: A shallow tray for bottom watering: This is a gentle way to water new propagations.
Propagation Methods
Fritillaria messanensis is best propagated by dividing the bulbs. This is their natural way of multiplying.
- Gently Unearth: With your spade or trowel, carefully dig around the dormant Fritillaria plant. You want to lift the entire bulb cluster without damaging any of the bulbs. The soil should be quite dry at this point, which makes it easier to work with.
- Clean Off the Soil: Once you have the bulb cluster, gently brush or crumble away as much of the soil as you can. You’ll likely see a main bulb with smaller offsets attached.
- Separate the Offsets: Using your clean knife or pruning shears, carefully twist or cut the offsets away from the main bulb. Aim to get a clean break. If an offset has a tiny bit of root attached, that’s a bonus! If theoffsets are very small or you’re worried about damaging the main bulb, you can leave them attached, but they may take longer to establish.
- Inspect and Plant: Examine each offset. If you see any signs of rot or damage, it’s best to discard it. Dust the cut surfaces with a fungicide if you’re particularly concerned. Plant each offset in its own pot or in a seed tray filled with your well-draining mix. Plant them at about twice the depth of their own height. Don’t overcrowd the pots.
- Label and Water Lightly: Label each pot with the plant variety and the date. Then, give them a light watering. You want the soil to be moist but not soggy.
The “Secret Sauce” (Pro Tips)
Here are a couple of things I’ve learned over the years that really seem to make a difference:
- Don’t Rush Them: Fritillaria bulbs can be notoriously slow to germinate or establish, even from offsets. It’s vital to be patient and resist the urge to constantly dig them up to “check” on their progress. They need time to settle in and develop a strong root system.
- Dry Dormancy is Crucial: When I say dormant, I mean dry. If you’ve left your Fritillaria bulbs in the ground, make sure the soil isn’t holding excessive moisture during their dormant period. If you’re storing bulbs before planting, keep them in a cool, dry, and well-ventilated spot.
Aftercare & Troubleshooting
Once your offsets are planted, place the pots in a cool, sheltered location, ideally a greenhouse or cold frame, where they will be protected from harsh weather but still experience natural temperature fluctuations. Water sparingly, only when the top inch of soil feels dry to the touch. The goal is to keep the soil consistently moist but never waterlogged.
The most common sign of trouble you’ll see is rot. If a bulb begins to look mushy, dark, or smells foul, it’s likely rotting. This is usually a sign of too much moisture or poor drainage. Unfortunately, there’s not much you can do once rot sets in, so it’s usually best to discard the affected bulb to prevent it from spreading. If you see no signs of growth after a good few months, don’t despair! Some bulbs just take their sweet time.
A Warm Closing
Propagating Fritillaria messanensis is a journey into the heart of patience and keen observation. It might test your resolve at times, but the thrill of seeing those first delicate leaves emerge from a bulb you’ve nurtured is an unparalleled joy. So, roll up your sleeves, embrace the quiet work, and enjoy the beautiful process of growing more of these charming bells for your garden! Happy propagating!
Resource:
https://identify.plantnet.org/k-world-flora/species/Fritillaria%20messanensis%20Raf./data