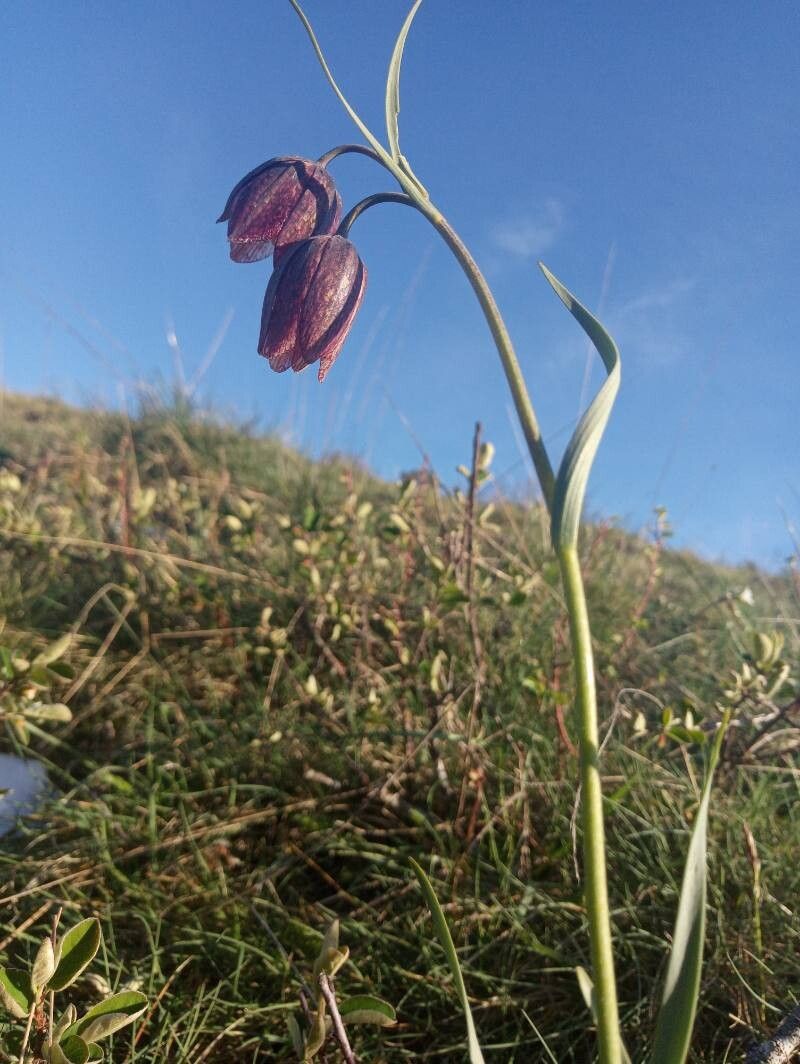
Oh, hello there! I’m so glad you’ve stopped by. Today, we’re diving into something really special: propagating Fritillaria montana. If you’re not familiar, imagine the most delicate, bell-shaped flowers, often in beautiful shades of purple or checkered patterns, nodding gently in a woodland setting. They’re simply enchanting, aren’t they? And the idea of creating more of these little treasures from existing ones? Well, that’s a gardening joy all its own. For beginners, I’d say Fritillaria montana propagation is a moderate challenge, but with a little patience and the right approach, you’ll be rewarded.
The Best Time to Start
For Fritillaria montana, the absolute best time to propagate is right after flowering and as the foliage begins to yellow and die back. This is typically in late spring to early summer. The plant is entering its dormant phase, and this is when we can best work with its bulbs or offsets without stressing it too much. Trying to propagate when it’s actively growing can be quite a bit trickier.
Supplies You’ll Need
Before we get our hands dirty, let’s gather our toolkit:
- Small, sharp pruning shears or a clean knife: For making clean cuts.
- Well-draining potting mix: I like a mix of equal parts peat moss, perlite, and coarse sand. You can also buy a specialized bulb or cactus mix.
- Small pots or trays: With good drainage holes, of course!
- Optional: Rooting hormone powder or gel: This can give your cuttings a little boost, though it’s not always essential for Fritillaria montana.
- Watering can with a fine rose or mister: For gentle watering.
- Labels and a marker: To keep track of what you’ve planted and when.
Propagation Methods
While Fritillaria montana doesn’t readily lend itself to stem cuttings or water propagation like some other plants, its bulbs are where the magic happens.
Division of Bulbs: This is by far the most effective and common method for Fritillaria montana.
- Gently unearth: Once the foliage has died back, carefully dig up the parent plant. You’re looking for the main bulb and any smaller bulbs (offsets) that have formed around it. Be extremely gentle; the bulbs are delicate.
- Inspect and separate: Look for any naturally occurring offsets, which are essentially baby bulbs attached to the parent bulb. With your clean knife or pruners, carefully separate these offsets. If an offset has a small basal plate (where roots would grow from), that’s a good sign it’s ready to go.
- Clean and dry: Gently brush off excess soil from the bulbs. It’s a good idea to let the bulbs air dry for a day or two in a cool, dry, and well-ventilated spot. This helps prevent rot.
- Potting up: Fill your small pots with the well-draining potting mix. Plant each offset about 2-3 inches deep, with the pointed end facing upwards. If you’re using rooting hormone, dip the basal plate of the offset into it before planting.
- Initial watering: Give the freshly potted bulbs a gentle watering. Don’t drench them; just moisten the soil.
The “Secret Sauce” (Pro Tips)
Here are a few things I’ve learned over the years that can really make a difference:
- Don’t overcrowd the pots. Give those new bulbs space to grow. Cramming them in is a surefire way to invite rot.
- Mimic their natural environment during dormancy. After planting, I like to place the pots in a cool, dry spot, perhaps a cool garage or a sheltered corner of the garden, where they won’t get too much direct sun or water until they start showing signs of life in the fall or next spring. They need that dry rest period.
- Be patient with offsets. Sometimes, a tiny offset might take a season or two to reach flowering size. Don’t be discouraged if they don’t bloom the very next year.
Aftercare & Troubleshooting
Once your Fritillaria montana offsets are planted, the key is to resist the urge to overwater.
- Dormant period: For the summer months, keep the soil barely moist. Just enough to prevent the bulbs from shriveling. Water very sparingly.
- Growth begins: As you see new shoots emerge (usually in the fall or early spring, depending on your climate), you can increase watering slightly. Water when the top inch of soil feels dry to the touch.
- Signs of failure: The most common culprit is rot. If your bulbs feel mushy, smell unpleasant, or develop dark, soft spots, rot has likely set in. This is usually due to overwatering or poor drainage. Unfortunately, if rot has taken hold, it’s very difficult to save the bulb.
Don’t worry if you lose a bulb or two; it’s all part of the learning process! Gardening is a journey of observation and adaptation. Keep an eye on your new plantings, be gentle, and celebrate those first tiny green shoots. Happy propagating!
Resource: