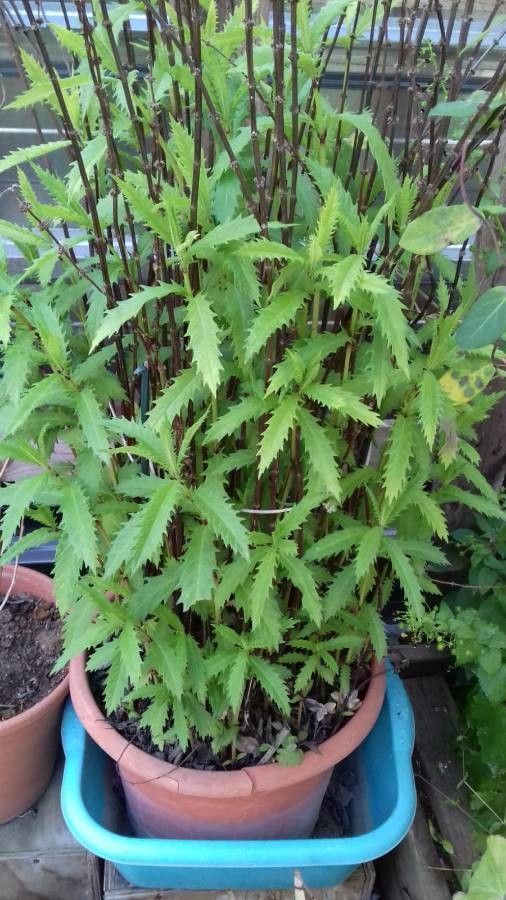
Hello there, fellow garden enthusiasts! It’s so wonderful to have you join me today. I’m thrilled to be sharing my passion for a rather special plant: Dendrocnide latifolia, or what some affectionately call the “Giant Stinging Nettle.” Now, before you run for the hills, hear me out! This isn’t your average prickly weed. Dendrocnide latifolia boasts magnificent, broad, almost architectural leaves that create a real statement in any tropical or subtropical garden. Propagating it is a fantastic way to expand your collection, share the magic with friends, or simply marvel at the resilience of nature. For beginners, trying your hand at Dendrocnide latifolia can be a rewarding challenge – it’s not the most forgiving plant, but with a little know-how, you’ll be well on your way.
The Best Time to Start
The absolute best time to get your hands dirty with Dendrocnide latifolia propagation is during its active growing season. For most of us, this means spring and summer. You’ll want to take cuttings from stems that are firm and woody but not old and brittle. Look for new growth that’s starting to mature, usually after the plant has finished its main flush of flowering or fruiting. Avoid taking cuttings from stressed or unhealthy plants, as they’re less likely to root successfully.
Supplies You’ll Need
Getting your workspace set up is half the battle, isn’t it? Here’s what I always have on hand:
- Sharp, clean pruning shears or a sharp knife: Crucial for making clean cuts that heal well. Sterilize them with rubbing alcohol before you start.
- A well-draining potting mix: I like a blend of perlite, peat moss, and a little bit of compost. You want something that drains freely but still holds some moisture. Specialized succulent or cactus mixes can also work well.
- Rooting hormone (optional, but recommended): This gives your cuttings a little boost. Look for one that contains IBA (Indole-3-butyric acid).
- Small pots or seed trays: Clean, with drainage holes, of course!
- A clear plastic bag or a propagation dome: This helps maintain humidity around your cuttings.
- Watering can or spray bottle: For gentle watering.
- Labels and a permanent marker: To keep track of what you planted and when.
Propagation Methods
While Dendrocnide latifolia can be a bit fussy, the most reliable method for me has always been stem cuttings.
- Select Your Cutting: Find a healthy stem with several leaves. Using your sterilized shears, make a clean cut about 4-6 inches long, just below a leaf node (the point where a leaf attaches to the stem). Gently remove the lower leaves, leaving just a couple at the top. This prevents them from rotting once planted.
- Prepare the Cutting: If you’re using rooting hormone, dip the cut end of the stem into the powder. Gently tap off any excess.
- Planting: Fill your small pots with your prepared potting mix. Make a hole in the center with your finger or a small stick. Gently insert the cut end of your Dendrocnide cutting into the hole. Firm the soil around the stem to ensure good contact.
- Watering: Water the soil thoroughly but gently. You want the soil to be moist but not waterlogged.
- Create the Humid Environment: Place the potted cutting inside a clear plastic bag or under a propagation dome. Seal it loosely, or ensure there’s some ventilation. This creates a mini-greenhouse effect.
- Placement: Place your pot in a bright spot with indirect light. Avoid direct sunlight, as this can scorch the delicate cutting.
The “Secret Sauce” (Pro Tips)
After years of coaxing plants into new life, I’ve picked up a few tricks that really make a difference, especially with plants like Dendrocnide latifolia:
- Bottom Heat is Your Friend: If you can, invest in a small heating mat designed for plant propagation. Placing your pots on even gentle bottom heat can significantly speed up root development. It’s like giving your cuttings a warm hug from below!
- Don’t Drown Your Leaves: When watering, be mindful. While the soil needs to be moist, ensure the remaining leaves on your cutting don’t sit in puddles of water. Any excess moisture around the foliage can invite fungal diseases. A light misting a couple of times a day can also help those precious leaves stay hydrated without oversaturating.
- Be Patient with the Stinging: While the mature plant has stinging hairs, the cuttings themselves usually don’t develop them strongly at first. However, it’s always wise to handle any part of a Dendrocnide plant with caution. Consider wearing gloves as a preventative measure, especially when handling numerous cuttings.
Aftercare & Troubleshooting
Once you start to see signs of new growth – perhaps tiny new leaves unfurling or a slight resistance when you gently tug the cutting – you know you’re on the right track! At this point, you can gradually reduce the humidity by opening the plastic bag a little more each day, eventually removing it altogether. Continue to water when the top inch of soil feels dry.
The most common issue you’ll encounter is rot. If your cutting turns mushy, black, or smells unpleasant, it’s a sign of overwatering or poor drainage. Unfortunately, a rotted cutting is usually beyond saving. The best approach is to prevent it by ensuring good air circulation and not overwatering from the start. If you see signs of mold on the soil, you can try gently scraping it off and allowing the soil to dry out a bit more.
A Encouraging Closing
Growing new plants is a journey, and with Dendrocnide latifolia, it’s a particularly rewarding one. There might be a bit of a learning curve, but don’t let that deter you. Every gardener has lost a cutting or two along the way – it’s all part of the process! Be patient with your little charges, observe them closely, and celebrate every tiny sign of success. Happy propagating, and may your garden thrive!
Resource:
https://identify.plantnet.org/k-world-flora/species/Dendrocnide%20latifolia%20(Gaudich.)%20Chew/data