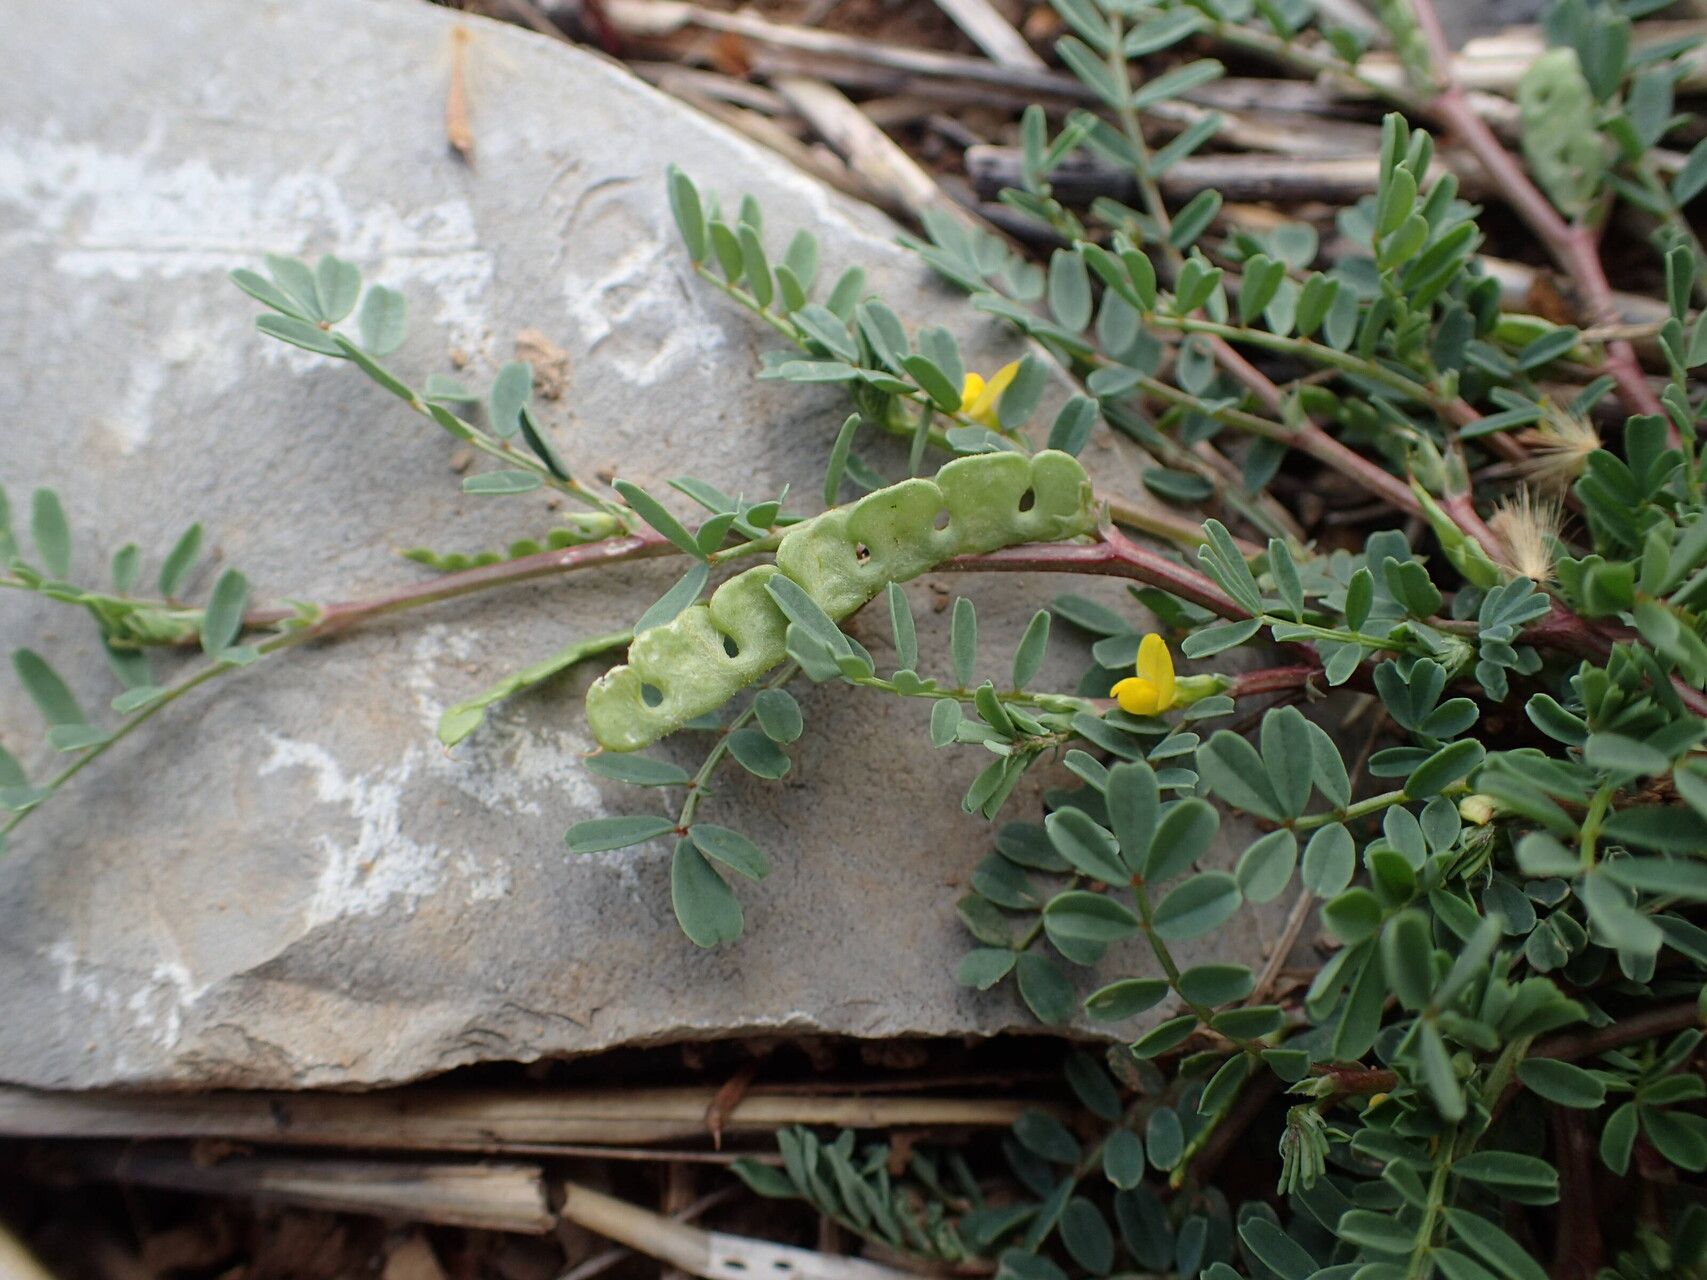
Hey there, fellow plant lovers! Today, we’re diving into the wonderful world of Hippocrepis unisiliquosa, also known as the Horseshoe Vetch. If you’ve seen this lovely legume gracing gardens, you’ve likely been charmed by its delicate, pea-like flowers and its ability to attract beneficial pollinators. It’s a plant that truly brings a bit of wild beauty to our cultivated spaces.
Propagating Hippocrepis is a deeply satisfying endeavor. There’s a special kind of joy in taking a piece of a beloved plant and nurturing it into a new life. For those of you just starting out with propagation, I’d say Hippocrepis unisiliquosa falls somewhere in the middle. It’s not the absolute easiest, but with a little attention and care, you’ll find success is well within reach.
The Best Time to Start
My personal favorite time to get started with propagating Hippocrepis unisiliquosa is late spring to early summer. This is when the plant is actively growing and has plenty of energy to put into developing new roots. You’re looking for stems that are firm but not yet woody. Think of them as having a bit of give when you bend them, but not flopping over. Waiting until after the main flush of spring growth has settled a bit usually gives you the perfect material.
Supplies You’ll Need
Let’s gather our little toolkit for this propagation adventure:
- Sharp, clean pruning shears or a sharp knife: Essential for making clean cuts that heal well.
- Rooting hormone (powder or gel): This isn’t strictly mandatory, but it can give your cuttings a nice boost. I find it helpful for Hippocrepis.
- Small pots or seed trays: Whatever you have on hand that’s clean and has drainage holes.
- Well-draining potting mix: A good blend for cuttings is usually a 50/50 mix of perlite and peat moss or coco coir. Alternatively, a good quality seed starting mix works well too.
- A clear plastic bag or a propagation dome: To create a humid environment for your cuttings.
- Water mister or spray bottle: For keeping things moist.
Propagation Methods
For Hippocrepis unisiliquosa, I find stem cuttings to be the most reliable and rewarding method. It’s also pretty straightforward.
Here’s how I do it:
- Select Your Stems: As I mentioned, look for healthy, current-season stems that are semi-hardwood. They should snap cleanly, not bend. Aim for cuttings about 4-6 inches long.
- Make the Cut: Using your sharp shears or knife, make a clean cut just below a leaf node. This is the point where a leaf attaches to the stem, and it’s where roots are most likely to form. Remove any flowers or developing seed pods from your cutting.
- Prepare the Cutting: Gently remove the leaves from the lower half of the stem. You want at least one or two leaf nodes exposed, as this is where the magic happens. You can leave a couple of leaves at the very top to help with photosynthesis.
- Apply Rooting Hormone (Optional but Recommended): Dip the cut end of the stem into your rooting hormone, tapping off any excess.
- Plant Your Cuttings: Fill your pots or trays with your prepared potting mix. Make a small hole with a pencil or your finger, and gently insert the cut end of your Hippocrepis cutting into the mix, ensuring the leaf nodes are buried under the surface. Firm the soil gently around it.
- Water and Cover: Water the pots thoroughly until you see water drain from the bottom. Then, cover the pots with a clear plastic bag or a propagation dome to trap humidity. If you’re using a bag, you might want to use some stakes to keep the plastic from touching the leaves directly.
The “Secret Sauce” (Pro Tips)
Over the years, I’ve picked up a few tricks that seem to make a big difference:
- Bottom Heat is Your Friend: If you have access to a seedling heat mat, placing your pots on it can significantly speed up root development. It mimics the warmth of the soil in the natural growing season and gives those root cells a real nudge.
- Don’t Drown Them: While humidity is crucial, you don’t want the cuttings sitting in soggy soil. Water thoroughly after planting, then only water when the top inch of soil feels dry to the touch. Overwatering is a fast track to rot.
- Patience is a Virtue (and a Necessity): Especially with semi-hardwood cuttings like these, be prepared for patience. It can take 4-8 weeks, sometimes even longer, for significant root growth to appear. Resist the urge to pull them up too often to check!
Aftercare & Troubleshooting
Once you start to see signs of life – like little roots peeking out of the drainage holes or new leaf growth on top – it’s time to gradually acclimate your new Hippocrepis babies to normal conditions.
- Increase Airflow: Slowly lift the plastic bag or dome for increasingly longer periods over a week or two. This helps prevent fungal issues.
- Light Watering: Continue to water when the top inch of soil feels dry.
- Transplanting: Once they have a good root system, you can gently transplant them into individual small pots.
- Watch for Rot: The most common problem you might encounter is rot. This usually happens due to overwatering or poor air circulation. If you see stems that look mushy or discolored at the soil line, it’s likely rot. Unfortunately, once rot sets in, it’s very difficult to save the cutting. Prevention through proper watering and good drainage is key! Wilting can also be a sign of stress, but if it’s accompanied by mushiness, it’s probably rot.
A Encouraging Closing
Remember, propagation is a journey, not a race. There will be times when things don’t quite work out, and that’s just part of the learning process. Don’t get discouraged! Celebrate every little success, and enjoy the quiet satisfaction of nurturing new life from a piece of a plant you love. Happy propagating!
Resource:
https://identify.plantnet.org/k-world-flora/species/Hippocrepis%20unisiliquosa%20L./data