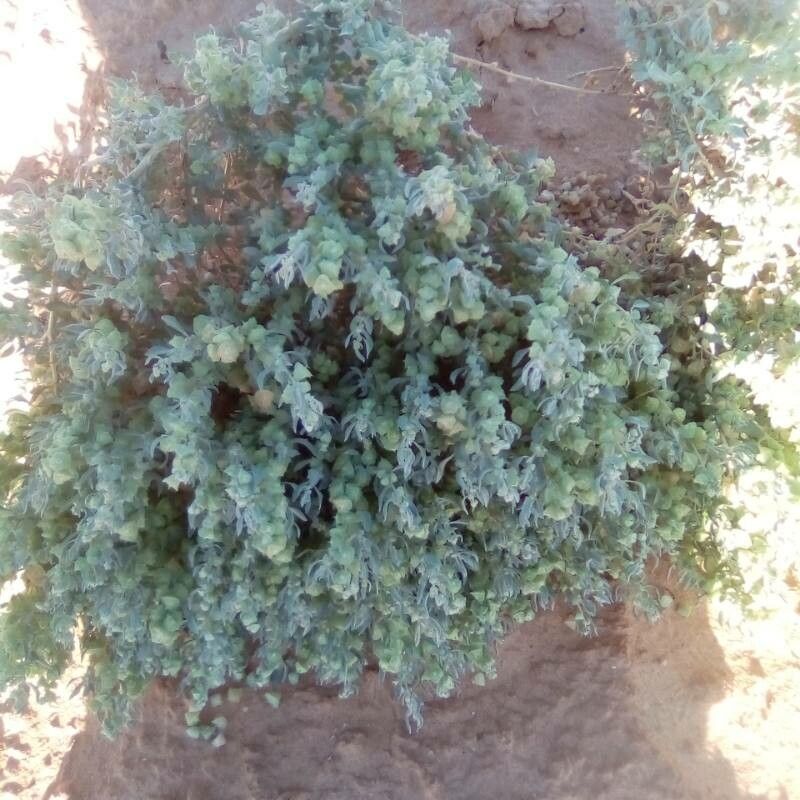
Oh, Atriplex canescens! You know, Saltbush. What a tough, beautiful plant that is. I’ve been growing and working with it for years, and honestly, there’s something really special about coaxing new life from an existing one. It’s a plant that asks for so little, yet gives so much in return – silvery-grey foliage, incredible drought tolerance, and a real sense of wild beauty.
If you’re looking to expand your Saltbush collection, or perhaps share some with friends, propagating it yourself is incredibly rewarding. Good news! For those just dipping their toes into the world of plant propagation, Atriplex canescens is generally quite amenable. It’s not overly fussy, which is a big plus in my book.
The Best Time to Start
For the highest success rate with Atriplex canescens, I’ve found late spring to early summer is your sweet spot. This is when the plant is actively growing and has plenty of energy to put into rooting. You’re looking for stems that are firm but not yet woody. Think of them as “semi-hardwood” cuttings. Waiting until the plant is really pushing out new growth ensures you’re taking cuttings when it’s feeling its most robust.
Supplies You’ll Need
Here’s what I usually have on hand when I’m ready to propagate:
- Sharp pruning shears or a craft knife: Clean cuts are crucial for preventing disease.
- Rooting hormone: While not always strictly necessary for Saltbush, it can really give your cuttings a boost. I prefer a powder or gel.
- A well-draining potting mix: I often use a 50/50 blend of perlite and seed-starting mix or coarse sand. You want that moisture to drain away quickly.
- Small pots or a seed tray with drainage holes: Clean pots are a must!
- A plastic bag or propagation dome: This helps maintain humidity.
- Labels and a marker: Trust me, you’ll thank yourself later!
- A sunny spot with indirect light: Direct sun can scorch delicate cuttings.
Propagation Methods
Stem Cuttings are my go-to for Atriplex canescens. Here’s how I do it:
- Take your cuttings: Look for healthy, upright stems that are not flowering. Using your clean shears, cut a section about 4 to 6 inches long. Make the cut just below a leaf node (where a leaf attaches to the stem).
- Prepare the cuttings: Gently strip off the lower leaves, leaving only 2 to 3 sets of leaves at the top. This reduces water loss. If your leaves are quite large, you can even cut them in half.
- Apply rooting hormone: Dip the cut end of each stem into your rooting hormone, tapping off any excess.
- Plant your cuttings: Fill your pots with your well-draining mix. Make a hole in the center with a pencil or your finger and insert the cutting, ensuring the lower leaf nodes are buried. Gently firm the soil around the stem. You can plant multiple cuttings in one pot, leaving a bit of space between them.
- Water and cover: Water the soil lightly until it’s evenly moist but not waterlogged. Then, cover the pots with a clear plastic bag or place them under a propagation dome to create a humid environment.
Water Propagation is another option that’s quite satisfying to watch.
- Select and prepare cuttings: Follow steps 1 and 2 above for preparing your cuttings.
- Place in water: Fill a clean jar or glass with water. Place your cuttings into the water, ensuring that no leaves are submerged.
- Find a bright spot: Place the container in a location that receives bright, indirect light.
- Change the water: Change the water every few days to keep it fresh and prevent bacterial growth.
- Transplant when ready: Once you see a good network of roots (typically a few inches long), you can carefully transplant them into your well-draining potting mix.
The “Secret Sauce” (Pro Tips)
- Don’t let the leaves touch the water: This is a big one, especially for water propagation. Submerged leaves will rot, and that rot can quickly spread to the stem. Keep those leaves up and out of the water!
- Use bottom heat: While not essential, giving your cuttings a little gentle warmth from below can significantly speed up rooting. A seedling heat mat works wonders. You don’t want it too hot, just a cozy warmth.
- Be patient with the woody bits: If you happen to take a cutting that’s a little more mature or woody, don’t despair. Sometimes these just take a bit longer to get going. If it looks healthy and isn’t mushy, give it time.
Aftercare & Troubleshooting
Once your cuttings have developed roots (you’ll often see new leaf growth as a sign, or you can gently tug them to feel resistance), it’s time to transition them to their own little homes.
- Gradual Acclimation: If you used a dome or bag, gradually remove it over a week to allow the new plants to adjust to lower humidity.
- Light Watering: Continue to water when the top inch of soil feels dry. They are still establishing their root systems.
- Bright, Indirect Light: Keep them in that same bright, indirect light.
- Watch for Rot: The most common sign of failure is rot, which usually appears as a mushy, brown base on the cutting. This is often due to too much moisture and poor drainage. If you see this, unfortunately, that cutting is likely lost. Prevention (using that well-draining mix and avoiding soggy conditions) is key here.
- Pests: Keep an eye out for aphids or spider mites, especially if you’re keeping them in a more enclosed space.
A Encouraging Closing
Propagating plants is a journey, and there will be successes and maybe a few failures along the way. Don’t get discouraged! Each attempt is a learning experience. Take a deep breath, enjoy the quiet satisfaction of nurturing these little bits of life, and before you know it, you’ll have a whole new collection of beautiful Atriplex canescens to admire. Happy propagating!
Resource:
https://identify.plantnet.org/k-world-flora/species/Atriplex%20canescens%20(Pursh)%20Nutt./data