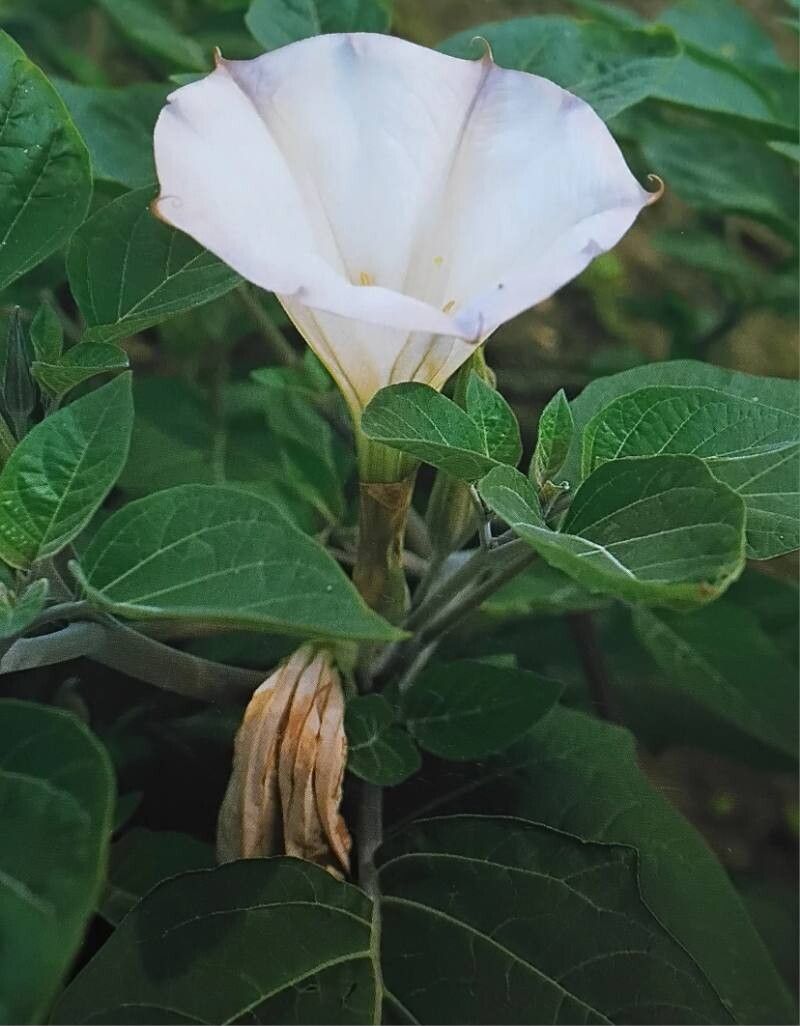
When I first encountered Datura wrightii, or Sacred Datura as it’s affectionately known, I was utterly smitten. Those enormous, trumpet-shaped white flowers, opening at dusk and perfuming the twilight air with a sweet, intoxicating scent – it’s pure magic. And if you’re anything like me, the thought of bringing that magic into more corners of your garden, or sharing it with fellow plant lovers, is incredibly appealing. The good news? Propagating it is generally quite achievable, even for those who are just starting to dip their toes into the wonderful world of gardening. You’ll find a real sense of accomplishment as you watch tiny new plants take hold.
The Best Time to Start
For Datura wrightii, patience is your best friend, but so is timing. The ideal window for propagation is late spring to early summer. This is when the plant is actively growing and has plenty of energy to put into developing new roots. Wait until the nighttime temperatures are consistently warm. Trying this too early, when it’s still cool, can lead to disappointment.
Supplies You’ll Need
Gathering your supplies makes the whole process smoother. Here’s what I reach for:
- Sharp, clean pruning shears or a craft knife: For taking cuttings. Sterilize them with rubbing alcohol to prevent disease.
- Rooting hormone powder or gel: Not strictly essential, but it gives your cuttings a significant boost.
- Potting mix: A well-draining mix is crucial. I like to use a blend of perlite and peat moss or coco coir, roughly a 50/50 ratio. You can also use a standard seed-starting mix, but adding extra perlite will improve drainage.
- Small pots or propagation trays: Clean pots are a must.
- Clear plastic bags or a propagator lid: To create a humid environment.
- Watering can or spray bottle: For gentle watering.
- Optional: Heat mat: To provide gentle bottom warmth.
Propagation Methods
Datura wrightii is forgiving and can be successfully propagated through a couple of methods. I find stem cuttings to be the most reliable.
Stem Cuttings
This is my go-to method.
- Take Your Cuttings: On a warm, sunny morning, select healthy, non-flowering stems from a mature plant. Using your sterilized pruners, take cuttings that are about 4-6 inches long. Make your cut just below a leaf node (where a leaf attaches to the stem).
- Prepare the Cuttings: Gently remove the lower leaves from the cutting, leaving just a few at the top. This prevents them from rotting when placed in the soil or water. If I’m using rooting hormone, I’ll dip the cut end into the powder or gel now.
- Planting the Cuttings: Fill your small pots with your moistened rooting mix. Make a hole in the center with your finger or a pencil. Insert the cut end of the stem into the hole, ensuring the leaf nodes that were buried are in good contact with the soil. Gently firm the soil around the stem.
- Create Humidity: Water the soil gently to settle it. Then, either cover the pot with a clear plastic bag (making sure the bag doesn’t touch the leaves) or place it in a propagator with the lid on. This traps moisture and creates that humid environment cuttings crave.
- Placement: Place the pots in a bright spot that receives indirect sunlight. Avoid direct sun, which can scorch the tender cuttings.
Water Propagation (Less Common, but works!)
While I lean towards soil, you can try rooting cuttings in water, though it requires a bit more careful observation.
- Prepare Cuttings: Follow steps 1 and 2 from the stem cutting method.
- Place in Water: Fill a clean jar or glass with room-temperature water. Ensure no leaves are submerged in the water. Only the cut stem should be underwater.
- Change Water Regularly: This is key! Change the water every 2-3 days to keep it fresh and oxygenated. This prevents bacterial growth and rot.
- Placement: Like soil cuttings, place in a location with bright, indirect light.
The “Secret Sauce” (Pro Tips)
Here are a few tricks I’ve learned over the years that make a real difference:
- Bottom Heat is Your Friend: If you have a heat mat, placing your pots on it can dramatically speed up rooting. It mimics the warmth of summer soil and encourages root development. Just make sure the heat isn’t too intense.
- Don’t Rush Them: It can take 3-6 weeks, sometimes longer, for cuttings to develop a good root system. Resist the urge to tug on them to check for roots. You’ll know they’re ready when you see new leaf growth or feel a gentle tug when you very carefully try to lift them.
- Cleanliness is Paramount: I can’t stress this enough. Always use clean tools and clean pots. A single bit of disease can wipe out your entire batch of cuttings before they even have a chance.
Aftercare & Troubleshooting
Once you see those beautiful new roots, it’s time for a little extra care.
- Transplanting: When your cuttings have a well-developed root system (you can often see roots emerging from the drainage holes, or they feel firmly anchored), it’s time to transplant them into slightly larger pots with a good quality potting soil. Continue to keep them in a bright, but not direct, sunny location.
- Watering: Water them as you would any other young plant – keep the soil consistently moist but not waterlogged. As they mature, they’ll become more drought-tolerant.
- Common Woes: The most common problem is rot. This usually happens due to overwatering or poor drainage, especially in the early stages. If you see mushy, black stems, or leaves that are wilting and yellowing rapidly, it’s usually a sign of rot. Unfortunately, there’s not much you can do to save a cutting that has rotted. Prevention is key: good drainage and being careful not to make the soil too wet. Another issue can be cuttings drying out – if your leaves start to droop and look parched, the humidity might not be high enough, or they might be too close to a heat source that’s drying them out.
A Encouraging Closing
Growing new plants from cuttings is such a rewarding part of gardening. It connects you more deeply to your plants, and there’s a genuine thrill in seeing a tiny piece of stem transform into a whole new life. Be patient with your Datura wrightii cuttings. Give them the right conditions, and let nature do its wonderful work. Enjoy the process, and soon you’ll be rewarded with your very own magical Sacred Datura plants! Happy gardening!
Resource:
https://identify.plantnet.org/k-world-flora/species/Datura%20wrightii%20Regel/data