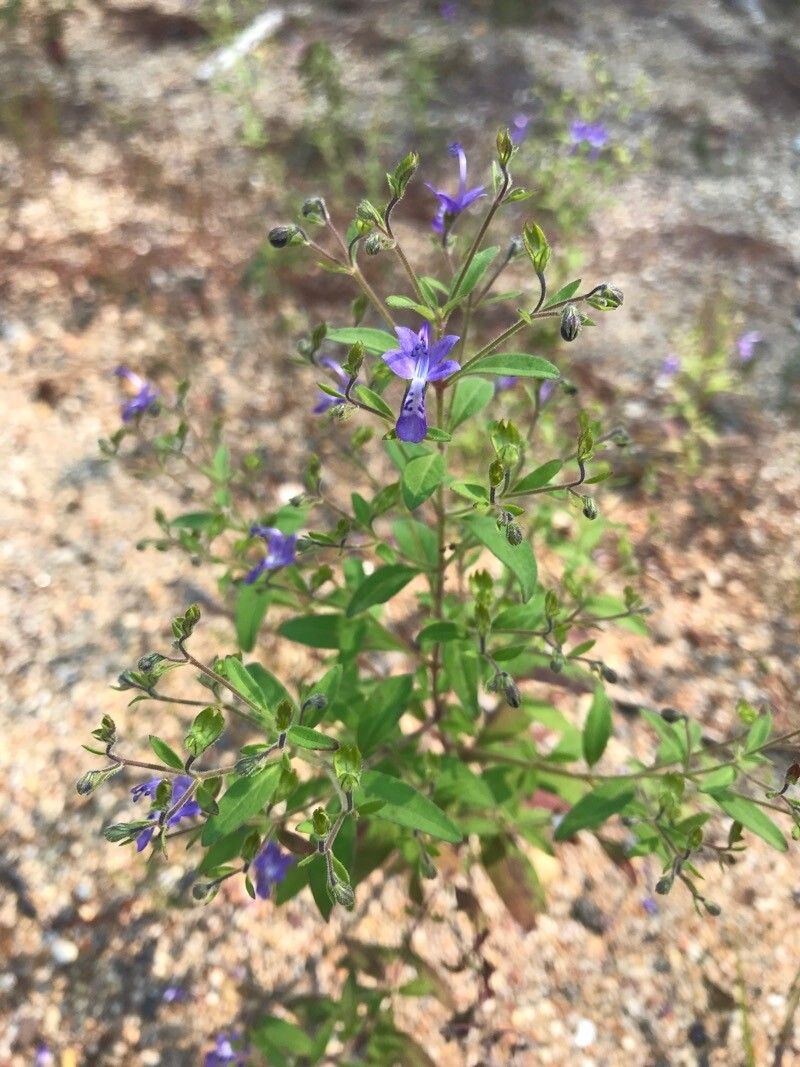
Hello fellow garden lovers! Today, we’re diving into the wonderful world of Trichostema dichotomum, also known as Blue Curls. If you’ve ever been captivated by its delicate, arching stems topped with those whimsical blue, coiled flowers that look like tiny DJ turntables, you’re in for a treat! Propagating these beauties is incredibly rewarding, and I’m thrilled to share my tried-and-true methods with you. Don’t worry, this isn’t an overly fussy plant to get started with, making it a fantastic option for those new to the propagation game.
The Best Time to Start
For the highest success rate with Trichostema dichotomum, I always recommend starting in late spring or early summer. This is when the plant is actively growing and has plenty of energy to throw into developing new roots. You’ll want to take cuttings from healthy, vigorous stems that haven’t yet flowered. Look for stems that are semi-hardwood – they’ll snap cleanly when bent, but won’t be completely woody.
Supplies You’ll Need
Gathering your supplies beforehand makes the whole process so much smoother. Here’s what I always have on hand:
- Sharp pruning shears or a clean craft knife: For taking precise cuttings.
- Rooting hormone (optional but recommended): A powder or gel to encourage faster root development.
- Well-draining potting mix: A blend of peat moss or coco coir, perlite, and a bit of compost works wonders.
- Small pots or trays: With drainage holes, of course!
- Plastic bags or a propagation dome: To create a humid environment.
- A mister bottle: For keeping your cuttings hydrated.
- Labels: To keep track of what you’ve planted and when.
Propagation Methods
There are a couple of ways we can get new Blue Curls going. My favorite, and generally the most successful for this plant, is stem cuttings.
Stem Cuttings:
- Select Your Cuttings: As I mentioned, aim for healthy, semi-hardwood stems. Each cutting should be about 4-6 inches long and have at least a few sets of leaves.
- Prepare the Cuttings: Using your clean shears or knife, make a cut just below a leaf node (where a leaf attaches to the stem). This is where roots are most likely to form. Remove the lower leaves, leaving just 2-3 sets at the top.
- Apply Rooting Hormone (Optional): Dip the cut end into your rooting hormone, tapping off any excess. This step really gives them a head start!
- Plant the Cuttings: Fill your small pots with your well-draining potting mix. Make a small hole in the center with your finger or a pencil. Insert the cut end of the stem into the hole, firming the soil gently around it.
- Water Gently: Water thoroughly until you see water drain from the bottom of the pot.
- Create Humidity: Cover the pot with a plastic bag (don’t let it touch the leaves!) or place it under a propagation dome. This traps moisture and keeps the cuttings from drying out.
Water Propagation (A Less Common Method, but Possible):
While I primarily use soil for Trichostema, you can try water propagation, especially for shorter stems.
- Take your cuttings as described above.
- Remove all but the top couple of leaves.
- Place the cuttings in a jar or glass of water, ensuring the leaves are not submerged.
- Change the water every few days to keep it fresh.
- Once small roots appear (usually after a few weeks), carefully transplant them into potting mix.
The “Secret Sauce” (Pro Tips)
Here are a couple of things I’ve learned over the years that make a real difference:
- Bottom Heat is Your Friend: If you have a heat mat designed for seed starting, place your pots on it. This gentle warmth from below mimics the soil temperature of summer and can significantly speed up root formation. It’s like giving your cuttings a cozy little spa day!
- Don’t Overwater, but Keep Them Moist: This is a delicate balance. You want the soil to stay consistently moist but not soggy. Soggy soil is a sure way to invite rot, which is the biggest enemy of cuttings. Check the soil moisture by gently poking your finger in. If it feels dry an inch down, it’s time to water.
Aftercare & Troubleshooting
Once you see new growth appearing, that’s a good sign roots are forming! You can gently tug on a cutting – if there’s resistance, roots have likely developed. Gradually acclimate your new plants to drier air by removing the plastic bag or dome for longer periods each day.
The most common problem you might encounter is rot. If your cuttings look mushy, black, or smell funny, they’ve likely rotted. This usually happens due to overwatering or poor air circulation. Compost any affected cuttings and learn from the experience! Sometimes, propagation is a numbers game, and not every cutting will make it.
A Encouraging Closing
Propagating Trichostema dichotomum is a journey, and like any garden project, it requires a bit of patience. Don’t get discouraged if your first attempts aren’t perfect. Keep experimenting, observe your plants, and enjoy the process of bringing more of these delightful Blue Curls into your life. Happy propagating!
Resource:
https://identify.plantnet.org/k-world-flora/species/Trichostema%20dichotomum%20L./data