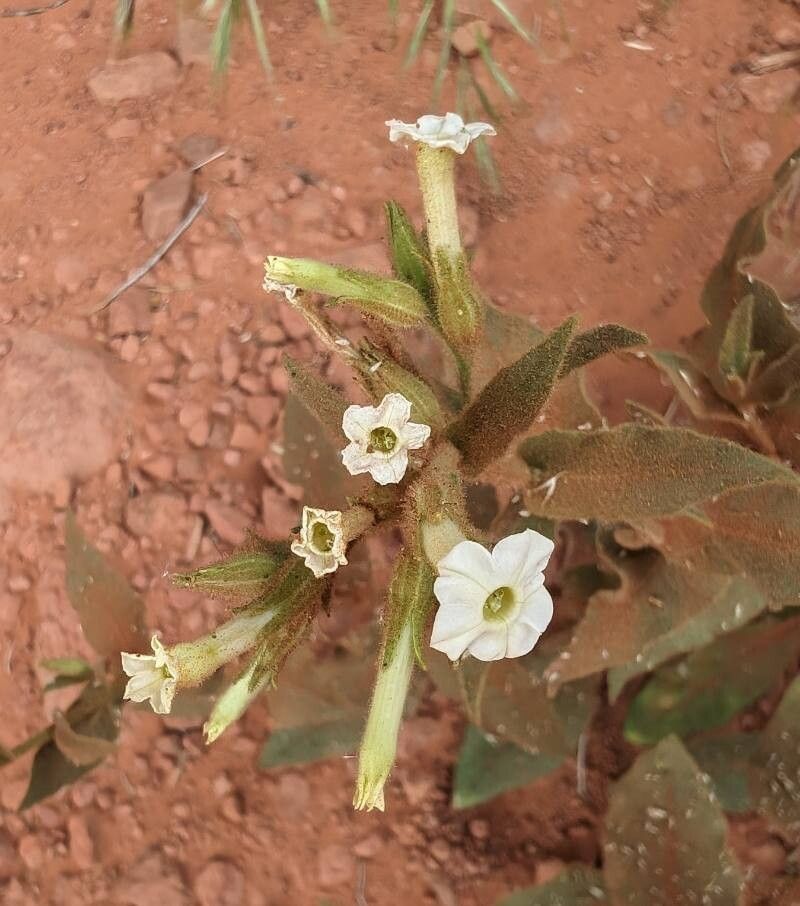
Hello fellow plant enthusiasts! Today, we’re diving into the delightful world of Nicotiana obtusifolia, also known as Desert Tobacco. This lovely plant is a real charmer in the garden, with its delicate, trumpet-shaped white flowers that release the most intoxicating, sweet fragrance, especially on warm evenings. It’s a fantastic way to add a touch of nighttime magic and a lovely aroma to your yard.
If you’re looking for a rewarding propagation project, Nicotiana obtusifolia is a wonderful choice. I’ve found it to be quite forgiving, making it a good option even for those of you just starting out on your propagation journey. There’s a special kind of joy in taking a piece of a plant you love and nurturing it into a whole new life.
The Best Time to Start
For the highest success rate with Nicotiana obtusifolia, late spring to early summer is your sweet spot. This is when the plant is actively growing and has plenty of energy to put into developing new roots. Starting around April, May, or June, after the last frost has passed and before the intense heat of mid-summer, will give your cuttings the best chance to establish themselves.
Supplies You’ll Need
Here’s what you’ll want to have on hand to make the process smooth sailing:
- Sharp, clean pruning shears or scissors: Sanitation is key to prevent disease.
- Rooting hormone (optional, but helpful): A powdered or gel formulation will encourage faster root development.
- Well-draining potting mix: I prefer a mix of perlite and peat moss or coco coir, about a 50/50 ratio. You can also use a good quality seed-starting mix.
- Small pots or trays with drainage holes: About 4-inch pots work well.
- Plastic bags or a small greenhouse/cloche: To maintain humidity around your cuttings.
- Watering can or spray bottle: For gentle watering.
Propagation Methods
Nicotiana obtusifolia is most easily propagated by stem cuttings. It’s straightforward and highly effective.
- Select Your Cuttings: Look for healthy, actively growing stems on your mature Nicotiana obtusifolia. Choose stems that are about 4-6 inches long and have several sets of leaves. Avoid flowering stems; we want the energy focused on root growth, not flower production.
- Make the Cut: Using your clean shears, make a clean cut just below a leaf node. A leaf node is where a leaf attaches to the stem. This is where the magic happens for root formation.
- Prepare the Cutting: Gently remove the lower leaves from the cutting, leaving just 2-3 sets of leaves at the top. If the top leaves are very large, you can even cut them in half horizontally to reduce water loss through transpiration.
- Apply Rooting Hormone (Optional): If you’re using rooting hormone, dip the cut end into the powder or gel, tapping off any excess.
- Plant Your Cuttings: Fill your small pots with your prepared potting mix and moisten it lightly. Make a hole in the center of the potting mix with your finger or a pencil. Insert the cut end of your Nicotiana cutting into the hole, ensuring the nodes where you removed leaves are buried in the soil. Gently firm the soil around the stem.
- Create a Humid Environment: Water the soil gently. Then, lightly mist the leaves of the cutting. Cover the pot with a plastic bag, creating a mini-greenhouse effect, or place it in a larger clear plastic bag. Make sure the bag doesn’t directly touch the leaves if possible. Alternatively, use a propagation dome or mini-greenhouse.
- Placement: Place your pots in a bright location, but out of direct sunlight. A sunny windowsill that gets indirect light is usually perfect.
The “Secret Sauce” (Pro Tips)
Here are a couple of little tricks I’ve learned over the years that really make a difference:
- Bottom Heat is Your Friend: While not strictly necessary for Nicotiana obtusifolia, providing gentle bottom heat can significantly speed up root development. A heated propagation mat placed under your trays or pots will encourage those roots to form much faster. You can find these at most garden centers.
- Don’t Let the Leaves Sweat: If you’re using a plastic bag, poke a few small holes in it after a day or two. This allows for a bit of air circulation and prevents excessive condensation buildup, which can lead to rot. You want humidity, not a swamp.
Aftercare & Troubleshooting
Once your cuttings have been planted, keep the soil consistently moist, but not waterlogged. Check the soil moisture every day or two, and mist the leaves occasionally if they look a bit dry.
You’ll know your cutting has rooted when you see new leaf growth, or if you gently tug on the stem and feel resistance. This usually takes 2-4 weeks, but can sometimes take longer depending on conditions.
Be on the lookout for signs of trouble. The most common issue is rot, which usually appears as a black, mushy stem at the soil line. This is often caused by overwatering or poor air circulation. If you see this, it’s best to discard the affected cutting and ensure your other cuttings have better airflow and aren’t sitting in soggy soil. Yellowing leaves can sometimes indicate it’s not getting enough light, or it might just be the natural shedding of lower leaves.
Once your Nicotiana obtusifolia has a good root system, you can gradually remove the plastic cover over a few days to acclimate it to normal humidity. Then, it’s ready to be transplanted into slightly larger pots or eventually into your garden.
Happy propagating! Remember, gardening is a journey, and each plant you nurture brings its own unique rewards. Be patient, observe your cuttings, and enjoy the process of bringing more of this fragrant beauty into your world!
Resource: