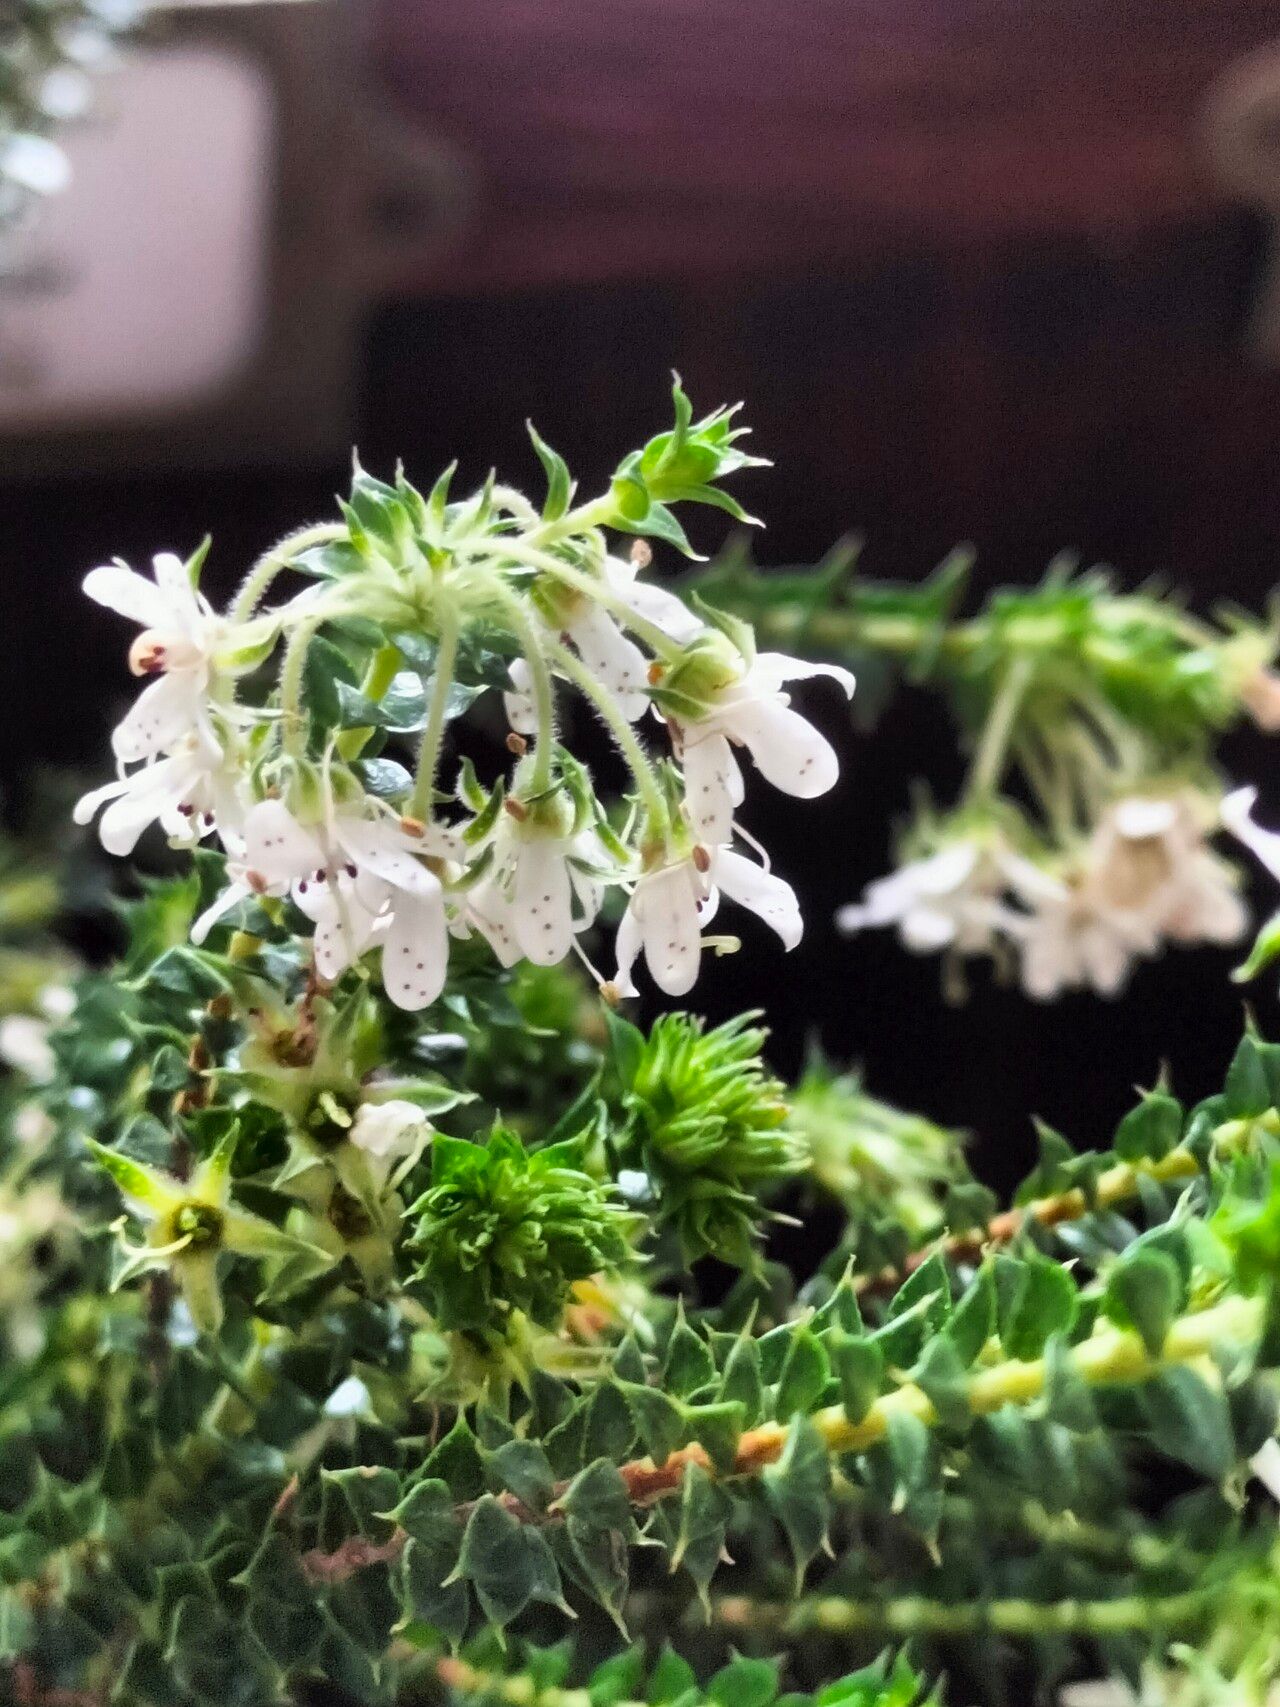
Friends, let’s talk about a little gem that often gets overlooked: Agathosma mucronulata. You might know it better by its common name, Buchu. I absolutely adore this plant for its delicate, fragrant foliage and its charming little blossoms. Bringing a sprig of Buchu indoors can perfume your whole home, and trust me, seeing your own little cuttings take root and grow into new plants is one of the most satisfying experiences a gardener can have. Now, is it a walk in the park for absolute beginners? Honestly, it can be a tad fussy, but with a little care and attention, anyone can give it a good go.
The Best Time to Start
For Agathosma, the sweet spot for propagation is definitely late spring or early summer. This is when the plant is actively growing, and you’ll find it has the most energy to put into developing new roots. Look for stems that are semi-hardened – not brand new, floppy growth, but not old, woody stems either. The ideal cutting will snap cleanly when bent gently, rather than just bending limply.
Supplies You’ll Need
Gathering your tools beforehand makes the whole process much smoother. Here’s what you’ll want:
- Sharp, clean pruning shears or a craft knife: A clean cut is crucial to prevent disease.
- Rooting hormone: This isn’t strictly mandatory, but it really does give your cuttings a boost. I prefer the powder form.
- Well-draining potting mix: A mix of peat moss and perlite (about 50/50) works beautifully. You can also find specific succulent or cactus mixes that will do the trick.
- Small pots or trays: Make sure they have drainage holes!
- A clear plastic bag or propagation dome: This will create a humid environment for your cuttings.
- Water: For misting and potentially for water propagation.
- Optional: A heat mat: This can significantly speed up root development.
Propagation Methods
I’ve found the most reliable way to propagate Agathosma mucronulata is through stem cuttings. Water propagation is possible, but honestly, I find I have better luck transitioning them to soil when I start them directly in it.
Stem Cuttings:
- Take Your Cuttings: Using your clean shears, select healthy stems and cut sections about 4-6 inches long. Try to get a few leaf nodes on each cutting, as this is where roots will form.
- Prepare the Cuttings: Gently remove the lower leaves from the bottom inch or so of each stem. This prevents them from rotting in the soil.
- Apply Rooting Hormone: Dip the cut end of each stem into your rooting hormone, tapping off any excess.
- Plant Your Cuttings: Fill your pots with your prepared, lightly moistened potting mix. Make a small hole in the center of each pot with your finger or a pencil, and insert the cut end of the stem. Gently firm the soil around the base of the cutting.
- Create Humidity: Water the soil gently after planting. Then, cover the pots with a clear plastic bag or propagation dome. This traps moisture and keeps the humidity levels high, which is exactly what your cuttings need. You can prop the bag up with a few skewers if it starts to droop onto the leaves.
The “Secret Sauce” (Pro Tips)
I’ve learned a few things over the years that really seem to help my Buchu cuttings thrive:
- Skip the Soggy Bottom: When you water your cuttings, ensure the soil is moist but not waterlogged. Overwatering can lead to frustrating rot, and nobody wants that! Aim for a consistency that feels like a wrung-out sponge.
- A Touch of Warmth Goes a Long Way: If you have a heat mat, place your pots on it. Agathosma roots respond wonderfully to gentle bottom heat, and it can dramatically speed up the rooting process. It’s not a deal-breaker if you don’t have one, but it’s a lovely little boost.
- Consider Air Circulation: While humidity is key, you don’t want stagnant, muggy air. Open the plastic bag or propagation dome for a few minutes every couple of days to allow for some air exchange. This helps prevent fungal issues.
Aftercare & Troubleshooting
Once your cuttings have been planted, keep them in a location with bright, indirect light, away from harsh midday sun. Be patient! It can take anywhere from 4 to 8 weeks for roots to develop. You’ll know they’re ready when you gently tug on a cutting and feel resistance, or when you see new growth appearing.
The most common sign of failure is rotting. If a cutting turns mushy and black at the base, it’s unfortunately not going to make it. This is usually a sign of too much moisture and not enough air circulation. If the leaves start wilting and drying out completely, it might mean it’s too dry, or the cutting wasn’t viable to begin with. Don’t be discouraged if some don’t make it; it’s all part of the learning process.
A Little Patience, A Lot of Reward
Propagating Agathosma mucronulata might take a little patience, and sometimes a cutting or two might decide not to cooperate. But when you see those tiny roots emerging and your new little plants start to unfurl their leaves, it’s such a rewarding feeling. So gather your supplies, find a sunny spot, and give it a go. Happy gardening, everyone!
Resource:
https://identify.plantnet.org/k-world-flora/species/Agathosma%20mucronulata%20Sond./data