Oh, hello there! Come on in, pull up a chair. I’ve got the kettle on, and I’d love to chat about one of my favorite little wonders: the Crocus hermoneus. These cheerful little blooms always feel like such a delightful surprise, peeking through the late winter or early spring soil with their vibrant colors. If you’ve ever loved seeing them pop up in your garden and wished you had more, well, you’re in luck! Propagating them is a thoroughly rewarding endeavor, and I’m happy to share how I get it done.
Introduction
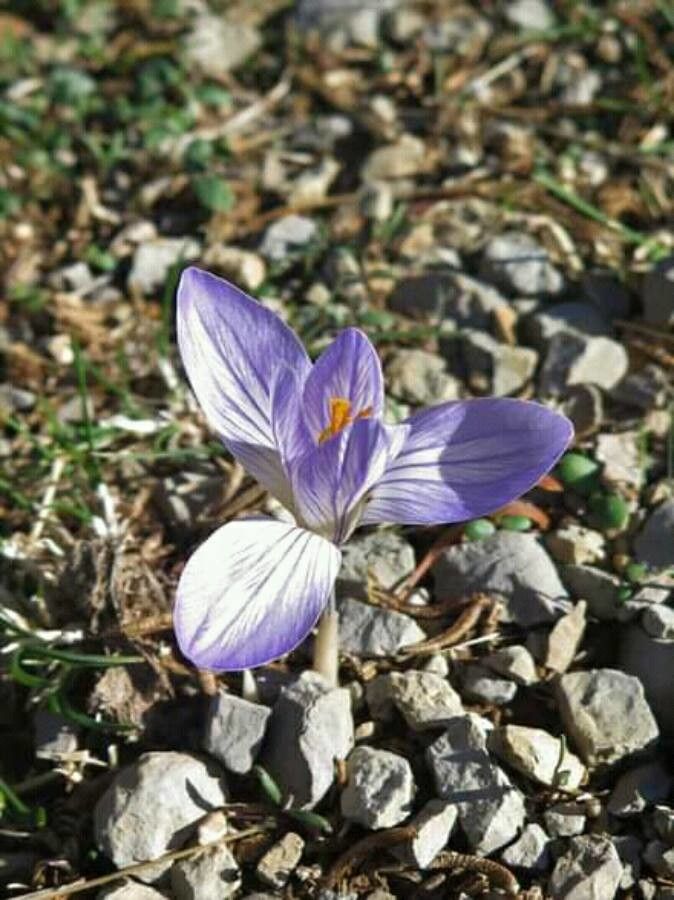
There’s something truly magical about the Crocus hermoneus. They arrive just when we’re all yearning for a bit of color after a long, gray spell. Their delicate petals, often in shades of purple, yellow, and white, are a promise of warmer days to come. And the joy of seeing those tiny corms plump up, ready to become new plants? Pure gardening satisfaction! Now, if you’re a beginner, I have to be honest with you – Crocus hermoneus can be a touch finicky. They have specific needs, but with a little patience and this guide, you’ll be well on your way to success. It’s not impossible at all; it just requires a bit of know-how.
The Best Time to Start
Timing is everything with these beauties. The absolute best time to propagate your Crocus hermoneus is after they have finished flowering and their foliage has begun to yellow and die back. This usually happens in late spring or early summer. They are storing energy for their next blooming season, and their energy reserves are at their peak. Trying to divide or transplant them while they are actively growing or still green can stress them unnecessarily.
Supplies You’ll Need
Gathering your supplies beforehand makes the whole process smoother. Here’s what I usually have on hand:
- A sharp, clean trowel or a small spade: For gently lifting the corms.
- A sturdy pot or seed tray: With drainage holes, of course!
- Well-draining potting mix: I like to use a mix of equal parts compost, sandy loam, and sharp grit. This ensures excellent drainage, which is crucial for corms.
- A watering can with a fine rose: For gentle watering.
- Garden gloves: To keep your hands clean.
- A small brush: An old paintbrush works wonderfully for gently cleaning soil off the corms.
- Optional: rooting hormone powder (though I find it’s often not strictly necessary for Crocus hermoneus when dividing in season).
Propagation Methods
For Crocus hermoneus, the most successful and straightforward method is division of the corms. They grow by producing offsets, which are essentially baby corms, around the main one.
- Wait for Dormancy: As I mentioned, the key is to wait until the foliage has completely died back. You’ll see the leaves turning yellow and drying out. This indicates the plant is entering its dormant period.
- Gently Unearth: Using your trowel or spade, carefully dig around the base of the plant. Work your way outwards to avoid damaging the corms. Gently lift the entire clump out of the soil.
- Clean the Corms: Once out of the ground, gently brush off as much of the soil as you can. You’ll see the main corm and attached to it, a number of smaller corms or bulblets.
- Separate the Offsets: This is the delicate part. Gently tease apart the smaller corms from the mother corm. They usually come away quite easily. If one is stubborn, use a clean knife or your fingers to carefully snap it away. Remove any dead or diseased-looking corms.
- Inspect and Pot: Look at your new corms. They should be firm and healthy-looking. You can plant them immediately or store them briefly (though immediate planting is best). Plant them about 3-4 inches deep, spaced a few inches apart, in your prepared pots or directly into a garden bed where you want them to grow. Make sure the pointed end (usually where the sprout emerges) is facing upwards.
- Water Lightly: Give them a gentle watering to settle the soil around them.
The “Secret Sauce” (Pro Tips)
Here are a couple of things I’ve learned over the years that seem to make a big difference for crocus:
- Don’t Be Afraid of the Dirt! When you’re cleaning the corms, don’t get too precious. A little bit of lingering soil on the corm isn’t going to hurt; in fact, it can sometimes help retain a bit of moisture. The main thing is to remove any signs of rot or pests.
- Labeling is Your Friend: If you’re propagating multiple varieties or even just to keep track of where you’ve planted them, tie a small label to the pot or marker stake. You’ll thank yourself come next spring when you might have forgotten which corner you planted that special yellow one in!
- Think About Drainage, Drainage, Drainage: I cannot stress this enough. If your pot or garden bed holds water, your crocus corms will rot. If you’re planting in the ground, amend the soil liberally with grit or sand. If you’re potting, a good, chunky potting mix is essential.
Aftercare & Troubleshooting
Once your new corms are in their pots or garden beds, they need a little care to get established.
- Watering: Keep the soil lightly moist but not waterlogged during their active growth period (which will be in the fall for them to sprout, and then in spring). Once they go dormant in summer, you can significantly reduce watering, allowing the soil to dry out a bit between waterings.
- Patience: This is perhaps the most important aspect of aftercare. It can take a full season, and sometimes even a bit longer, for a newly divided corm to reach blooming size. Don’t despair if you don’t see blooms the very next spring!
- Troubleshooting:
- Rotting Corms: This is the most common issue. Signs include a mushy texture, foul smell, or a black, slimy surface. This is almost always due to overwatering or poor drainage. Ensure your soil is very free-draining and avoid soggy conditions.
- No Growth: If your corms aren’t sprouting in the fall or spring, they might be too young, too small, or perhaps they’ve succumbed to rot. If you’re concerned, you can gently dig one up to check its condition. If it’s firm and healthy, it might just need more time.
A Encouraging Closing
So there you have it! Propagating Crocus hermoneus is a gentle art, a way of multiplying the joy these little flowers bring. Don’t be discouraged if your first attempt isn’t perfect; every gardener has had their share of learning experiences. Enjoy the process, the quiet satisfaction of nurturing something new, and most importantly, look forward to the delightful surprise of more crocus blooms appearing in your garden. Happy propagating!
Resource:
https://identify.plantnet.org/k-world-flora/species/Crocus%20hermoneus%20Kotschy%20ex%20Maw/data