Oh, hello there, fellow plant enthusiast! Pull up a chair and let’s chat about a truly special plant: Stangeria eriopus. If you’ve ever seen one of these beauties, you know they possess a prehistoric charm, with their fern-like fronds unfurling from a substantial caudex. They’re like living fossils, and there’s something incredibly satisfying about coaxing new life from them.
Propagating Stangeria eriopus isn’t exactly a walk in the park for absolute beginners, but with a bit of attention and care, it’s absolutely achievable. The reward of seeing a tiny new plant emerge is well worth the effort. Let’s get our hands dirty!
The Best Time to Start
For Stangeria eriopus, the absolute best time to think about propagation is during its active growing season. This typically falls in the late spring and summer months. You’ll want to work with a healthy, mature plant that’s showing signs of vigorous new growth. Trying to propagate when the plant is dormant is like trying to teach a sleeping cat to juggle – it’s just not going to happen!
Supplies You’ll Need
Before we dive in, let’s gather our tools. Having everything ready makes the process so much smoother.
- Sharp, sterilized pruning shears or a clean knife: Essential for making clean cuts. I always keep a small bottle of rubbing alcohol handy to sterilize between cuts, preventing any disease spread.
- Well-draining potting mix: A cactus or succulent mix works wonderfully, or you can create your own by combining equal parts potting soil, perlite, and coarse sand.
- Small pots or seed trays: Choose pots with drainage holes, of course.
- Rooting hormone (optional but recommended): This can give your cuttings a helpful boost. Look for one containing IBA.
- Perlite or vermiculite: Great for improving drainage and aeration in your potting mix.
- Mister bottle: For gentle watering.
- Clear plastic bag or dome: To create a humid environment for cuttings.
- Labels: So you don’t forget what you’ve planted where!
- Warm spot: A place that stays consistently warm, like a greenhouse bench or on top of a refrigerator (if it doesn’t get too hot).
Propagation Methods
Stangeria eriopus can be propagated through a couple of primary methods.
Division (My Preferred Method!)
This is often the most successful way to get new plants, as you’re working with a more established piece of the original plant.
- Gently remove the parent plant from its pot. Be careful not to disturb the roots too much.
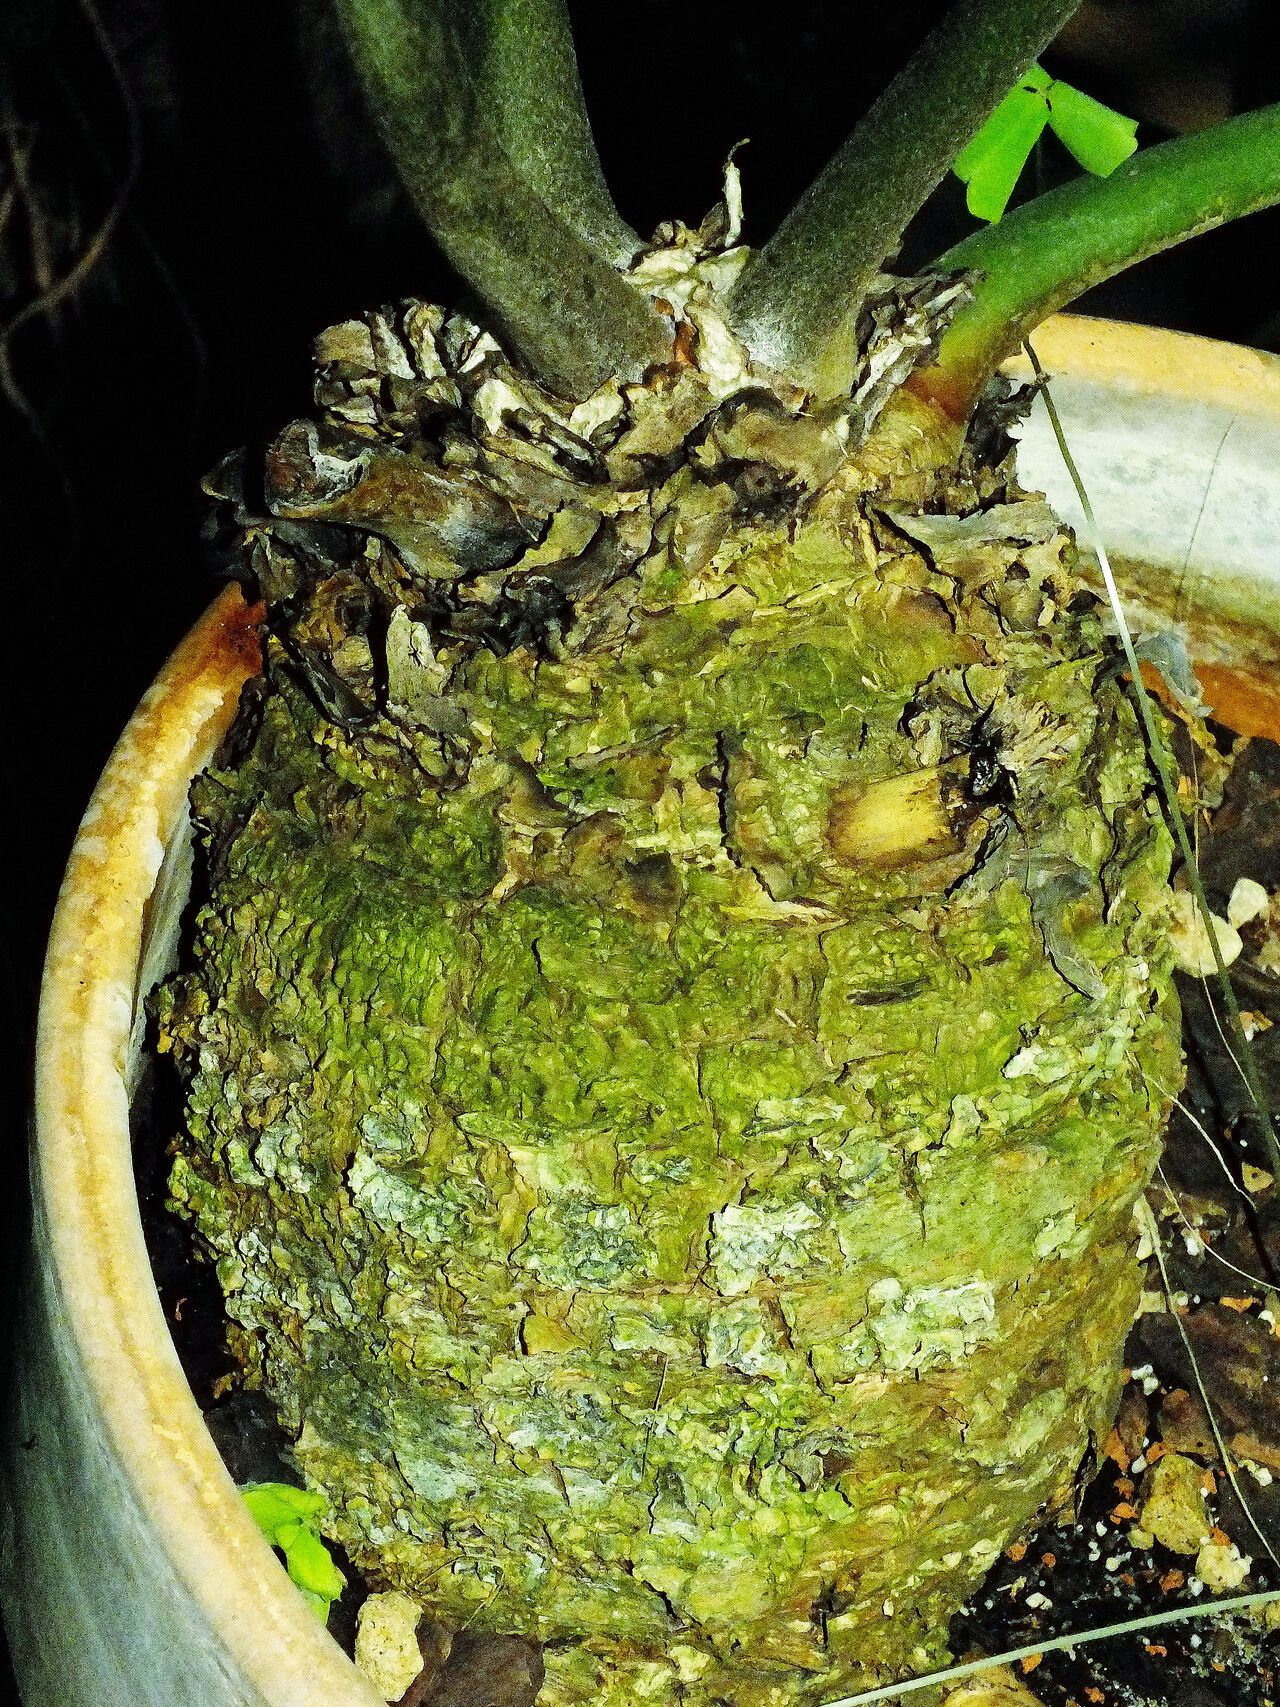
- Examine the caudex (the swollen stem base). Look for natural divisions or offsets that are already forming their own root systems.
- Using your sharp, sterilized tool, carefully separate a division. You want to ensure each division has at least one healthy root attached. If a division is too tightly connected, it’s sometimes best to leave it.
- Allow the cut surface to callous over. This is crucial! Place the division in a dry, airy spot for a few days to a week until the cut end is dry and hardened. This prevents rot.
- Plant the calloused division in your well-draining potting mix. Make sure the caudex is mostly exposed, just like on the parent plant. Don’t bury it deep.
- Water lightly and place in a warm, bright spot with indirect light. Avoid direct sun initially.
Seed Propagation (A True Labor of Love)
If you’re feeling adventurous and happen to have access to fresh seeds (which can be tricky to come by!), this is another path.
- Sow seeds in a very well-draining seed-starting mix. As soon as you get them, plant them!
- Keep the soil consistently moist, but not waterlogged.
- Provide warmth and good light. Germination can be slow and unpredictable, sometimes taking months. Patience is key here.
The “Secret Sauce” (Pro Tips)
Now for a little insider knowledge to give you an edge.
- Don’t rush the callousing: I’ve seen many gardeners impatient with this step, leading to rot. Trust the process! A dry, healed cut is your best defense against fungal issues.
- Bottom heat is your friend: For divisions, placing the pot on a seedling heat mat can significantly speed up root development. The warmth encourages the roots to wake up and grow.
- Observe, observe, observe: Get to know your plant and its environment. If cuttings look a bit stressed, they might need more humidity. If a division looks like it’s shriveling, it might need a tiny bit more water, but be very cautious.
Aftercare & Troubleshooting
Once you see signs of new growth – that’s your cue! This usually means roots have formed and the plant is starting to establish itself.
- Gradually introduce more light. As your new Stangeria grows, you can slowly move it to a brighter location, eventually acclimating it to the same conditions as your mature plant.
- Water sparingly. Stangeria are drought-tolerant by nature. Water thoroughly only when the potting mix is completely dry, and then let it dry out again.
- Watch out for rot. This is the most common problem. Signs include a mushy or darkening caudex or wilting leaves that feel soft and limp. If you spot this, you may need to unpot the plant, remove the rotted parts with a sterilized knife, let it callous again, and repot in fresh, dry mix. Prevention is always better than cure, so good drainage and careful watering are vital.
A Little Encouraging Word
Propagating Stangeria eriopus is a journey, not a race. There will be moments of doubt, but that’s perfectly normal. Celebrate every little sign of progress. Be patient, enjoy the process of learning about your plant, and know that that little bit of green you coaxed into existence is a testament to your growing green thumb. Happy gardening!
Resource:
https://identify.plantnet.org/k-world-flora/species/Stangeria%20eriopus%20(Kunze)%20Baill./data