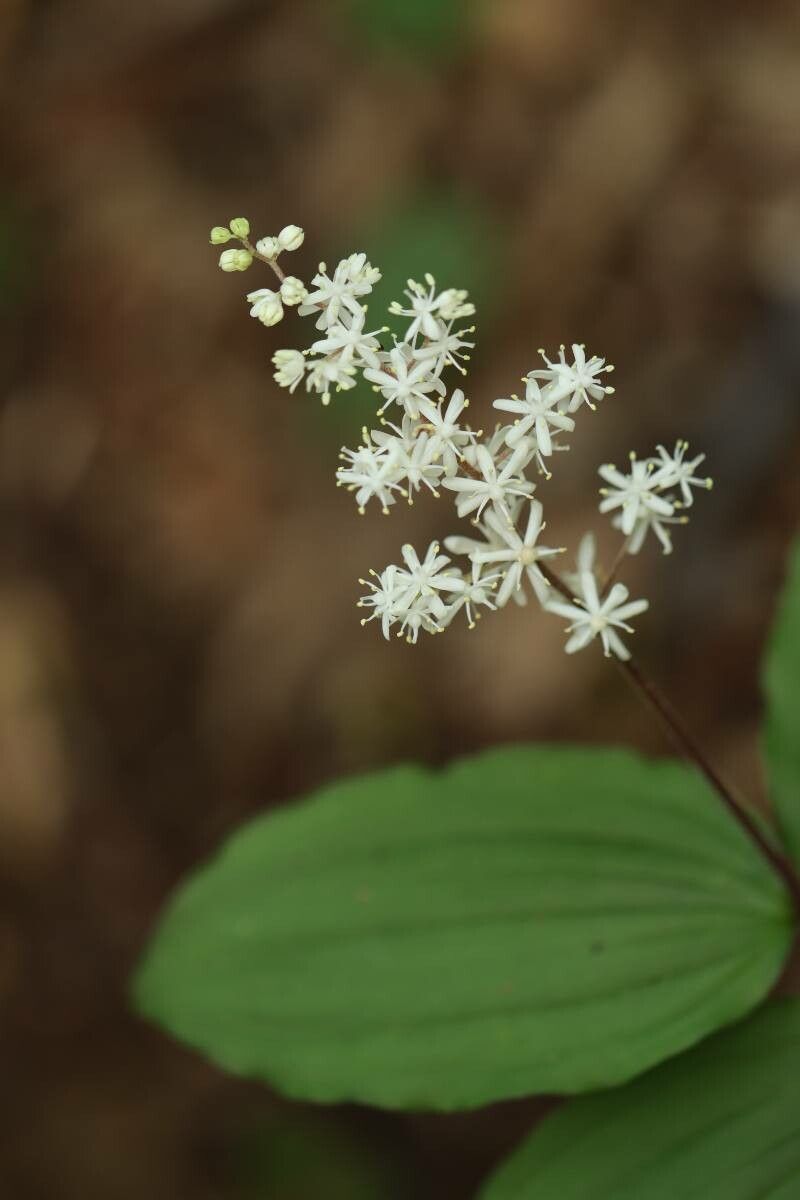
Oh, hello there! Come on in, grab a mug of your favorite brew. Today, we’re going to talk about a little woodland charmer that I just adore: Maianthemum japonicum, or as some of us lovingly call it, “May Lily” or “False Lily of the Valley.” Don’t let that common name fool you though; this plant has its own beautiful elegance. Its delicate, arching stems adorned with clusters of fragrant, white, bell-shaped flowers in spring, followed by charming red berries (if you have more than one plant!), make it a truly special addition to any shady corner of your garden.
Now, if you’re new to the wonderful world of plant propagation, you might be wondering if this is a good one to start with. I’d say that Maianthemum japonicum falls into the moderately easy category. It’s not quite as straightforward as a spider plant pup, but with a little care and patience, you’ll definitely be rewarded with success. And oh, the satisfaction you’ll feel when you see those tiny new plants stretching towards the light! It’s like magic, really.
The Best Time to Start
For the highest success rate with Maianthemum japonicum, I find that early spring is your golden ticket. This is when the plant is shaking off its winter slumber and is bursting with new growth. Alternatively, you can also have good luck with late summer or early fall, just as the plant begins to slow down its vigorous growth before winter. The key is to propagate when the plant has energy to spare.
Supplies You’ll Need
Here’s a little rundown of what you’ll want to have on hand before you begin:
- Sharp Pruning Shears or a Clean Knife: For making clean cuts.
- Small Pots or Seed Starting Trays: Clean ones, of course!
- Well-Draining Potting Mix: I like to use a mix that’s roughly 50% peat moss or coco coir and 50% perlite or coarse sand. This ensures good aeration.
- Rooting Hormone (Optional but Recommended): A powder or gel helps encourage root development.
- Watering Can with a Fine Rose: For gentle watering.
- Plastic Bags or a Clear Plastic Dome: To create a humid environment.
- Gloves: If you have sensitive skin.
Propagation Methods
Maianthemum japonicum is most easily propagated through division. This is where we’ll focus our efforts.
Division: The Tried and True Method
This is essentially splitting up a mature plant into smaller sections, each with its own roots and shoots.
- Dig Up the Mother Plant: In early spring or late fall, gently dig up your Maianthemum japonicum plant. Try to get as much of the root ball as possible without causing too much disturbance.
- Clean the Roots: Gently wash away some of the excess soil so you can clearly see the rhizomes and roots.
- Locate Natural Divisions: Look for where the rhizomes naturally branch. You should be able to see where new shoots are emerging from older sections.
- Separate Gently: Using your hands or a clean, sharp knife, carefully separate the rhizomes. You want each division to have at least one good shoot (or eye) and a decent amount of healthy root. Don’t be afraid to be firm but gentle here. If a piece doesn’t want to separate easily, it might be too small or not ready.
- Pot Up Your New Plants: Fill your clean pots with your well-draining potting mix. Make a small hole in the center and place your new division in it, ensuring the top of the rhizome is just at or slightly below the soil surface. The new shoots should be pointing upwards.
- Water Gently: Give your newly potted divisions a good, gentle watering. You want the soil to be moist but not waterlogged.
- Provide Humidity: Cover each pot loosely with a clear plastic bag or place them under a clear plastic dome. This will help maintain humidity, which is crucial for these divisions while they establish. Place them in a bright spot, but out of direct sunlight.
The “Secret Sauce” (Pro Tips)
Here are a few little secrets I’ve learned over the years that can make a big difference:
- Don’t Overcrowd Your Divisions: When you’re dividing, resist the urge to make the pieces too small. Larger divisions with more robust root systems generally have a higher success rate. It’s better to have a few strong new plants than many weak ones.
- Let Them Callus Slightly: After you’ve made your cuts, if you notice any really moist or sappy areas, you can let those sections air dry for an hour or two before potting. This helps prevent rot, especially if the conditions are humid.
- Think “Woodland Floor”: Maianthemum japonicum loves dappled light and consistent moisture, much like its natural habitat. Replicate those conditions as much as you can in its early stages.
Aftercare & Troubleshooting
Once your new divisions are potted, keep that soil consistently moist but never soggy. You can gently lift the plastic bag daily to allow for some air circulation and check the moisture level. Once you see new growth emerging – which can take anywhere from a few weeks to a couple of months – you’ve got a good sign things are going well!
The biggest pitfall with Maianthemum japonicum propagation is rot. If your division starts to look mushy, turns black, or develops a foul smell, it’s likely succumbing to rot. This usually happens if the soil is too wet and the air circulation is poor. If you catch it early, you might be able to salvage a piece by cutting away the rotted parts with a clean knife and repotting in fresh, slightly drier soil, but often it’s a sign the division wasn’t viable.
A Little Encouragement to Keep Growing
So there you have it! Propagating Maianthemum japonicum is a wonderfully rewarding endeavor. Don’t get discouraged if your first attempt isn’t perfect. Gardening is all about learning and observing. Be patient with your new plants, give them the care they crave, and soon you’ll be enjoying your own beautiful May Lilies spreading throughout your garden. Happy propagating!
Resource: