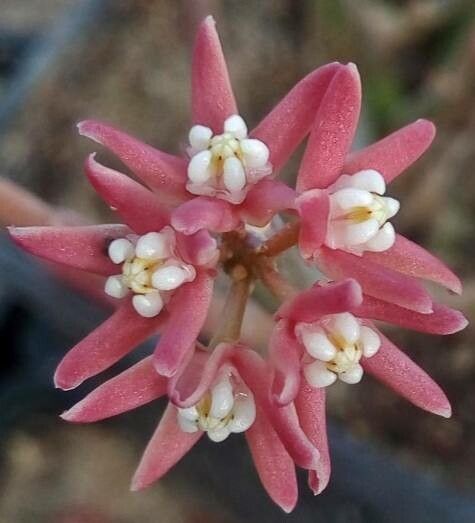
Hello, fellow plant lovers! Today, we’re diving into the wonderful world of Cynanchum vanlessenii. This plant, with its delicate, star-shaped blooms and intoxicating fragrance, is a real showstopper. Its vanilla-like scent, especially in the evening, is simply divine and makes any garden corner feel a little more magical. Propagating it is a fantastic way to share this beauty with friends or simply expand your own collection. Now, I’ll be honest, Cynanchum vanlessenii can be a tiny bit fussy, so it might not be the absolute easiest plant for a brand new propagator, but with a little care and these steps, you can absolutely succeed.
The Best Time to Start
For Cynanchum vanlessenii, spring is your golden ticket. Think of it as the plant waking up from its winter nap, full of vigor and ready to grow. Starting in late spring or early summer, when the plant is actively producing new growth, gives your cuttings the best chance to establish themselves before the cooler months arrive. Aim for healthy, new shoots that are slightly firm but not woody.
Supplies You’ll Need
Gathering your tools beforehand makes the whole process smoother. Here’s what I always have on hand:
- Sharp Pruning Shears or a Clean Knife: For making nice, clean cuts.
- Rooting Hormone: A good quality powder or gel really helps encourage root development.
- Potting Mix: A well-draining blend is crucial. I like using a seed-starting mix combined with perlite or sharp horticultural sand – about a 50/50 ratio. This prevents waterlogging.
- Small Pots or Seed Trays: Clean pots are a must!
- Plastic Bag or Cling Film: To create a mini-greenhouse effect.
- Watering Can with a Fine Rose: For gentle watering.
- Optional: Heat Mat: Bottom heat can significantly speed up rooting.
Propagation Methods
We’ll focus on the most reliable method for Cynanchum vanlessenii: stem cuttings.
- Take Your Cuttings: On a bright morning, when the plant is well-hydrated, select a healthy stem. Using your clean shears, take cuttings that are about 4-6 inches long. Make your cut just below a leaf node (where a leaf joins the stem). This is where the magic of root production often begins.
- Prepare the Cuttings: Gently remove the lower leaves, leaving just a couple of leaves at the top. This reduces water loss and prevents leaves from rotting in the soil.
- Apply Rooting Hormone: Dip the cut end of the stem into your rooting hormone, tapping off any excess. You want a nice, even coating.
- Plant Your Cuttings: Fill your clean pots with your prepared potting mix. I like to make a small pilot hole with my finger or a pencil. Then, insert the cutting into the hole, ensuring the leaf nodes that were below the soil line are covered. Gently firm the soil around the stem.
- Water and Cover: Water the pot gently until the soil is evenly moist but not soggy. Then, cover the pot with a clear plastic bag or cling film. You can use stakes to keep the plastic from touching the leaves. This creates a humid environment, which is vital for cuttings to root.
- Placement: Place the pot in a bright location, but keep it out of direct, hot sunlight. A north-facing windowsill is often perfect. If you’re using a heat mat, place the pot on it now.
The “Secret Sauce” (Pro Tips)
Now, for a couple of things I’ve learned over the years that can really improve your success rate:
- The “Scratch Test”: After a few weeks, you can gently scratch a tiny bit of the outer bark on the stem where it’s buried. If you see green underneath, it’s still alive! This is a good indicator that things are progressing, even if you don’t see roots yet.
- Don’t Rush the Transplant: Be patient! Resist the urge to tug on your cuttings to see if they have roots. The best way to tell is by looking for new leaf growth from the top. Another good sign is when the cutting starts to feel like it’s anchored in the soil. This can take anywhere from 4-8 weeks, sometimes longer.
Aftercare & Troubleshooting
Once you see signs of new growth, your cuttings are likely rooting!
- Gradually Acclimate: Once roots have formed, begin to gradually introduce your new plant to less humid conditions. Open the plastic bag for a few hours each day, extending the time over a week or two.
- Potting Up: Once your plant is strong and well-established, you can transplant it into its own slightly larger pot with a good quality potting mix.
- Watch for Rot: The most common problem is root rot, which happens when the soil stays too wet. If your cutting turns mushy or black, it’s likely rotten. This is why a well-draining mix and careful watering are so important. If you see wilting before your cutting has rooted, it might be losing too much moisture – ensure your cover is creating enough humidity.
A Little Patience Goes a Long Way
Propagating Cynanchum vanlessenii is a journey, not a race. There will be times when not every cutting makes it, and that’s perfectly natural. Learn from each attempt, adjust your approach, and most importantly, enjoy the process of nurturing these little wonders. Soon, you’ll be surrounded by that gorgeous, vanilla-scented magic! Happy propagating!
Resource: