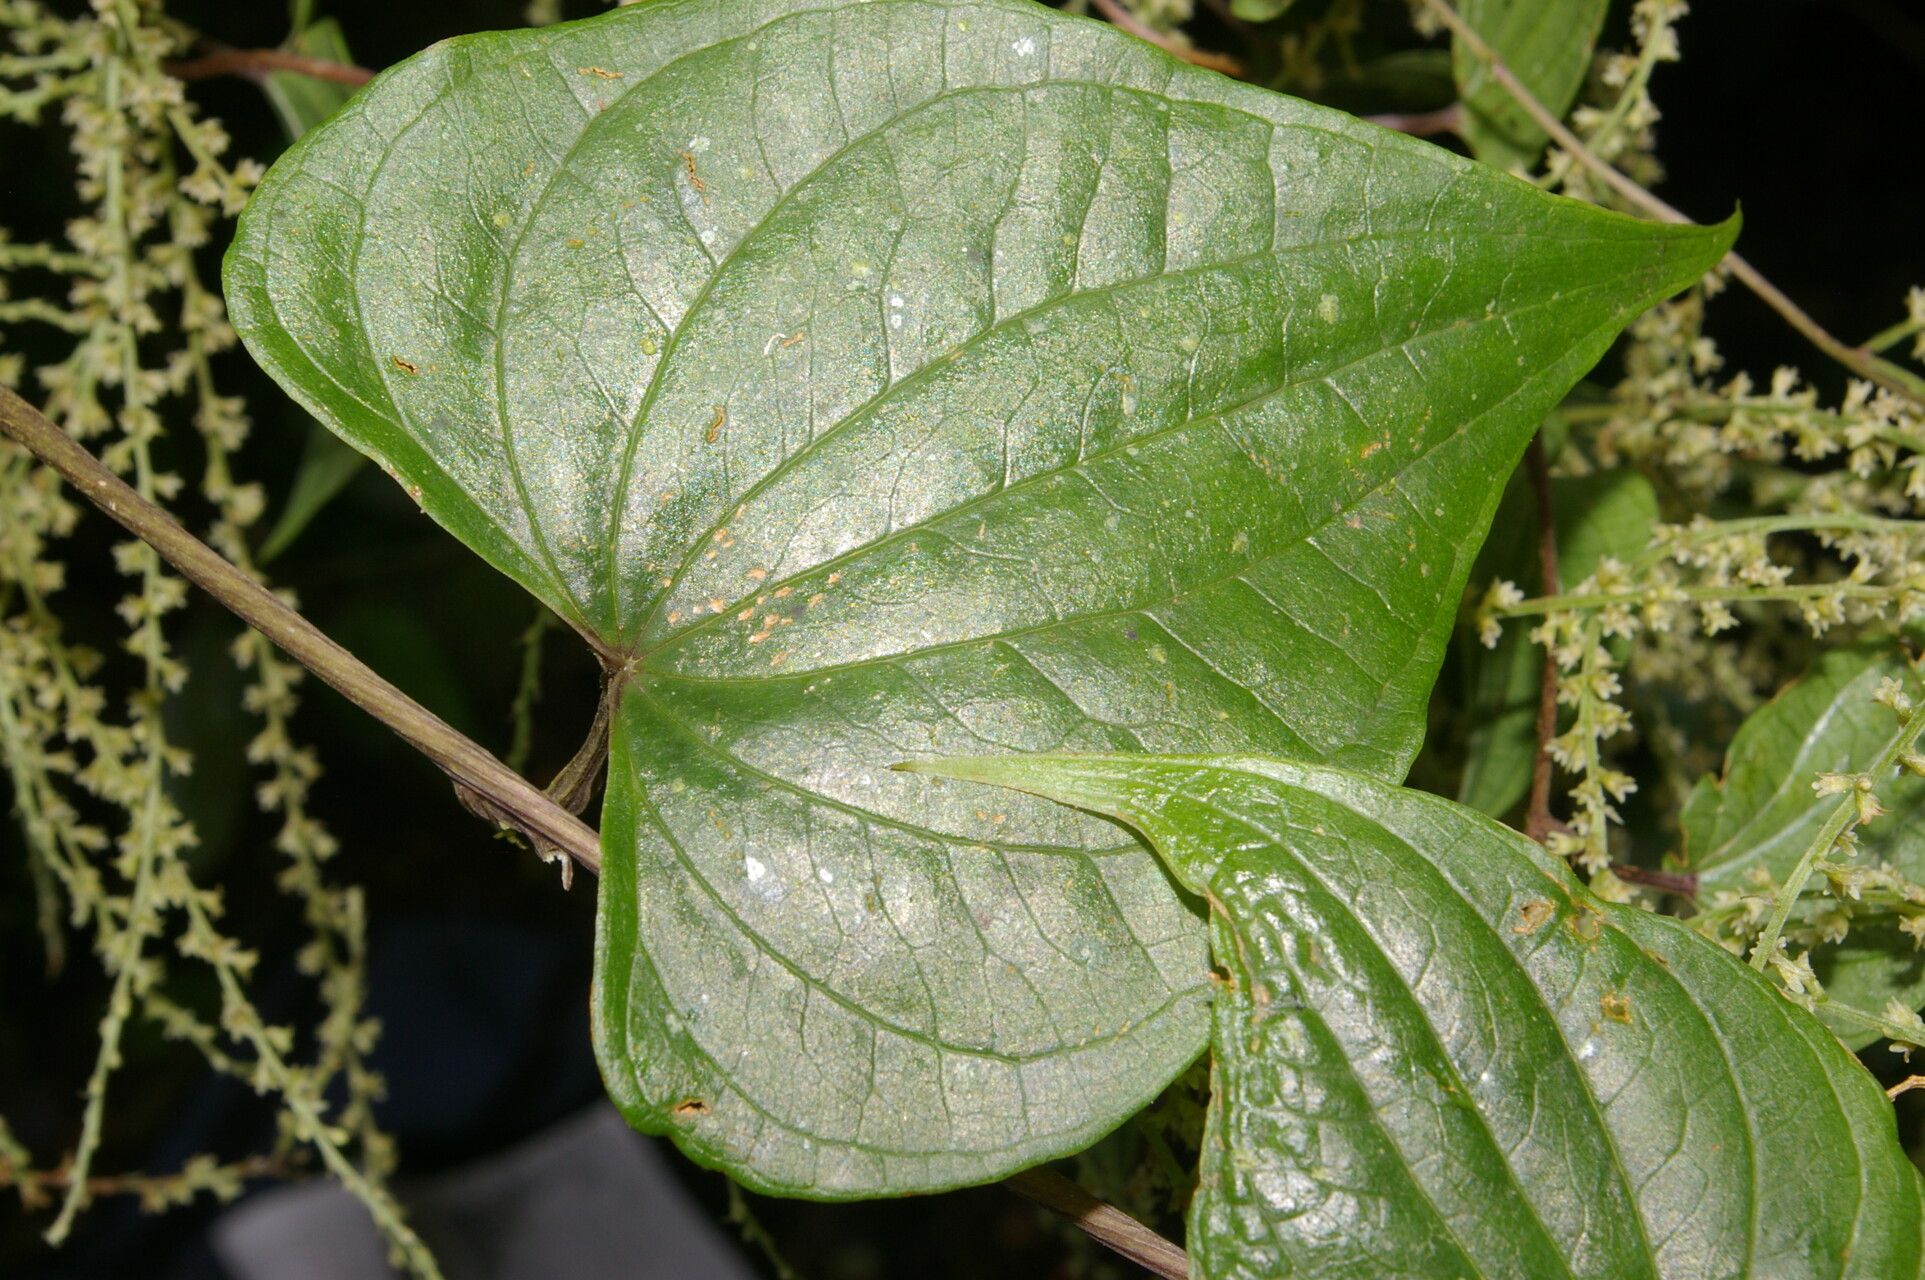
Oh, my friends, let’s talk about a truly special plant: Dioscorea matagalpensis, also known as the Matagalpa yam. If you’re looking for a vine that brings a touch of the exotic to your home, with its gorgeous, heart-shaped leaves and vining habit, this is it! Watching one of these beauties unfurl its foliage is pure joy. And the best part? You can easily multiply your own collection to share with fellow plant lovers or just fill every sunny corner you have. Now, don’t let the fancy name scare you. While it’s not quite as forgiving as a pothos for absolute beginners, with a little guidance, propagating Dioscorea matagalpensis is very doable and incredibly rewarding.
The Best Time to Start
When it comes to getting these vines to root, active growth is your best friend. So, lean into the spring and summer months. This is when the plant is naturally pushing out new shoots and has the energy reserves to dedicate to forming roots. Trying to propagate from dormant stems in winter is just setting yourself up for a bit of disappointment, so let’s wait for that vibrant energy to kick in!
Supplies You’ll Need
Gathering your supplies beforehand makes the whole process a breeze. Here’s what I always have on hand:
- Sharp Pruning Shears or a Clean Knife: For making clean cuts.
- Well-Draining Potting Mix: I like a blend of coco coir, perlite, and a little bit of compost. You can also find specific succulent or cactus mixes that work well.
- Small Pots or Seed Starting Trays: Clean ones, of course!
- Rooting Hormone (Optional but Recommended): This gives your cuttings a nice boost. Look for one with IBA.
- Clear Plastic Bags or a Propagator Lid: To create a humid environment.
- Spray Bottle: For misting.
- Labels: Trust me, you’ll thank yourself later!
Propagation Methods
Let’s get our hands dirty! The most reliable way I’ve found to multiply Dioscorea matagalpensis is through stem cuttings.
Stem Cuttings:
- Find a Healthy Stem: Look for a mature, but not woody, stem on your parent plant. It should have several sets of leaves.
- Make the Cut: Using your clean shears, cut a piece of stem about 4-6 inches long. Make your cut just below a leaf node (where a leaf attaches to the stem). This is where the magic happens, where roots are most likely to form.
- Prepare the Cutting: Gently remove the lower leaves, leaving just one or two at the very top. This prevents them from rotting in the soil. You can even cut larger leaves in half if it helps reduce transpiration.
- Apply Rooting Hormone: Dip the cut end of the stem into your rooting hormone, tapping off any excess.
- Plant the Cutting: Fill your small pot with your well-draining potting mix. Make a hole with your finger or a pencil, and gently insert the cutting, ensuring the nodes where you removed the leaves are below the soil surface.
- Water Gently: Water the soil lightly, just enough to moisten it.
- Create Humidity: Cover the pot with a clear plastic bag or place it in a propagator. Make sure the leaves don’t touch the plastic if possible.
- Place in Bright, Indirect Light: Find a warm spot that receives plenty of bright, filtered light, but no direct sun.
The “Secret Sauce” (Pro Tips)
Here are a couple of little tricks I’ve picked up along the way that can really make a difference:
- Bottom Heat is Your Friend: While not strictly necessary, placing your pots on a seedling heat mat can significantly speed up root formation. The warmth encourages those roots to get going!
- Don’t Drown Your Cuttings: Once you’ve planted your cuttings, the most common mistake is overwatering. The soil should be consistently moist, not soggy. Stick your finger in an inch or so; if it feels dry, give it a light mist or a small watering. Too much moisture invites rot.
- Whispers of Airflow: While humidity is crucial, stagnant air can also be problematic. Every couple of days, lift the plastic bag or open the propagator for a few minutes to allow for some air circulation. This helps prevent fungal issues.
Aftercare & Troubleshooting
Once your cuttings have developed a healthy root system (you can gently tug on them after a few weeks, or peek into a drainage hole if the pot is translucent), it’s time for a little extra care.
- Acclimate Slowly: Gradually introduce your new plant to less humid conditions. Remove the plastic bag for longer periods each day before removing it entirely.
- Watering: Continue to water when the top inch of soil feels dry. Your new Dioscorea matagalpensis will appreciate consistent moisture but not waterlogged roots.
- Light: Keep it in bright, indirect light. Once it’s established, you can slowly introduce it to more light if desired, but direct sun can scorch its leaves.
Now, what if things go wrong? The most common culprit is rot. If your cutting turns mushy, black, or smells foul, it’s a sign of too much moisture and not enough airflow. Unfortunately, rotted cuttings are usually a loss. The best course of action is to remove the offending cutting and examine your watering and ventilation habits for the remaining ones. Sometimes, a cutting might just fail to root; don’t get discouraged! It happens to all of us. Just try again with fresh material.
Happy Growing!
There you have it! Propagating Dioscorea matagalpensis is a wonderful way to expand your plant family. Be patient with your new little propagations – they take their time, and that’s perfectly okay. Enjoy the process, celebrate every tiny root you see, and soon you’ll have a cascade of these glorious vines to admire. Happy gardening, everyone!
Resource:
https://identify.plantnet.org/k-world-flora/species/Dioscorea%20matagalpensis%20Uline/data