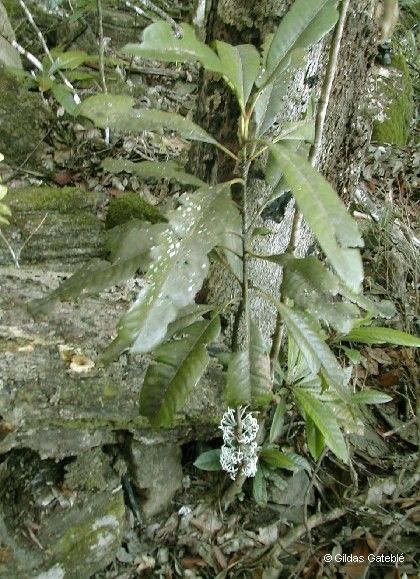
Hello, fellow plant enthusiasts! If you’ve ever been captivated by the vibrant, fire-red blooms of Ixora kuakuensis, you’re not alone. This tropical beauty brings such a burst of color and life to any garden or sunroom. And trust me, there’s a special kind of joy in watching a tiny cutting transform into a thriving plant you nurtured yourself. It’s really quite rewarding!
Now, if you’re new to the plant propagation game, I’ll be honest, Ixora can be a little bit of a gentle challenge. It’s not the most forgiving plant out there, but with a bit of patience and careful attention, you absolutely can succeed. Think of it as a rewarding puzzle to solve!
The Best Time to Start
For the highest success rate, I find that late spring or early summer is your absolute sweet spot. The plant is in its active growing phase, meaning it has plenty of energy to put into producing new roots. You want to take cuttings from healthy, new growth that’s just starting to firm up – not the soft, floppy new shoots, but not the woody old stems either. Look for those semi-hardwood stems.
Supplies You’ll Need
Getting your workspace ready makes everything so much smoother. Here’s what I always have on hand:
- Sharp Pruning Shears or a Clean Knife: For making clean cuts. A dull tool will crush the stem, making it harder to root.
- Rooting Hormone: This isn’t strictly required for Ixora, but it does give your cuttings a significant boost and can dramatically increase success rates. I prefer the powder form.
- Well-Draining Potting Mix: A good mix is crucial. I usually use a blend of equal parts peat moss (or coco coir), perlite, and coarse sand. This ensures good aeration and prevents waterlogging.
- Small Pots or Seedling Trays: Clean pots are a must to avoid introducing diseases. Small ones are perfect for cuttings.
- Plastic Bags or a Propagator: To create a humid microclimate around your cuttings.
- Water: For a quick dip in the rooting hormone or for misting.
Propagation Methods: Stem Cuttings
This is hands-down the most reliable method for Ixora kuakuensis.
- Select Your Cuttings: As I mentioned, look for those semi-hardwood stems. You want pieces that are about 4-6 inches long and have at least two sets of leaves.
- Make the Cut: Using your sharp shears, make a clean cut just below a leaf node (where a leaf attaches to the stem). This is where the rooting hormones are most readily available.
- Prepare the Cutting: Gently remove the lower leaves from the stem, leaving just the top two or three leaves. If the remaining leaves are very large, you can cut them in half to reduce water loss through transpiration.
- Apply Rooting Hormone: Dip the cut end of the stem into your rooting hormone, tapping off any excess.
- Plant Your Cuttings: Fill your clean pots with your well-draining mix. Make a small hole in the center with your finger or a pencil. Insert the cutting into the hole, ensuring the leaf nodes are buried in the soil. Gently firm the soil around the stem.
- Water Gently: Water the soil thoroughly but gently. You don’t want to dislodge the cutting.
- Create Humidity: Cover the pot with a clear plastic bag (a zip-top bag works great) or place it in a small propagator. Make sure the leaves do not touch the plastic. You can use stakes to hold the bag up if needed.
The “Secret Sauce” (Pro Tips)
Here are a few things I’ve learned over the years that can really make a difference:
- Bottom Heat is Your Friend: Especially if your house is on the cooler side, placing your pots on a seedling heat mat can significantly speed up root development. The warmth encourages the plant to send out those precious roots.
- Location, Location, Location: After planting, find a spot that gets bright, indirect light. Direct sun will scorch your cuttings and dry them out too quickly. A shelf near a bright window or under grow lights is perfect.
- Don’t Overwater (Even in Humidity): While humidity is key, soggy soil is the enemy. Check the soil moisture regularly. It should feel damp, not waterlogged. If you see condensation on the inside of the plastic bag, that’s a good sign of adequate humidity.
Aftercare & Troubleshooting
Once your cuttings have developed a good root system – you’ll know because you might see new growth on top, or when you gently tug on the cutting, there’s resistance – it’s time for a bit of a transition.
Start by gradually acclimatizing them to lower humidity. Remove the plastic bag for a few hours each day, then longer, until they’re comfortable without it. Continue to keep them in bright, indirect light and water when the top inch of soil feels dry. Soon, you can transplant them into slightly larger pots.
The most common problem you’ll encounter is rot. This usually happens due to overwatering and a lack of drainage. If a cutting turns black and mushy, it’s probably a goner. Don’t be discouraged! It happens to the best of us. Simply discard the rotted cutting and try again, making sure your soil is well-draining and you’re not overwatering. You might also see cuttings that just… don’t do anything. This is usually due to an unhealthy cutting or a lack of warmth and humidity.
Happy Rooting!
Propagating Ixora kuakuensis is a journey, and like any gardening endeavor, it’s full of learning and experimentation. Be patient with yourself and your cuttings. The satisfaction of seeing those first tiny roots emerge and then watching your new plant flourish is truly a wonderful feeling. So gather your supplies, find the right spot, and enjoy the process of bringing more of these beautiful blooms into your life. Happy gardening!
Resource:
https://identify.plantnet.org/k-world-flora/species/Ixora%20kuakuensis%20S.Moore/data