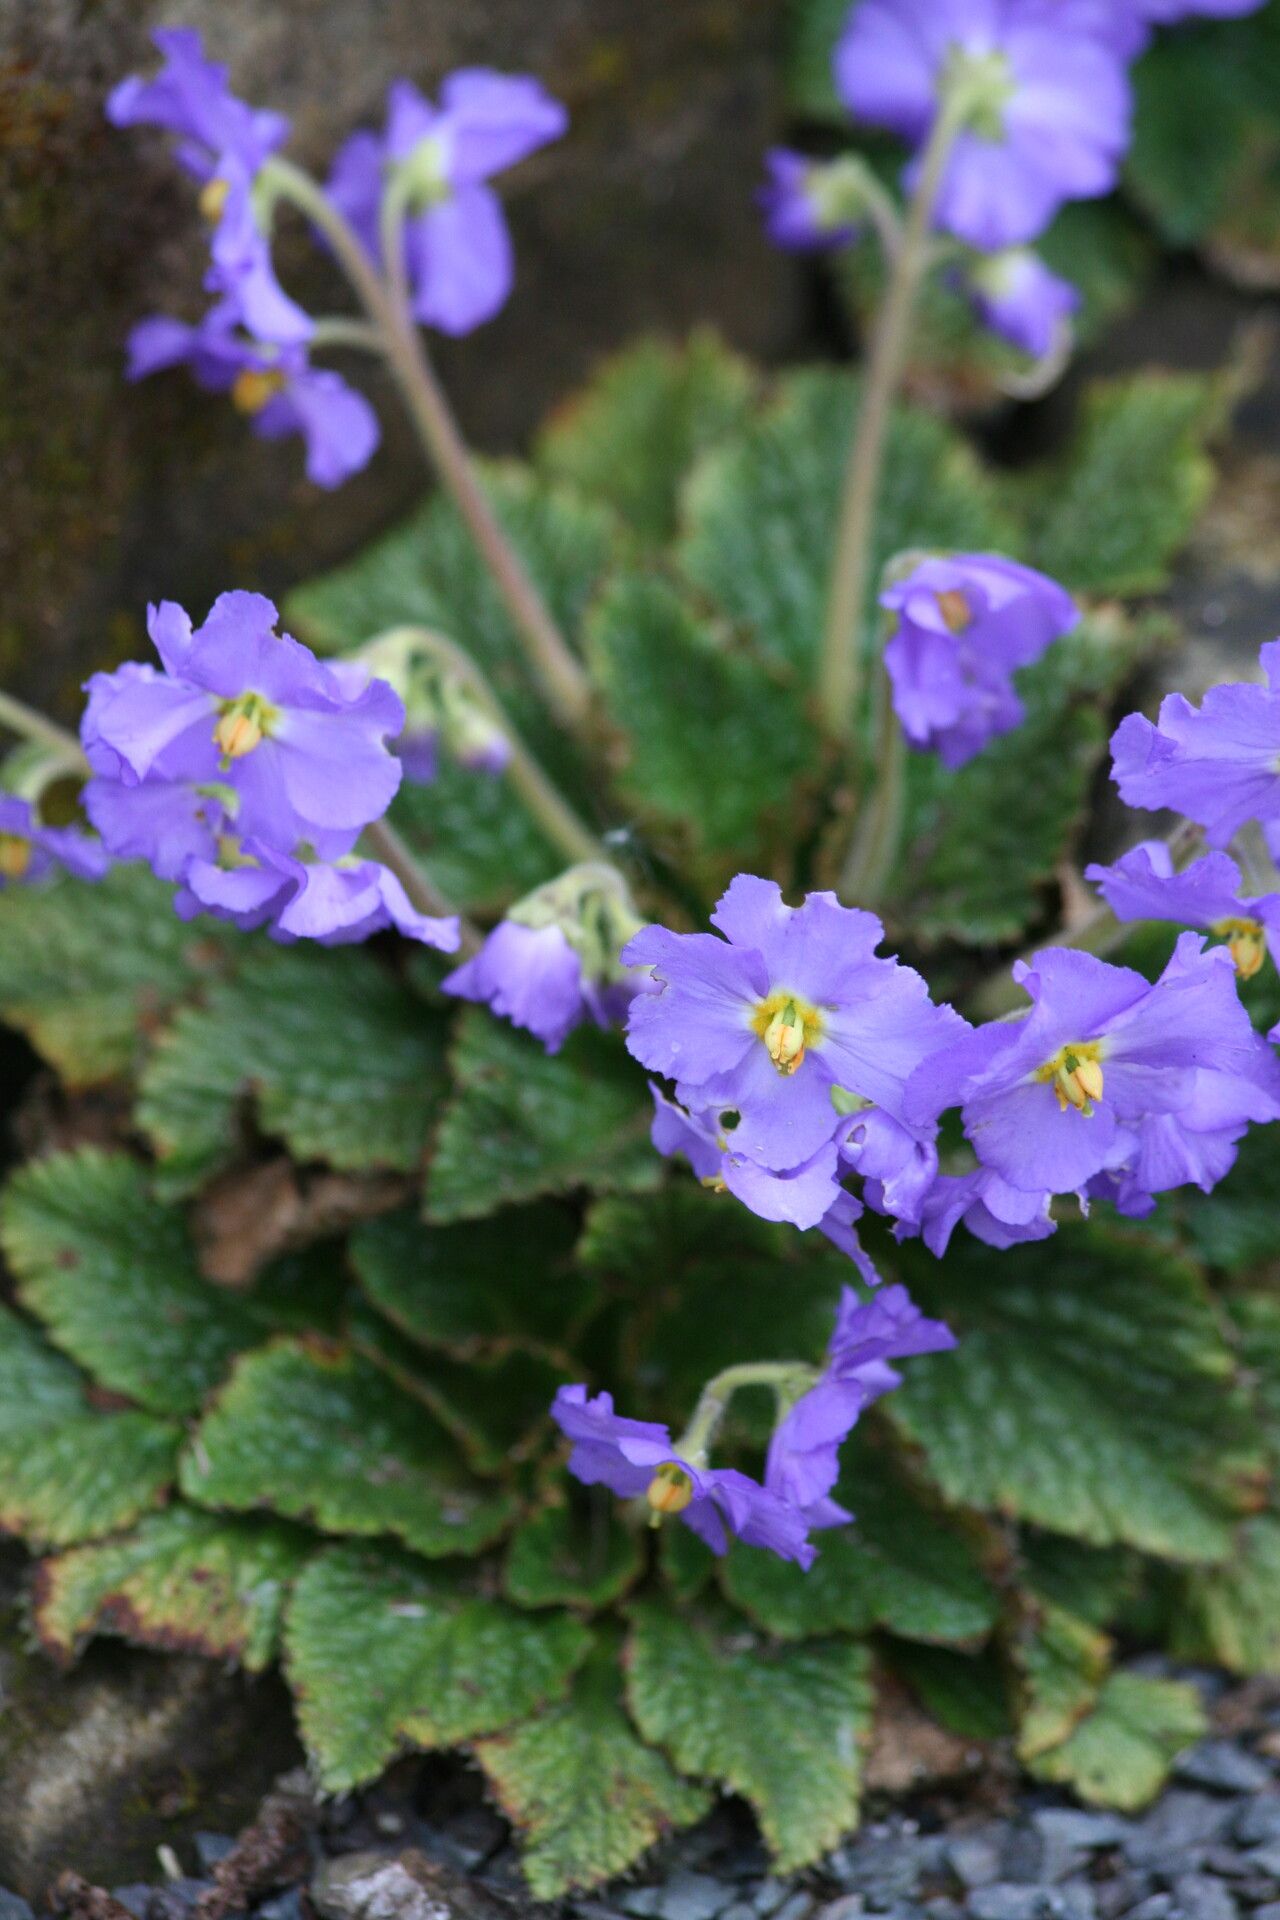
Oh, hello there! Come on in, grab a mug. Let’s chat about Ramonda nathaliae. If you’re anything like me, you’ve probably been captivated by this little gem. Those beautiful, rosetted leaves, often with a velvety texture, and those delightful purple-blue flowers that seem to glow even in the shadiest corners. It’s a plant that truly earns its place in a gardener’s heart.
Now, you might be wondering if bringing more of these beauties into your world is a daunting task. Truthfully, Ramonda nathaliae can be a bit of a diva sometimes, but with a little know-how, propagating it is absolutely achievable and incredibly rewarding. It’s a journey that connects you even more deeply with these fascinating plants.
The Best Time to Start
When it comes to coaxing new life from your Ramonda, timing is key. I find the late spring or early summer, right after the plant has finished its main blooming flush, is the sweet spot. This is when the plant has plenty of energy stored up and is actively producing new growth that’s ready to take root. Avoid propagation during its dormant period or during extreme heat; it just stresses the plant unnecessarily.
Supplies You’ll Need
Gathering your tools beforehand makes the whole process so much smoother. Here’s what I always have on hand:
- Sharp, clean pruning shears or a razor blade. Sterilize them with rubbing alcohol to prevent disease.
- A well-draining potting mix. I often use a blend of perlite, coarse sand, and a good quality peat-based potting soil. Think gritty; Ramondas hate soggy feet.
- Small pots or shallow trays. Enough to give your new cuttings some space.
- A rooting hormone powder or gel (optional). This can give your cuttings a helpful boost, though Ramondas can often root without it.
- A spray bottle. For gentle misting.
- A clear plastic bag or dome. To create a humid environment.
- Gravel or small stones. For drainage in the pots.
Propagation Methods
Ramonda nathaliae is most successfully propagated through division and leaf cuttings. Let’s walk through them.
Division: The Direct Approach
This is my preferred method, especially for mature plants. It’s like giving your established Ramonda a little haircut and getting baby plants in return!
- Gently unpot your Ramonda. You might need to carefully loosen the soil around the edges.
- Inspect the root ball. Look for natural breaks where you can separate sections of the plant. You’ll often see new growth points emerging from the base of older stems.
- Using your clean shears or a sharp knife, carefully divide the plant. Try to ensure each division has some roots attached. Don’t be afraid of it; a clean cut is better than a messy tear.
- Pot up each division into its own small pot filled with your well-draining mix. Make sure the base of the Ramonda is just at soil level. You can add a bit of gravel on top for aesthetics and to help prevent the crown from staying too wet.
- Water them in gently, just enough to settle the soil.
Leaf Cuttings: Patience is a Virtue
This method requires a bit more patience, but it can be incredibly satisfying to watch a whole new plant emerge from just a single leaf.
- Select a healthy, mature leaf. Choose one that’s firm and free from any blemishes.
- Carefully remove the leaf from the parent plant. If it has a bit of stem attached, that’s even better.
- If your leaf doesn’t have a stem, you can make a tiny cut at the base where it attaches to the crown.
- (Optional) Dip the cut end into rooting hormone.
- Plant the leaf cutting. In your gritty potting mix, create a small hole. Insert the cut end of the leaf (or the stem) into the hole and gently firm the soil around it. The base of the leaf should be just touching or slightly buried.
- Mist the soil lightly with your spray bottle.
The “Secret Sauce” (Pro Tips)
Here are a few little tricks I’ve learned over the years that often make a big difference:
- Humidity is king, but air circulation is queen. For those leaf cuttings, I pop them into a pot and cover it with a clear plastic bag or a propagation dome. This creates that lovely humid microclimate. However, and this is crucial, open the bag or dome for a few minutes every day to let in fresh air and prevent fungal issues. Stagnant, humid air is a recipe for rot.
- Don’t drown their roots (or the leaf base!). When watering new cuttings or divisions, err on the side of caution. It’s far better to have them slightly too dry than too wet. Soil should be consistently moist, not soggy. I often use the “bottom watering” method for divisions: place the pot in a tray of water and let it soak up what it needs from the bottom.
- Gentle warmth helps. If you’re propagating in a cooler room, consider a gentle bottom heat. A propagation mat set to a low temperature can encourage root development without overheating the foliage. Just a little warmth from below can really get things moving.
Aftercare & Troubleshooting
Once you see those first tiny roots appearing (you might need to gently tug on a leaf cutting, or see new growth emerge from a division), you’re on your way!
- Gradually acclimate your new plants. If they’ve been under a dome, start by taking it off for longer periods.
- Continue to keep the soil consistently moist but not waterlogged.
- Avoid direct sunlight, especially for young plants. They prefer bright, indirect light.
- The biggest enemy is rot. If you see leaves turning mushy, yellowing, or falling off without any signs of new growth, it’s likely due to overwatering or poor drainage. Don’t be discouraged if you lose a cutting – it happens to the best of us! Just pull it out, examine the soil, and adjust your watering.
A Little Encouragement
Propagating Ramonda nathaliae is a journey, not a race. There will be moments of nail-biting anticipation, and yes, sometimes a cutting might not make it. But when you see that first tiny root, or witness a whole new rosette unfurling from a single leaf, the satisfaction is immense. Be patient with yourself and with your plants. Enjoy the process of learning and nurturing. Happy gardening!
Resource:
https://identify.plantnet.org/k-world-flora/species/Ramonda%20nathaliae%20Pančić%20&%20Petrovič/data