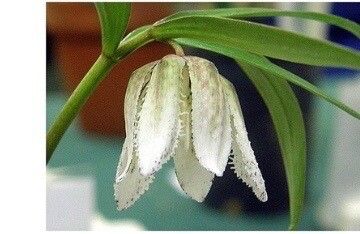
Oh, Fritillaria koidzumiana! If you’re captivated by those nodding, bell-shaped blooms in gorgeous hues of purple and green, you’re not alone. I remember the first time I saw this beauty in a friend’s garden. It felt like stumbling upon a hidden woodland treasure. Propagating these gems is a truly rewarding journey, and while it might seem a little… intricate at first glance, with a bit of know-how, you can absolutely succeed. Think of it as unlocking a beautiful secret.
The Best Time to Start
For Fritillaria koidzumiana, the sweet spot for propagation is right after flowering, usually in late spring or early summer. This is when the plant has stored up its energy and is ready to put it into creating new growth. You’ll want to catch it before it heads into its dormancy period.
Supplies You’ll Need
Here’s what you’ll want to have on hand:
- A sharp, sterile knife or pruning shears: For clean cuts. I always keep a small bottle of rubbing alcohol nearby to sterilize my tools between cuts.
- A well-draining potting mix: A good blend for bulbs or succulents works wonders. I often mix in perlite or sharp sand for extra aeration.
- Small pots or trays: terracotta pots are lovely for bulbs, but plastic works fine too.
- Rooting hormone (optional but recommended): This can give your cuttings a helpful boost.
- Watering can with a fine rose: Gentle watering is key.
- Labeling stakes: Don’t forget what you’ve planted and when!
Propagation Methods
Fritillaria koidzumiana is primarily propagated through division of its bulbs. While stem cuttings are less common and can be trickier with this species, I’ll focus on the most successful method for home gardeners.
Bulb Division
This is where you’ll have the most luck.
- Wait for dormancy: As I mentioned, the ideal time is after flowering and when the foliage has yellowed and died back completely. This tells you the bulb is resting and ready to be disturbed.
- Gently unearth the clump: Carefully dig around the mother bulb. You want to loosen the soil and lift the entire cluster. Be patient and try not to damage the bulbs.
- Identify the offsets: You’ll see smaller bulbs, called offsets or bulbils, attached to the main bulb. These are your new Fritillarias!
- Separate the offsets: Using your sterile knife or fingers, gently twist or cut the offsets away from the mother bulb. Make sure each offset has a bit of its own basal plate (where roots will grow).
- Let them callous (important!): Place the separated offsets on a dry surface, like a paper towel, in a well-ventilated area for a day or two. This allows any cut surfaces to dry and form a protective callus, which helps prevent rot.
- Plant your new bulbs: Fill your pots with your well-draining potting mix. Plant the offsets about 2-3 inches deep, pointing the root end down if you can tell.
- Water sparingly: Give them a light watering, just enough to moisten the soil. Don’t drench them.
The “Secret Sauce” (Pro Tips)
Here are a couple of things I’ve learned over the years that make a difference:
- Think like a bulb! Fritillarias don’t like to sit in soggy soil. Ever. If your potting mix isn’t draining like a sieve, add more perlite. I learned this the hard way with a precious specimen.
- Give them a cool start: Once planted, I prefer to keep my newly divided Fritillaria bulbs in a cooler spot, perhaps a shaded part of the garden or a cool greenhouse. They appreciate a bit of chill for root development.
Aftercare & Troubleshooting
Once your Fritillaria divisions are planted, keep the soil lightly moist but never wet. Indoors, a bright location is good, but avoid direct, scorching sun. Outdoors, provide dappled shade.
The most common woe you’ll encounter is rot. If you see any mushy, discolored bulbs, unfortunately, they’re likely past saving. This almost always comes down to overwatering or a potting mix that doesn’t drain. If you’re unsure, it’s better to underwater than to overwater. Be patient; new growth might not appear for weeks or even months, especially if you’ve planted them closer to summer dormancy.
A Encouraging Closing
Watching a new Fritillaria koidzumiana emerge from the soil is pure gardening magic. Don’t get discouraged if your first attempt isn’t perfect. Every gardener experiences setbacks. The joy is in the process, in learning to understand these beautiful plants, and in the anticipation of those delightful blooms. Happy propagating, and enjoy your blooming success!
Resource:
https://identify.plantnet.org/k-world-flora/species/Fritillaria%20koidzumiana%20Ohwi/data