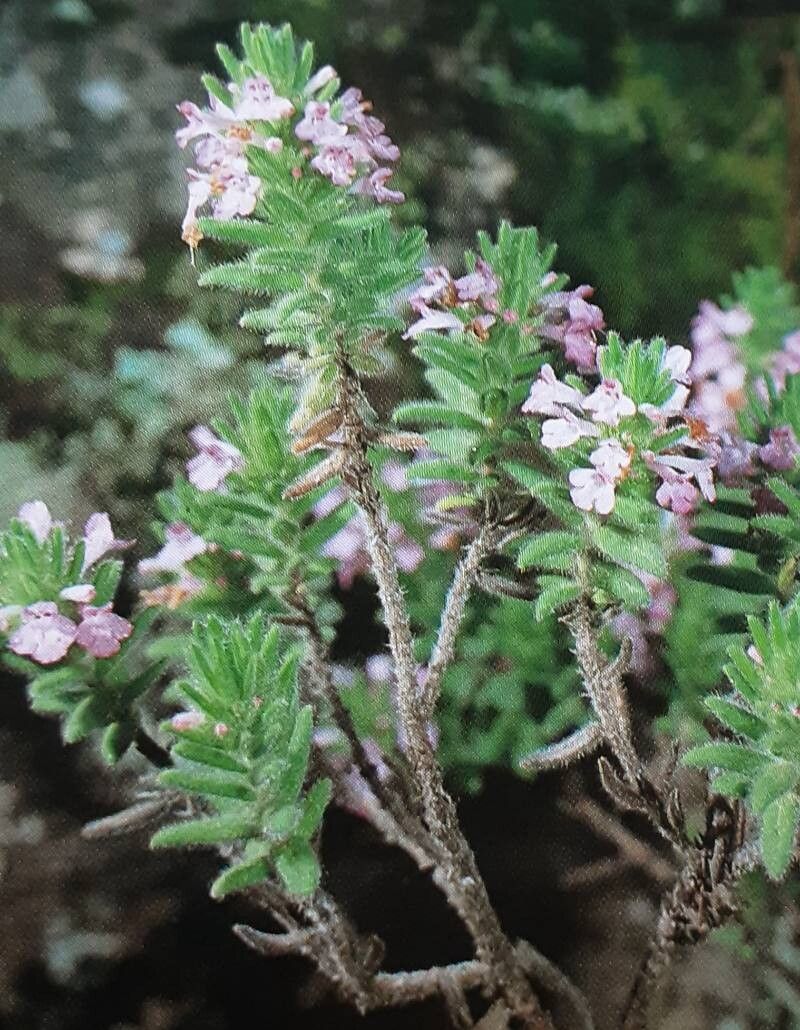
Oh, hello there, fellow plant enthusiast! Grab your mug, let’s chat about a little gem I’ve come to adore in my garden: Micromeria pineolens. If you’re anything like me, you appreciate plants that bring a burst of fragrance and a touch of the Mediterranean right into your space. Micromeria pineolens, often called the “Thyme Pine” or simply “Corsican Mint” (though it’s not true mint!), boasts tiny, aromatic leaves that release a delightful piney, minty scent when brushed. It forms lovely, low-growing mats, perfect for spilling over pot edges or tucking into rock gardens.
As for propagating it, I’m happy to report that Micromeria pineolens is generally quite forgiving. Even if you’re just starting your plant-parenting journey, you should find this a rewarding and successful endeavor. Think of it as cloning your favorite scent!
The Best Time to Start
For the highest success rate, I always aim to propagate my Micromeria pineolens in late spring to early summer. This is when the plant is actively growing, and those young, tender stems have plenty of energy to put into developing roots. You can also have success with cuttings taken in early autumn if you have a protected spot or are propagating indoors with supplemental light. The key is to work with healthy, vigorous growth.
Supplies You’ll Need
You don’t need fancy equipment for this. Here’s what I usually have on hand:
- Sharp, clean pruning shears or a sharp knife: Essential for making clean cuts.
- Small pots or seedling trays: Anything that can hold your cuttings and some soil.
- A well-draining potting mix: I often use a 50/50 mix of perlite and peat moss or coco coir. You can also find specific “seed starting” or “cuttings” mixes.
- Rooting hormone (optional but recommended): A powder or gel that encourages root development. I find it speeds things up considerably.
- Small labels: To remember what you planted and when!
- A clear plastic bag or cloche: To create a humid environment for your cuttings.
Propagation Methods
Micromeria pineolens is wonderfully amenable to propagation by stem cuttings, which is my go-to method. It’s straightforward and yields great results.
- Gather Your Cuttings: In your chosen growing season, look for healthy, non-flowering stems on your mature plant. You want stems that are firm but still a bit flexible, not woody or brittle.
- Make the Cut: Using your sharp shears or knife, take cuttings that are about 3-4 inches long. Try to make the cut just below a leaf node (where a leaf joins the stem). This is where roots are most likely to form.
- Prepare the Cuttings: Gently remove the lower leaves from the bottom inch or so of each cutting. This bit will be going into the soil, and we don’t want leaves rotting.
- Apply Rooting Hormone (If Using): Dip the cut end of each stem into your rooting hormone, tapping off any excess.
- Planting Time: Moisten your potting mix. Make a small hole in your pot or tray with a pencil or your finger. Insert the cut end of the stem into the hole, making sure the lowest leaves are above the soil line. Gently firm the soil around the stem to ensure good contact.
- Create a Humid Environment: Water the soil lightly. Then, cover the pot with a clear plastic bag or place it under a clear cloche. This traps moisture and creates the humid environment cuttings crave. Make sure the leaves don’t touch the plastic if possible – it can encourage rot.
The “Secret Sauce” (Pro Tips)
- Don’t Overcrowd: I learned this one the hard way! Give your cuttings some space. If they’re too close together, they’re more prone to fungal issues and compete for light. I usually aim for at least an inch or two between each stem.
- Bottom Heat is Your Friend: If you have a heat mat designed for seedlings, popping your tray on top of it can significantly speed up root formation. Don’t go too hot, though; just a gentle warmth encourages those roots to sprout.
- Use Mature, Healthy Parent Plants: It sounds obvious, but using cuttings from a stressed or unhealthy plant is a recipe for disappointment. Make sure your “mother plant” is thriving before you start snipping!
Aftercare & Troubleshooting
Once you’ve got your cuttings potted up, place them in a location that receives bright, indirect light. Avoid direct afternoon sun, which can scorch those delicate newcomers. Keep the soil consistently moist but not waterlogged. You can check this by gently pressing the soil; it should feel slightly damp to the touch.
After a few weeks, you should start to see signs of new growth. The best indicator of roots forming is when you gently tug on a cutting, and it offers a little resistance. You’ll also see new leaves emerging. At this point, you can gradually acclimate your new plants to normal humidity by opening the plastic bag a little more each day before removing it completely.
The most common issue you might encounter is rot, which usually happens if the soil stays too wet or the air circulation is poor. If you see a cutting turning black or mushy at the base, sadly, it’s likely a goner. Don’t get discouraged; just discard it and try again!
A Little Patience Goes a Long Way
Propagating plants is such a wonderful way to connect with nature and multiply the beauty in your garden. Micromeria pineolens is a joy to work with, and seeing those tiny roots emerge and new plants unfurl is truly magical. Be patient with the process, enjoy the journey, and soon you’ll have a whole collection of fragrant little wonders to share – or keep all to yourself, I won’t tell! Happy propagating!
Resource:
https://identify.plantnet.org/k-world-flora/species/Micromeria%20pineolens%20Svent./data