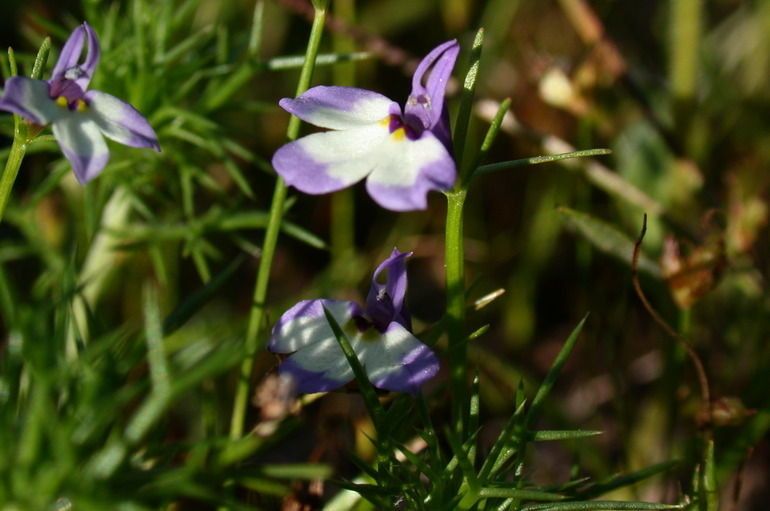
Well hello there, fellow garden enthusiasts! It’s me, your friendly neighborhood plant whisperer, ready to chat about one of my absolute favorite finds: Downingia bella. If you haven’t met this little gem yet, imagine a patch of pure, unadulterated joy bursting with delicate, bell-shaped blossoms. They create a carpet of vibrant color that’s simply irresistible. And guess what? Multiplying these beauties is incredibly rewarding, a true testament to the magic of nurturing new life. Now, for the good news: while it has its quirks, propagating Downingia bella is definitely achievable for beginners with a little guidance.
The Best Time to Start
For me, the sweet spot for propagating Downingia bella is typically in the late spring or early summer. This is when the plant is actively growing and has plenty of energy to put into developing new roots. You’re looking for healthy, non-flowering stems for cuttings. If you’re thinking about seed starting, early spring, just after the last frost, is your best bet.
Supplies You’ll Need
Gathering your tools beforehand makes the whole process so much smoother! Here’s what I like to have on hand:
- Sharp pruning shears or a clean craft knife: For making precise cuts.
- A good quality seed-starting mix or a well-draining potting mix: You want something light and airy. I often mix in a bit of perlite for extra drainage.
- Small pots or trays: Clean ones are key to preventing disease.
- A spray bottle: For gentle misting.
- Optional: Rooting hormone: While not always strictly necessary for Downingia bella, it can give you a nice boost.
- Optional: A clear plastic bag or dome: To create a humid environment for cuttings.
Propagation Methods
Let’s get our hands dirty! For Downingia bella, stem cuttings are my go-to method because they’re quick and very effective.
Propagating by Stem Cuttings:
- Select a healthy parent plant. Look for vibrant, lush growth.
- Take your cuttings. Using your clean shears or knife, snip off a healthy stem that is about 4-6 inches long. Make the cut just below a leaf node (where a leaf attaches to the stem).
- Prepare the cuttings. Gently remove the lower leaves, leaving just a few at the top. This prevents them from rotting in the soil or water. If you’re using rooting hormone, dip the cut end into it according to the product instructions.
- Plant your cuttings. Fill your small pots with your prepared soil mix. Make a small hole in the center of the soil with your finger or a pencil.
- Insert the cuttings. Gently place each cutting into the hole, ensuring the leaf nodes are nestled in the soil. Firm the soil gently around the base.
- Water gently. Use your spray bottle to lightly mist the soil. You want it moist, not waterlogged.
- Create humidity. Cover the pot with a clear plastic bag or dome. This traps moisture and helps the cuttings root. Make sure the bag doesn’t touch the leaves. Place it in a bright spot, but out of direct sunlight.
The “Secret Sauce” (Pro Tips)
Now for a couple of little tricks I’ve learned over the years that can really make a difference:
- The bottom heat trick: If you have a heat mat (often used for seed starting), placing your pots on it can significantly speed up root development. Downingia bella just loves a bit of warmth from below. Just remember to keep the top shaded from direct sun!
- Don’t overwater, ever! This is probably the biggest pitfall for many new propagators. It’s better to have slightly drier soil than soil that’s constantly soggy. Root rot can set in frightfully fast.
Aftercare & Troubleshooting
Once your cuttings have been in their humid little homes for a few weeks, you can start checking for roots. Gently tug on a cutting; if you feel resistance, that’s a good sign!
- Gradually introduce to drier air: Once you see roots, slowly start to remove the plastic bag for longer periods. Let them get used to the regular humidity of your home.
- Transplant when ready: When the new plants have a good root system and are showing new growth, it’s time to transplant them into slightly larger pots.
- Watch for rot: The most common sign of failure is rot. If your cuttings turn mushy or black, that’s a clear indicator of too much moisture and not enough air circulation. If you see this, try to remove the affected cutting immediately and ensure your remaining ones have better drainage and less water.
A Encouraging Closing
Propagating plants is a journey, much like tending to a garden itself. There will be successes and sometimes, a few lessons learned. Be patient with your little Downingia bella cuttings. Watch them closely, offer them the right conditions, and soon enough, you’ll have an abundance of these cheerful blooms to share. Happy propagating!
Resource:
https://identify.plantnet.org/k-world-flora/species/Downingia%20bella%20Hoover/data