Oh, hello there! Pull up a chair, let’s chat plants. Today, I’m so excited to talk about a lovely little shrub that might not be on everyone’s radar, but it absolutely should be: Erithalis fruticosa.
A Little Bit of Emerald Magic: Why You’ll Love Propagating Erithalis
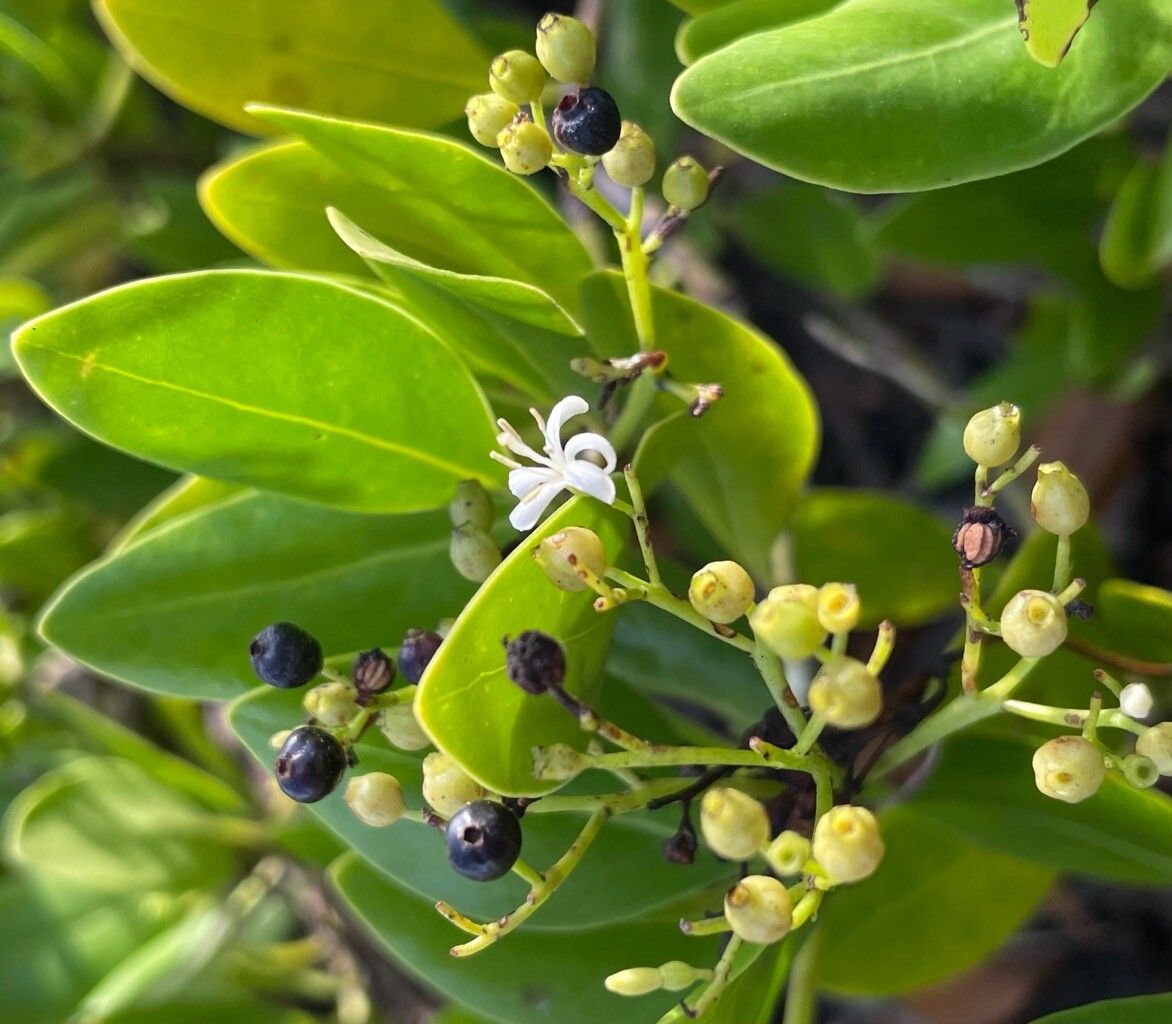
You know those plants that just have a certain je ne sais quoi? That’s Erithalis fruticosa for me. Often called “Black Torch,” this evergreen shrub offers beautiful, glossy dark green foliage and, come summer, a stunning display of delicate, fragrant white flowers that pollinators adore. It brings a touch of the tropics to many gardens, and honestly, growing your own from a cutting is incredibly satisfying. Don’t worry if you’re just starting out; while it’s not as simple as a pothos, propagating Erithalis fruticosa is absolutely doable with a little care and patience. It’s a fantastic way to expand your collection or share this beauty with friends.
When is the Best Time to Get Started?
For the highest chance of success, I find that late spring to early summer is your golden window. This is when the plant is actively growing, and the stems are what we call “semi-hardwood.” They’re not brand new and floppy, but they haven’t become old and woody either. This perfect stage makes them more likely to root. You can also try in early autumn if you have a greenhouse or a very sheltered spot, but spring is generally more forgiving.
What You’ll Need for Your Propagating Adventure
Gathering your supplies beforehand makes the whole process much smoother. Think of it as setting up your little plant spa!
- Sharp, clean pruning shears or a sharp knife: Sterilize them with rubbing alcohol to prevent disease.
- Small pots or seed trays: Around 3-4 inches is usually good. Make sure they have drainage holes!
- Potting mix: A well-draining mix is crucial. I love a blend of equal parts peat moss (or coco coir), perlite, and a bit of fine bark. Some people swear by a sandy mix, which also works. The key is excellent aeration.
- Rooting hormone: This is highly recommended for Erithalis fruticosa. A powder or gel will do.
- Plastic bag or propagation dome: To create a humid environment.
- Spray bottle: For misting.
- Labels: To remember what you planted and when!
Let’s Get Our Hands Dirty: Propagation Methods
While Erithalis can be a bit particular, stem cuttings are your best bet for home propagation.
Method: Semi-Hardwood Stem Cuttings
- Take Your Cuttings: Early in the morning, when the plant is hydrated, select healthy stems that are about 4-6 inches long. Look for stems that have started to firm up but can still be bent slightly without snapping.
- Prepare the Cuttings: With your clean shears, make a clean cut just below a leaf node. The leaf node is where a leaf attaches to the stem; this is where the magic of root formation often happens.
- Remove Lower Leaves: Gently strip off the leaves from the bottom half to two-thirds of the stem. You want to leave just a few sets of leaves at the top to help with photosynthesis. If the remaining leaves are quite large, I sometimes cut them in half horizontally to reduce water loss.
- Dip in Rooting Hormone: Dip the cut end of the stem into your rooting hormone, tapping off any excess. This gives your cutting a nice little boost.
- Plant Your Cuttings: Fill your clean pots with your prepared, moistened potting mix. Make a small hole in the center with your finger or a pencil.
- Insert the Cuttings: Gently insert the prepared cutting into the hole, making sure the rooting hormone stays on the base of the stem. Firm the soil gently around the base.
- Water Gently: Water the soil lightly but thoroughly. You want it to be moist, not waterlogged.
- Create a Humid Environment: This is key! Cover the pots with a clear plastic bag or a propagation dome. Ensure the leaves do not touch the plastic too much. You can use small stakes to prop up the bag if needed.
- Place in Bright, Indirect Light: Find a spot that gets plenty of bright, indirect light. Avoid direct, hot sun, which can scorch the delicate cuttings.
The “Secret Sauce”: My Insider Tips
Over the years, I’ve learned a few tricks that seem to really make a difference with trickier plants like Erithalis.
- Bottom Heat is Your Friend: If you can, place your pots on a gentle seedling heat mat. This provides warmth to the base of the cuttings, encouraging root development. It mimics the warmth of the soil in warmer climates and is a gamechanger for many woody cuttings.
- The “Air Layering” Alternative: For a higher success rate with slightly larger pieces, consider air layering on the parent plant. You can do this in spring. Wound a section of stem, apply rooting hormone and sphagnum moss, and wrap it all in plastic. Once roots form within the moss, you can carefully cut below the roots and pot it up. It’s a bit more involved but often yields excellent results.
- Don’t Be Afraid to Experiment: I’ve found some Erithalis cuttings root better in pure perlite or vermiculite, while others prefer the bark mix. If you have a few extra cuttings, try planting some in slightly different mediums to see what works best in your environment.
Aftercare and When Things Go Wrong
Once your cuttings are planted, be patient! It can take 6-12 weeks, sometimes longer, for roots to develop.
- Check for Roots: You can gently tug on a cutting (very carefully!) or check for roots poking through the drainage holes. Another sign is new leaf growth at the top.
- Acclimate Gradually: Once you see signs of rooting, begin to acclimate them to normal humidity. Gradually remove the plastic bag for longer periods each day over a week or two.
- Transplanting: When they’re well-rooted and have a bit of new growth, you can transplant them into larger individual pots. Continue to use a well-draining mix.
- Troubleshooting (Rot): The most common problem you’ll encounter is rot. This usually happens if the soil is too wet and there isn’t enough air circulation. If a cutting looks mushy or black at the base, it’s likely rotted. Unfortunately, there’s not much you can do to save a rotted cutting. Prevention is key: ensure good drainage and don’t overwater. If you notice mold on the soil surface, you can try gently removing the top layer and replacing it with fresh mix, or lightly misting with a dilute hydrogen peroxide solution.
Keep Growing, My Friends!
Propagating plants is a journey of learning and observation. Some attempts will be more successful than others, and that’s perfectly okay. The most important thing is to enjoy the process, to be present with your plants, and to celebrate every little victory, like that first hint of new growth or the sight of tiny roots emerging.
Happy propagating! I can’t wait to hear about your Erithalis fruticosa successes.
Resource:
https://identify.plantnet.org/k-world-flora/species/Erithalis%20fruticosa%20L./data