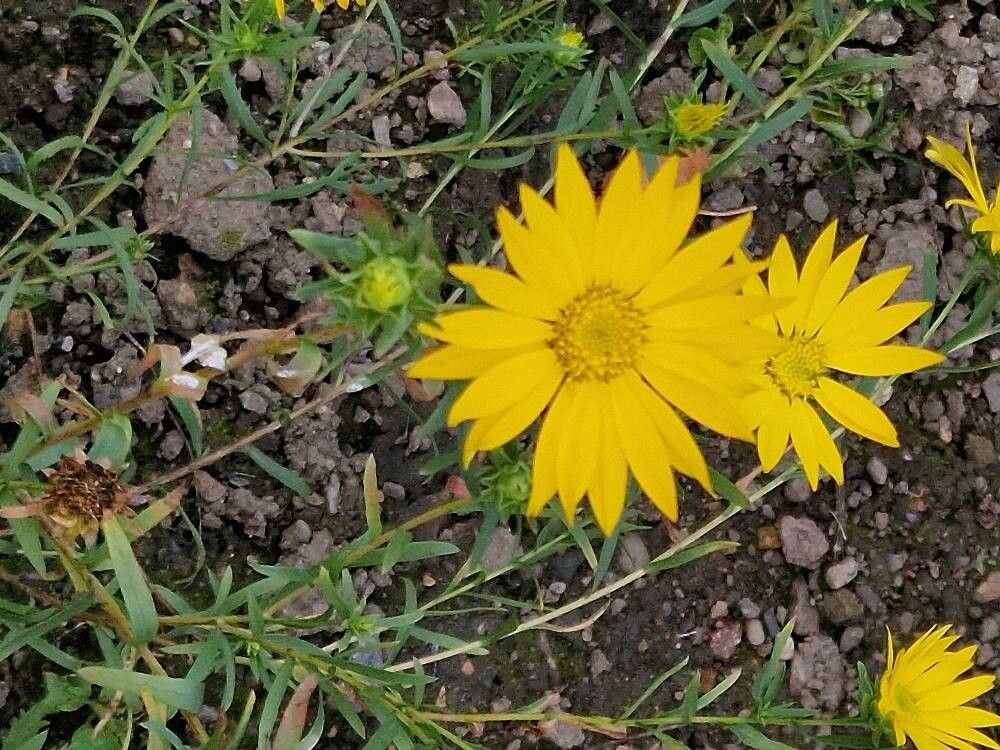
Hello fellow garden enthusiasts! It’s so lovely to have you here. Today, I want to talk about a little ray of sunshine for our gardens: Xanthisma texanum, often called Texas Star or Star Daisy. This native wildflower is just a delight, with its cheerful, daisy-like blooms that are a beacon for pollinators. They really do brighten up any sunny spot. And the best part? Propagating them yourself is surprisingly rewarding, and I’ve found it’s a fantastic plant for beginners looking to get their hands dirty in a new way. You get to witness that magic happen – a tiny slip of a stem transforming into a whole new plant!
The Best Time to Start
For Xanthisma texanum, I’ve found the late spring to early summer is truly your golden window. Before the plant gets too established and starts putting all its energy into blooming, you’ll have the most vigorous growth to work with. Aim for when the plant is actively growing, but not yet putting on its major floral display.
Supplies You’ll Need
Here’s what I always have on hand when I’m propagating these beauties:
- Sharp pruning shears or a clean knife: For making nice, clean cuts.
- Rooting hormone powder (optional but helpful): Especially for stem cuttings.
- Well-draining potting mix: I like a mix of equal parts peat moss, perlite, and compost. Or, you can buy a good quality seed starting mix.
- Small pots or propagation trays: With drainage holes, of course!
- Watering can with a fine rose or spray bottle: To gently water newly planted cuttings.
- Clear plastic bags or a propagation dome: To create a humid microclimate.
Propagation Methods
Xanthisma texanum is quite obliging, and I’ve had great success with a couple of methods.
Stem Cuttings: My Go-To
This is my favorite way to get more Texas Stars.
- Take your cuttings: In late spring or early summer, select healthy, non-flowering stems. Look for stems that are about 4-6 inches long. Using your sharp pruning shears or knife, make a clean cut just below a leaf node (that little bump where a leaf grows).
- Prepare the cuttings: Gently remove the lower leaves, leaving just a couple at the very top. If you’re using rooting hormone, dip the cut end into the powder, tapping off any excess.
- Plant your cuttings: Fill your small pots or trays with your well-draining potting mix. Make a small hole in the center with your finger or a pencil. Carefully insert the cut end of your stem cutting into the hole, ensuring the leaf nodes are below the soil surface. Gently firm the soil around the stem.
- Create humidity: Water the soil gently until it’s moist but not soggy. Then, cover the pot with a clear plastic bag or a propagation dome. This will help keep humidity high, which is crucial for root development. Place the pots in a bright spot with indirect light.
Water Propagation: A Speedy Option
Sometimes, you just want to see those roots forming!
- Prepare the cuttings: Similar to stem cuttings, take healthy, non-flowering stem tips, about 4-6 inches long. Remove most of the lower leaves, leaving just a few at the top.
- Place in water: Put the cuttings in a clean jar or vase filled with fresh water. Make sure that no leaves are submerged in the water, as they will rot.
- Change the water regularly: This is key! Change the water every 2-3 days to keep it fresh and prevent bacterial growth.
- Watch for roots: In a week or two, you should start seeing tiny white roots emerging. Wait until these roots are at least an inch long before you plan to transplant them into soil.
The “Secret Sauce” (Pro Tips)
Here are a couple of things I’ve learned over the years that make a real difference:
- Bottom Heat is Your Friend: If you can, place your pots on a seedling heat mat. Even a gentle warmth from underneath encourages roots to form much more quickly. It mimics the conditions plants love when they’re putting out new growth.
- Don’t Rush the Transplant: For stem cuttings, I like to wait until I see new leaf growth appearing at the top. That’s a sure sign that roots have formed below. For water propagation, let those roots get nice and substantial – at least an inch long – before attempting to pot them up.
Aftercare & Troubleshooting
Once your cuttings have developed a good root system (you can gently tug – if there’s resistance, they’re rooted!), it’s time to move them into their own pots.
- Watering: Water them in gently and keep the soil consistently moist but not waterlogged. As the new plants establish, you can slowly transition them to a more regular watering schedule, letting the top inch of soil dry out between waterings.
- Light: Continue to provide bright, indirect light for the first week or two before gradually introducing them to more direct sunlight, similar to your mature plants.
Now, what if things don’t go as planned? The most common issue is rot. This usually happens if the soil is too wet or if you don’t have good drainage. If you see a cutting turn black and mushy, it’s best to discard it and try again. Another sign of failure can be wilting that doesn’t recover after watering – this often means root development hasn’t happened, or the cutting was too old/unhealthy to begin with. Don’t get discouraged; it happens to the best of us!
A Encouraging Closing
Propagating Xanthisma texanum is such a satisfying endeavor. It’s a wonderful way to expand your garden and share these cheerful blooms with friends. Be patient with the process, celebrate every root you see, and embrace the learning that comes with each attempt. Happy gardening!
Resource:
https://identify.plantnet.org/k-world-flora/species/Xanthisma%20texanum%20DC./data