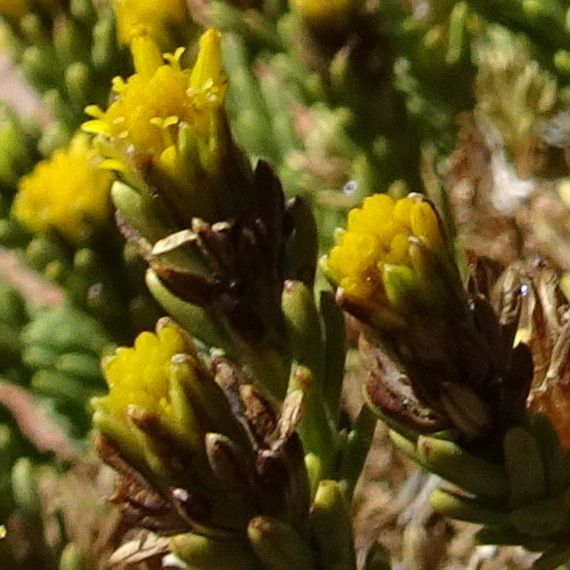
Oh, Werneria juniperina! Isn’t that a delightful plant? I’ve always been charmed by its delicate, silvery foliage and its tidy, almost miniature appearance. It’s the kind of plant that makes you lean in close, appreciating the subtle beauty. Propagating it is a wonderful way to expand your collection, share with friends, or simply enjoy the satisfaction of nurturing life from a small piece. Now, for the burning question: is it beginner-friendly? I’d say Werneria juniperina is moderately easy to propagate. It’s not quite as foolproof as, say, a succulent, but with a little attention to detail, you’ll likely have success.
The Best Time to Start
My favorite time to take cuttings from Werneria juniperina is in late spring or early summer. This is when the plant is actively growing and has plenty of energy. You want to look for stems that are firm but not yet woody – think of them as semi-hardwood cuttings. They’ll have a bit of flexibility, but won’t droop pathetically. Taking them when they’re actively putting on new growth really gives them a good head start.
Supplies You’ll Need
Gathering your tools beforehand makes the whole process so much smoother. Here’s what I always have on hand:
- Sharp Pruning Shears or a Craft Knife: Cleanliness is key!
- Rooting Hormone: A good quality powder or gel makes a noticeable difference.
- A Well-Draining Potting Mix: I often use a blend of equal parts peat moss or coco coir, perlite, and coarse sand.
- Small Pots or Trays: Whatever you’ll be rooting your cuttings in.
- Plastic Bags or a Propagator: To create a humid environment.
- Watering Can with a Fine Rose: Gentle watering is important.
- Labels and a Pen: Trust me, you’ll thank yourself later!
Propagation Methods
For Werneria juniperina, I find stem cuttings to be the most reliable and straightforward method.
- Select Your Cuttings: Find those perfect semi-hardwood stems. You’re looking for pieces about 4-6 inches long. Make your cut just below a leaf node. This is where the magic happens, where the plant is primed to sprout roots.
- Prepare the Cuttings: Gently remove the leaves from the bottom half of the cutting. You don’t want any foliage dipping into the soil or water, as this can lead to rot. Leave a few sets of leaves at the top.
- Apply Rooting Hormone: Dip the cut end of each stem into your rooting hormone. Give it a little shake to remove any excess. A thick coating isn’t necessary; a light dusting is all you need.
- Plant Your Cuttings: Fill your small pots with your well-draining mix. Make a hole with your finger or a pencil, then carefully insert the prepared cutting. Gently firm the soil around the base.
- Water Gently: Give the pots a light watering to settle the soil.
The “Secret Sauce” (Pro Tips)
Over the years, I’ve picked up a few little tricks that seem to boost my success rates.
- Bottom Heat is a Game Changer: If you can get your hands on a small heating mat, placing your pots on it can really speed up root development, especially if your house is on the cooler side. It mimics the warmth of spring soil.
- Don’t Overwater, Ever: This is probably the number one mistake people make. The soil should be consistently moist but never soggy. Feel the weight of the pot; if it feels light, it’s time for a gentle watering. Soggy soil is a recipe for rot, and we definitely don’t want that!
- Patience with the Potting Mix: For Werneria juniperina, I don’t use a very rich potting soil for the cuttings. A lighter, grittier mix allows for better aeration and discourages fungal issues. Think of it as giving them breathing room to grow roots, not lush top growth.
Aftercare & Troubleshooting
Once your cuttings are planted and settled, it’s time to create that humid environment. Cover the pots with a plastic bag or place them in a propagator. A bit of ventilation is a good idea to prevent things from getting too stagnant. Place them in a bright spot, but out of direct, hot sun.
You’ll know your cuttings are rooting when you see new leaf growth or feel a slight tug when you gently wiggle them. This can take anywhere from a few weeks to a couple of months. Once they’ve developed a good root system – you might even see roots peeking out the drainage holes – you can transplant them into their own individual pots.
What about problems? The most common enemy is rot. If you see your cuttings turning mushy or black, it’s usually a sign of too much moisture. If this happens, try to remove the affected cutting and let the others dry out slightly. You might also see a cutting simply shrivel up and die. This can happen if it wasn’t quite ready, or if the conditions weren’t ideal. Don’t get discouraged; just try again!
A Encouraging Closing
So there you have it! Propagating Werneria juniperina is a rewarding process that connects you more deeply to your plants. Be patient with your little charges, give them the right conditions, and enjoy watching them unfurl their new leaves and develop their own roots. Happy propagating!
Resource:
https://identify.plantnet.org/k-world-flora/species/Werneria%20juniperina%20Hieron./data