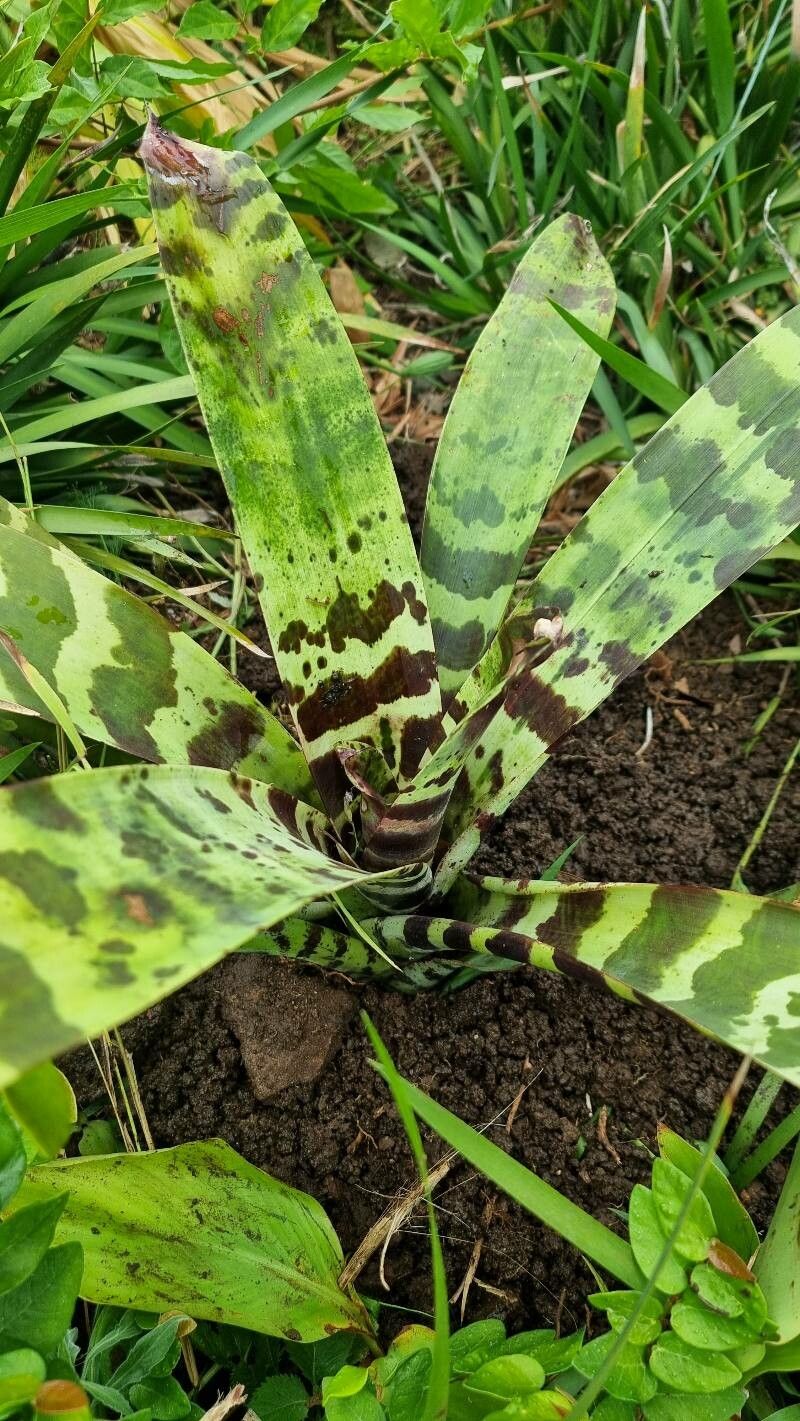
Hello there, fellow plant lovers! If you’ve ever admired the striking beauty of Vriesea pardalina, with its bold, architectural leaves and show-stopping bloom spikes, you know it’s a plant that commands attention. And guess what? Getting more of these gorgeous bromeliads for your collection is entirely possible, and honestly, it’s one of the most satisfying gardening joys I know.
Why Propagate Vriesea Pardalina?
There’s something truly special about nurturing a new plant from a piece of an established one. For Vriesea pardalina, it’s about sharing its unique spotted patterns and vibrant colors. The good news? While they might look a bit intimidating, propagating Vriesea pardalina is generally quite achievable, even for those of you just starting your plant journey. You don’t need to be a seasoned pro to succeed with this one!
When is the Best Time to Start?
The absolute sweet spot for propagating Vriesea pardalina is during the spring and early summer months. This is when the plant is in its active growing season. You’ll notice new growth emerging, and the plant has the energy reserves to bounce back from propagation and to put out roots. If your plant has recently bloomed and is starting to show pups, even better! That’s your golden ticket.
What You’ll Need
Gathering your supplies beforehand makes the whole process smoother. Here’s what I always have on hand:
- Sharp, clean pruning shears or a sharp knife: For making clean cuts. Sterilize them with rubbing alcohol between uses!
- Well-draining potting mix: A cactus and succulent mix is a great base. I often add perlite or orchid bark to ensure excellent aeration.
- Rooing hormone (optional but recommended): This can significantly speed up root development.
- Small pots or containers: Terracotta pots are excellent as they allow the soil to breathe.
- Watering can with a fine rose or a spray bottle: For gentle watering.
- A warm, bright location: Out of direct, harsh sunlight.
- A clear plastic bag or a propagation dome (optional): To create a humid microclimate.
Propagation Methods for Vriesea Pardalina
Vriesea pardalina typically propagates through its pups, which are baby plants that grow from the base of the mother plant. This is by far the easiest and most successful method for this bromeliad.
Method: Dividing Pups
- Wait for the Pups to Grow: Look for pups that are at least one-third the size of the mother plant. They should have their own developed leaves and ideally, you might even see tiny roots emerging from their base.
- Gently Loosen the Soil: If your mother plant is in a pot, gently tip it out or dig carefully around the base. If it’s planted in the ground, carefully excavate around the pup.
- Separate the Pup: Using your sharp, clean pruning shears or knife, carefully cut the pup away from the mother plant. Try to make the cut as close to the mother plant’s base as possible. If you see established roots on the pup, try to get some with it. Don’t worry if you can’t get many; they’ll grow.
- Allow to Callus (Optional but Recommended): After separating, let the cut end of the pup air dry for a day or two. This helps it to form a callus, which reduces the risk of rot when you pot it up. You can place it in a bright, indirect light spot for this.
- Potting Up: Fill your small pot with your well-draining potting mix. If you’re using rooting hormone, dip the cut end of the pup into it. Gently press the pup into the soil so it’s stable. It doesn’t need to be buried deeply, just enough to stand upright.
- Initial Watering: Water very lightly. You want the soil to be slightly moist, not soggy. Overwatering at this stage is the quickest way to invite root rot.
The “Secret Sauce” (Pro Tips)
Here are a couple of tricks I’ve learned over the years that really make a difference:
- Think “Airy, Not Soggy”: Bromeliads are epiphytic by nature, meaning they grow on trees in the wild. This means they hate sitting in wet feet. Ensure your potting mix is incredibly open and airy. Adding plenty of perlite or small orchid bark is key. Even after potting, err on the side of underwatering for the first few weeks.
- Consider a Humid Dome: Those new pups can be a bit fragile. If you have a dry climate or are worried about them drying out, pop a clear plastic bag loosely over the pot (make sure the leaves don’t touch the plastic!) or cover it with a propagation dome. This creates a mini-greenhouse effect that helps them retain moisture until they establish their roots. Open it up for a few hours each day to allow for air circulation.
Aftercare & Troubleshooting
Once your pup is potted, place it in a warm spot with bright, indirect light. Avoid direct sun, which can scorch its delicate leaves. Water sparingly, only when the top inch of soil feels dry to the touch.
The most common issue you might encounter is rot. If you see your pup turning mushy, black, or developing dark spots that spread rapidly, it’s likely due to too much moisture and not enough air circulation. Unfortunately, if rot sets in, it’s very difficult to save the plant. The best defense is good prevention: use excellent drainage, water sparingly, and ensure good air movement.
Be patient! It can take several weeks, sometimes even a couple of months, for new roots to establish and for you to see definitive signs of new growth on your pup.
Happy Propagating!
Watching a new Vriesea pardalina start to grow from your own efforts is incredibly rewarding. Enjoy the process, learn from each one, and don’t be discouraged if you have a minor setback. Gardening is all about patience and connection, and I know you’ll do wonderfully. Happy propagating!
Resource:
https://identify.plantnet.org/k-world-flora/species/Vriesea%20pardalina%20Mez/data