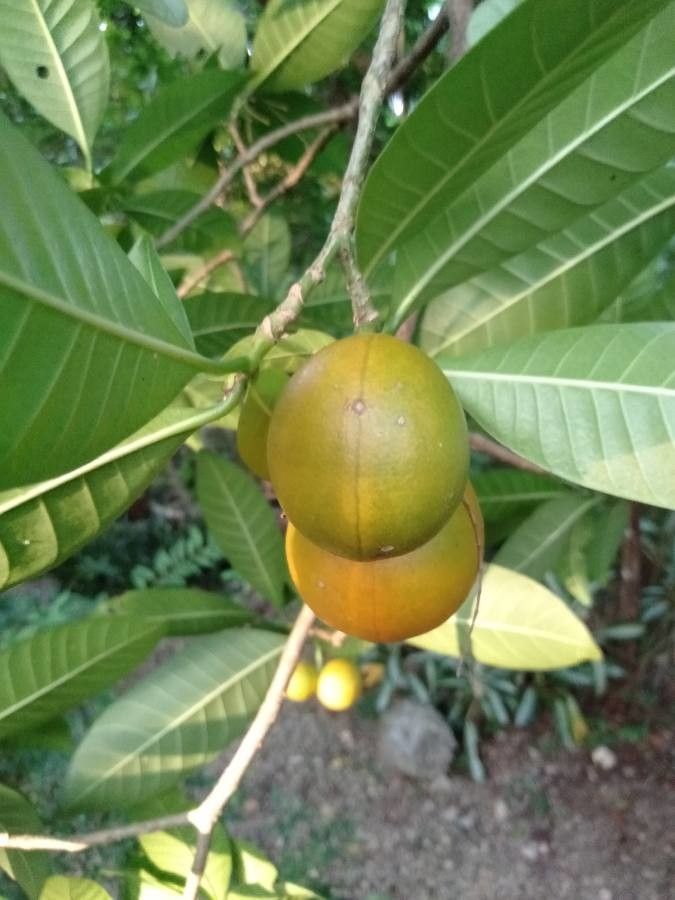
Hello fellow plant lovers! Today, we’re diving into the world of a truly special plant: Voacanga globosa, sometimes called the African Rosebay or the Kurchi. I’ve had the pleasure of nurturing these beauties for years, and honestly, they’re an absolute delight. Their glossy leaves and beautiful, star-shaped white flowers are a real treat for the senses. Plus, there’s something incredibly rewarding about taking a little piece of an existing plant and coaxing it to grow into something new. It feels like magic, doesn’t it? Now, if you’re wondering if this is a good plant for beginners to propagate, I’d say it’s moderately easy. With a little attention and the right approach, you’ll likely have success.
When to Get Your Hands Dirty
The sweet spot for propagating Voacanga globosa is definitely during its active growing season. Think late spring through early to mid-summer. This is when the plant has the most energy to put into rooting. You’ll want to choose stems that are semi-hardwood, meaning they’re not brand new, floppy growth, but also not old, woody growth that’s hardened off. A stem that bends rather than snaps cleanly is usually a good indicator.
What You’ll Want in Your Propagation Toolkit
Gathering your supplies beforehand makes the whole process flow so much smoother. Here’s what I usually have on hand:
- Sharp, clean pruning shears or a knife: Essential for making clean cuts.
- A good potting mix: A blend that drains well is key. I often use a mix of perlite and peat moss or coir, roughly a 50/50 ratio.
- Small pots or trays: Clean containers with drainage holes are a must.
- Rooting hormone (optional but recommended): This can really give your cuttings a boost. A powder or gel form works well.
- Plastic bags or a propagation dome: To create a humid environment around your cuttings.
- A well-draining base layer for pots: Small pebbles or broken terracotta shards can help.
Let’s Get Propagating: Stem Cuttings
This is my go-to method for Voacanga globosa. It’s reliable and you can get several new plants from one healthy specimen.
- Take Your Cuttings: Select healthy, semi-hardwood stems from your plant. Aim for cuttings that are about 4-6 inches long. Make your cut just below a leaf node (where a leaf attaches to the stem). This is where the magic happens, as roots are more likely to emerge from these points.
- Prepare the Cuttings: Gently remove the lower leaves from your cuttings, leaving just a few at the very top. This prevents them from rotting in the soil and reduces moisture loss. If your leaves are quite large, consider cutting them in half to further minimize water loss.
- Apply Rooting Hormone (if using): Dip the cut end of each stem into your rooting hormone, tapping off any excess.
- Plant Them Up: Stick the treated ends of your cuttings into your prepared potting mix. Make a small hole with a pencil or your finger first to avoid rubbing off the rooting hormone. Ensure the leaf nodes are buried.
- Create Humidity: Water the soil gently until it’s moist but not soggy. Then, cover your pots with a plastic bag or place them under a propagation dome. This is crucial for keeping the humidity high, which prevents the cuttings from drying out before they can root.
The “Secret Sauce” – Insider Tips from My Greenhouse
Here are a few little tricks I’ve learned over the years that can make a big difference:
- Bottom Heat is Your Friend: If you can, place your pots on a heating mat. This gentle warmth encourages root development from below, mimicking ideal soil conditions. It’s like giving the roots a cozy little spa treatment.
- Don’t Drench, Just Dampen: When watering your cuttings, err on the side of slightly too dry rather than too wet. Overwatering is the quickest way to invite fungal diseases and rot, which is the enemy of new propagations. Check the soil moisture before watering.
- Patience, My Dear Gardener: Voacanga globosa can be a bit leisurely with its rooting process. Don’t be discouraged if you don’t see immediate results. It can take anywhere from 4 to 12 weeks for roots to establish. Resist the urge to constantly tug on the cuttings to check for roots – this can damage them!
Aftercare and What to Watch For
Once you start to see new leaf growth, that’s a fantastic sign your cuttings are rooting! At this point, you can gradually remove the plastic bag or dome over a few days to help them acclimate to the drier air. Keep the soil consistently moist but still well-drained.
Be on the lookout for wilting, yellowing leaves, or a mushy stem base. These are often signs of rot. If you see this, it’s best to remove the affected cutting to prevent it from spreading. Sometimes, a cutting just doesn’t make it, and that’s okay! It’s all part of the learning process.
Keep Growing!
Propagating plants is such a rewarding journey, and Voacanga globosa is a wonderful plant to experiment with. Don’t be afraid to get your hands dirty, and remember that even experienced gardeners have cuttings that don’t take. The joy is in the trying, the nurturing, and the eventual success of bringing a new life into the world. Happy planting!
Resource:
https://identify.plantnet.org/k-world-flora/species/Voacanga%20globosa%20(Blanco)%20Merr./data