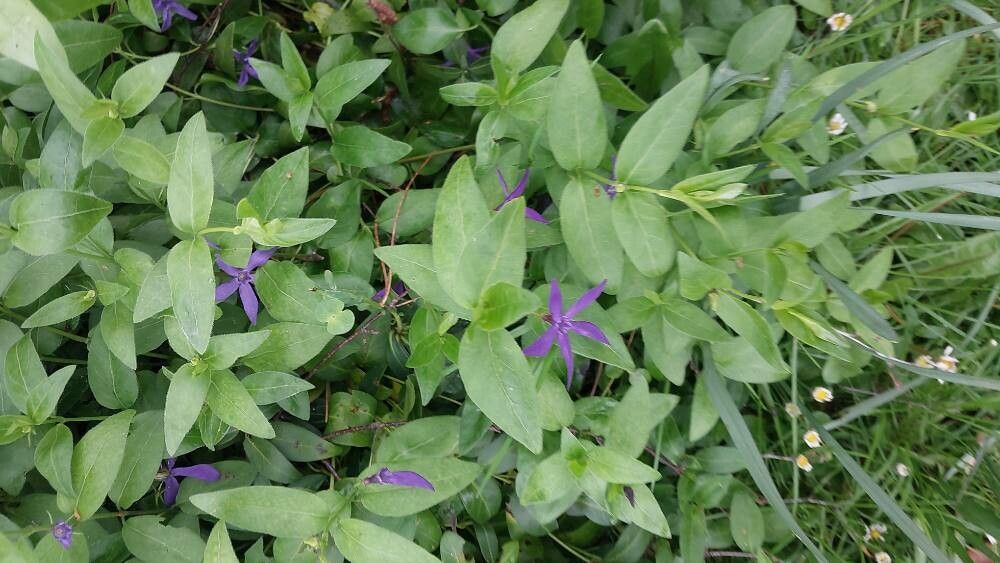
Hello fellow gardening enthusiasts! It’s so lovely to have you here. Today, we’re diving into the wonderful world of Vinca herbacea. If you’re looking for a charming groundcover that brings delicate, bell-shaped flowers and lush greenery to your garden beds, you’re in for a treat. Propagating Vinca herbacea is a fantastic way to expand your collection or share its beauty with friends. And I’m happy to say, it’s a pretty beginner-friendly plant to work with, which makes it all the more rewarding!
The Best Time to Start
My favorite time to get my hands dirty with Vinca herbacea propagation is in late spring or early summer. This is when the plant is actively growing, and the new shoots are pliable and full of energy. Starting now means your new little Vincas will have plenty of time to establish themselves before cooler weather arrives.
Supplies You’ll Need
To set yourself up for success, gather these essentials:
- Sharp pruning shears or a clean knife: For making neat cuts.
- Small pots or seed trays: Clean, with drainage holes, of course!
- A good quality potting mix: I like a blend of seed starting mix and perlite for excellent drainage and aeration.
- Rooting hormone (optional but recommended): This little powerhouse can really speed things up.
- A watering can with a fine rose: For gentle watering.
- Plastic bags or a propagator lid: To create a humid environment.
Propagation Methods
Vinca herbacea is most commonly and successfully propagated through stem cuttings. Here’s how I do it:
- Select your cuttings: Look for healthy, non-flowering stems that are about 3-5 inches long. Gently bend a stem; if it snaps cleanly, it’s a good candidate.
- Make the cut: Using your sharp shears or knife, make a clean cut just below a leaf node (where a leaf attaches to the stem).
- Prepare the cutting: Remove the lower leaves from the cutting, leaving just a few at the top. This prevents them from rotting in the soil.
- Apply rooting hormone (if using): Dip the cut end of the stem into your rooting hormone powder, tapping off any excess.
- Plant your cuttings: Fill your small pots or trays with your moistened potting mix. Make a small hole with a pencil or your finger, and insert the cut end of the Vinca stem into the hole. Gently firm the soil around it.
- Water gently: Give your newly potted cuttings a light watering.
- Create humidity: Cover the pots loosely with a plastic bag or a propagator lid to maintain high humidity. This is crucial for preventing the cuttings from drying out before they root. Place them in a bright spot, but out of direct sunlight.
The “Secret Sauce” (Pro Tips)
Here are a few things I’ve learned over the years that make a real difference:
- Don’t let the leaves touch the water (or the soil surface too much): When preparing your cuttings, ensure the remaining leaves are well above the soil line. Any leaves submerged or touching the damp soil are prime spots for rot to set in.
- Bottom heat is your friend: If you have access to a heat mat designed for seedlings, placing your pots on it can significantly speed up the rooting process. It mimics the warmth of spring and encourages root development.
- Be patient with the roots: Sometimes it can take a few weeks for Vinca cuttings to develop a strong root system. Resist the urge to tug on them to check! Wait for signs of new growth at the top, which typically indicates roots have formed.
Aftercare & Troubleshooting
Once you see new growth emerging from your cuttings, it’s a good sign that roots are forming! Gradually acclimate your new plants to normal humidity levels by opening the plastic bag or propagator lid a little more each day over a week. Continue to keep them in bright, indirect light and water when the top inch of soil feels dry.
The most common issue you might encounter is rot. If you notice stems turning mushy or black, it’s likely due to too much moisture and not enough airflow. Ensure your potting mix is well-draining, and don’t overwater. If rot sets in on one cutting, it’s best to discard it to prevent it from spreading to others.
Happy Propagating!
Propagating Vinca herbacea is a rewarding journey, and I truly hope these tips help you create a lovely new batch of these charming plants. Remember to be patient, enjoy the process, and celebrate every little success. Happy gardening!
Resource:
https://identify.plantnet.org/k-world-flora/species/Vinca%20herbacea%20Waldst.%20&%20Kit./data