Hello fellow plant lovers! Today, we’re diving into the wonderful world of Utricularia leptoplectra, a little gem that I’ve come to absolutely adore over the years. If you’re looking for a plant that’s both fascinating and relatively easy to multiply, you’ve come to the right place.
Why Propagate Utricularia leptoplectra?
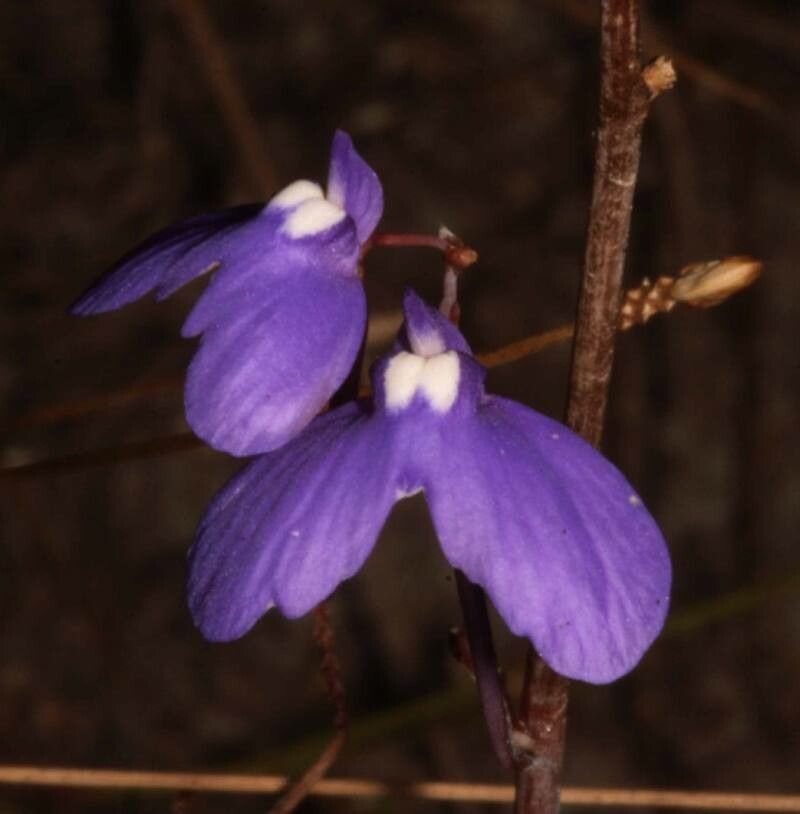
Utricularia leptoplectra, often called the “common bladderwort,” boasts such delicate, whimsical flowers. It’s a carnivorous plant, which in itself is pretty darn cool! Watching those tiny traps develop is a constant source of delight. Propagating them isn’t just about getting more plants (though who doesn’t love that?); it’s about understanding their life cycle and feeling that incredible connection when you nurture a tiny piece of a plant into a whole new specimen. I’d say for most gardeners with a bit of patience, this one is quite manageable to propagate.
When is the “Sweet Spot” for Starting?
The best time to get your propagation party started is during the plant’s active growing season. For Utricularia leptoplectra, this generally means late spring through summer. You’ll know it’s happy and ready when you see lots of new growth – plump leaves and even developing flower stalks. Starting when the plant is vigorous means it has plenty of stored energy to dedicate to creating new roots.
What You’ll Need to Get Going
Don’t worry, you probably have most of these items already!
- A clean, sharp pair of small scissors or pruning shears.
- A well-draining potting mix. A good blend for carnivorous plants is usually a 50/50 mix of peat moss and perlite or horticultural sand. Avoid anything with added fertilizers.
- Small pots or trays for your cuttings.
- A spray bottle for misting.
- Distilled water or rainwater. This is crucial, as bladderworts are sensitive to minerals in tap water.
- (Optional, but helpful) A clear plastic dome or bag to create a humid microclimate.
Let’s Get Propagating: My Favorite Methods
There are a couple of ways to coax new Utricularia leptoplectra plants into existence, and I find both to be quite effective.
1. Stem Cuttings: The Classic Approach
This is my go-to method. It’s straightforward and usually yields a good success rate.
- Select a Healthy Stem: Look for a stem that is at least 2-3 inches long and has a few healthy leaves or any small, developing traps.
- Make the Cut: Using your clean scissors, carefully snip the stem just below a leaf node (where a leaf emerges from the stem). This is where new roots are most likely to form.
- Prepare the Cutting: You can gently remove the bottom leaf or two if they’ll be submerged in the soil. This helps prevent rot.
- Plant Your Cutting: Gently insert the cut end of the stem into your prepared potting mix. Ensure at least one leaf node is buried in the soil. If you have a few cuttings, space them a couple of inches apart in a small pot or tray.
- Water Gently: Water the potting mix thoroughly with distilled water. The soil should be moist but not waterlogged.
2. Division: When it’s Time to Share the Pot
If your Utricularia leptoplectra has become quite vigorous and is filling its pot, it might be time to divide it. This is less about creating entirely new individuals from scratch and more about separating existing clumps.
- Gently Remove from Pot: Carefully slide the entire plant out of its container.
- Identify Natural Divisions: Gently tease apart the root ball using your fingers. Look for sections that naturally have their own established mass of roots and shoots.
- Separate the Clumps: Carefully pull or snip apart the larger clumps. Try to keep as much of the root system intact as possible for each new division.
- Repot: Pot each division into its own small container with fresh, moist potting mix.
The “Secret Sauce”: My Pro Tips
After years of growing and experimenting, here are a few little tricks that have made a big difference for me:
- Keep ’em Moist, Not Soggy: While Utricularia leptoplectra loves moisture, sitting in waterlogged soil for too long is a fast track to rot. The goal is consistently damp soil, especially for cuttings that haven’t rooted yet.
- Humidity is Your Friend: These little darlings thrive in high humidity. Once you’ve planted your cuttings, cover the pot or tray with a clear plastic dome or bag. Make sure to open it daily for a few minutes to allow for air circulation and prevent mold growth.
- Bottom Heat if You Have It: If you have the luxury of a heat mat, placing your propagation trays on it can really speed things up. Gentle bottom warmth encourages root development much faster than room temperature alone.
Aftercare and What to Watch For
Once your cuttings look like they’re starting to develop new growth – tiny leaves unfurling or stolons extending – you’re on the right track!
- Continue Misting: Keep the potting mix consistently moist with distilled water. Misting the leaves directly can also be beneficial.
- Gradually Acclimate: As your new plants grow stronger and develop a decent root system, you can gradually reduce the humidity by opening the dome or bag for longer periods. Eventually, you can remove it altogether.
- Signs of Trouble: The most common issue is rot, which usually looks like a mushy, brown stem or leaves at the soil line. This is often a sign of overwatering or poor air circulation. If you see this, remove the affected part immediately and check your watering practices. If the entire cutting turns black and mushy, it’s usually a sign that it didn’t root and succumbed to rot.
Happy Growing!
Witnessing these little plants take hold and flourish is one of the most rewarding parts of gardening. Be patient with your cuttings, and don’t get discouraged if every single one doesn’t make it. Gardening is a journey of learning and observation, and with a little care and attention, you’ll soon have a windowsill full of thriving Utricularia leptoplectra. Happy propagating!
Resource:
https://identify.plantnet.org/k-world-flora/species/Utricularia%20leptoplectra%20F.Muell./data