Hello, fellow garden enthusiasts! It’s so wonderful to connect with you today. I’ve been digging in the dirt and marveling at the plant kingdom for two decades now, and I can honestly say there’s a special kind of magic in coaxing new life from an existing plant. Today, we’re diving into the fascinating world of Typhonium trilobatum, also known as the East Indian wild ginger or creeping ginger.
Your New Passion: Propagating Typhonium Trilobatum
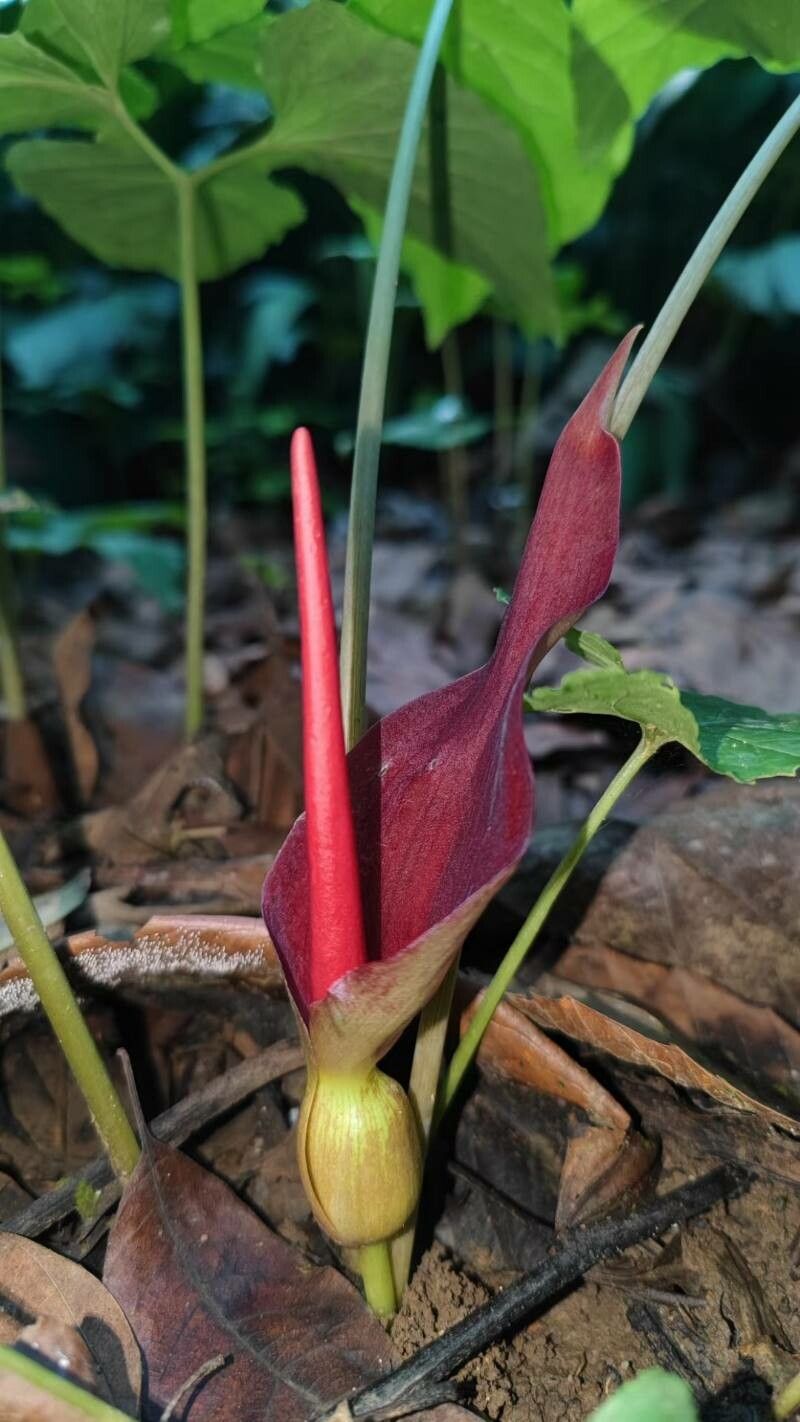
Typhonium trilobatum is a bit of an enigma, isn’t it? Its unusual, often striking spathe and often intoxicating fragrance make it a captivating plant for any collector. And the best part? Sharing a piece of that magic by propagating it is incredibly rewarding. For beginners, I’d say Typhonium trilobatum falls into the “moderately easy” category. It’s not as fuss-free as a spider plant, but with a little attention and the right approach, you’ll find success.
When to Get Your Hands Dirty
The absolute best time to propagate Typhonium trilobatum is during its active growth period. This generally means late spring through summer. You want to work with healthy, vigorous plant material. Avoid propagating when the plant is dormant or stressed, as this will significantly lower your chances of success. Look for new shoots and healthy foliage to begin with.
Your Propagation Toolkit
Gathering your supplies before you start is always a good idea. It makes the process much smoother, and trust me, you don’t want to be searching for a clean knife halfway through!
- Sharp, clean pruning shears or a sharp knife: For making clean cuts and minimizing damage.
- Well-draining potting mix: A good starting point is a 1:1 mix of peat moss or coco coir and perlite or coarse sand.
- Small pots or trays: Clean containers are crucial.
- Rooting hormone (optional but recommended): A powder or gel can give your cuttings a helpful boost.
- Watering can or spray bottle: For gentle watering.
- Labels and a pen: To keep track of your new plants!
Bringing New Life: Propagation Methods
Typhonium trilobatum is most commonly propagated through division, which I find to be the most reliable method.
Method: Division
This plant, over time, forms clumps of tubers connected by rhizomes. Dividing these clumps allows you to separate them into new, independent plants.
- Gently excavate: Carefully remove the parent plant from its pot. If it’s in the ground, dig around it to loosen the root ball.
- Locate the divisions: Gently shake away excess soil to expose the rhizomes and tubers. You’ll see where new shoots are emerging from the main central tuber or rhizome.
- Make the cut: Using your clean, sharp shears or knife, carefully divide the clump. Aim to separate pieces with at least one healthy tuber and a developing shoot or root. Don’t be afraid to get in there; the plant is quite robust.
- Pot them up: Fill your clean pots with your well-draining potting mix. Make a small divot in the center and place your division so the top of the tuber is just below the soil surface, with the new shoot pointing upwards.
- Water gently: Water thoroughly but gently, ensuring the soil is moist but not waterlogged.
The “Secret Sauce”: My Insider Tips
After years of trying different things, I’ve learned a few tricks that really make a difference.
- Don’t rush the new growth: When you’re dividing, resist the urge to aggressively pull them apart. Use your tool to make a clean cut. This prevents damaging delicate developing roots and shoots.
- Warmth is good: While not strictly necessary for division, if you happen to be experimenting with other methods (like cuttings), providing a little bottom heat can significantly speed up root formation. A heat mat works wonders.
- Let them breathe: After dividing and repotting, place your new divisions in a bright spot with indirect light. Avoid direct sun, which can scorch tender new growth. Good air circulation is also key to preventing fungal issues.
Life After Roots: Aftercare & Troubleshooting
Once your divisions are potted, keep the soil consistently moist but not waterlogged. You’ll know roots are forming when you see new leaf growth emerge.
The biggest challenge you might face is rot. This almost always happens due to overwatering or poor drainage. If you see your new plant looking limp and mushy at the base, or if the tuber seems to be decaying, it’s likely rot. Unfortunately, this is often difficult to recover from. Make sure your pots have drainage holes and don’t let them sit in saucers of water.
Happy Growing!
Propagating Typhonium trilobatum is a journey of patience and observation. Don’t be discouraged if your first attempt isn’t perfect. Each successful new plant you nurture is a triumph, a testament to your green thumb and newfound connection with this unique plant. Enjoy the process, and I can’t wait to hear about your successes! Happy gardening!
Resource:
https://identify.plantnet.org/k-world-flora/species/Typhonium%20trilobatum%20(L.)%20Schott/data