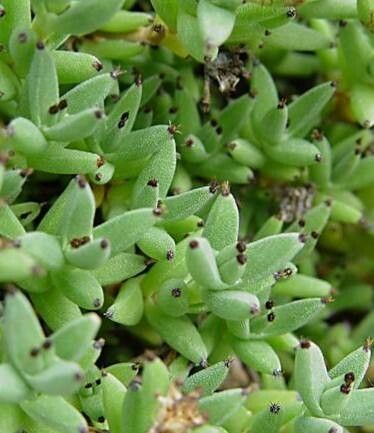
Oh, hello there! I’m so glad you’ve found your way to my little corner of the internet. Today, we’re diving into the delightful world of Trichodiadema mirabile, a succulent that truly captures the imagination. Its intricate, branch-like stems adorned with tiny, jewel-like flowers make it a standout in any collection. And honestly, there’s a special kind of joy in coaxing a brand-new plant into existence from a small piece of its parent. It’s a truly rewarding experience to watch something grow from your efforts. Now, for beginners, I’d say Trichodiadema mirabile is moderately easy. It’s not quite as forgiving as a Sedum, but with a bit of attention, you’ll have success.
The Best Time to Start
When it comes to getting your propagation off to the best start, I always recommend working with Trichodiadema mirabile during its active growing season. For most of us, this means late spring through summer. You’ll see the plant really pushing out new growth then, and those tender shoots will have the best chance of taking root quickly. Avoid propagating when the plant is stressed, like during extreme heat or a cold snap.
Supplies You’ll Need
Gathering your tools beforehand makes the whole process much smoother. Here’s what I like to have on hand:
- Well-draining potting mix: A specific succulent or cactus mix is perfect. You can also create your own by mixing equal parts potting soil, perlite, and coarse sand. This is crucial for preventing waterlogged roots!
- Sharp pruning shears or a knife: Clean cuts are essential.
- Rooting hormone (optional but helpful): This can really give your cuttings a boost.
- Small pots or trays: Something with drainage holes is a must.
- Watering can or spray bottle: For gentle watering.
- Gravel or perlite: For added drainage in the pots.
- Labels: So you don’t forget what you’ve planted!
Propagation Methods
There are a couple of ways we can go about multiplying our beloved Trichodiadema mirabile. I find stem cuttings to be the most reliable.
Stem Cuttings:
- Select Healthy Stems: Look for well-established, healthy stems on your mature plant. You want pieces that are at least 2-3 inches long.
- Make the Cut: Using your clean pruning shears or knife, make a clean cut just below a leaf node. A leaf node is where a leaf attaches to the stem – this is where roots are most likely to form.
- Allow to Callus: This is a super important step! Let the cut end of the stem dry out and callus over for at least 24-48 hours. You can simply leave them in a dry, airy spot out of direct sun. This prevents rot when you plant them.
- Prepare Your Pots: Fill your small pots with your well-draining potting mix. You can mix in a little extra perlite for good measure.
- Apply Rooting Hormone (Optional): If you’re using rooting hormone, dip the callused end of the cutting into the powder.
- Plant the Cuttings: Gently insert the callused end of the cutting into the soil, about an inch deep. You can usually fit 2-3 cuttings per small pot, just make sure they aren’t touching each other too much. Lightly firm the soil around them.
- Water Sparingly: After planting, give the soil a very light watering. You want it to be just moist, not soggy.
The “Secret Sauce” (Pro Tips)
After years of tinkering, I’ve learned a few tricks that can make all the difference.
- Avoid Leaf Contact with Water: When you do water, aim the water directly at the soil. If you’re using shallow trays, especially if you’re bottom-watering, make sure the leaves of your cuttings aren’t submerged. Excess moisture on the leaves can lead to rot.
- Embrace Bottom Heat (If You Can): For really stubborn cuttings, a heat mat placed underneath your pots can be a game-changer. It encourages root development much faster. You don’t need it to be super hot, just gently warm.
Aftercare & Troubleshooting
Once your cuttings are in their new homes, patience is key!
- Watering: Continue to water very sparingly. Allow the soil to dry out almost completely between waterings. You’re looking for a “thirsty” soil, not a wet one. A good test is to stick your finger in about an inch – if it feels dry, it’s time for a light drink.
- Light: Keep your cuttings in a spot with bright, indirect light. Direct sun can scorch young, vulnerable cuttings.
- Rooting: It can take anywhere from a few weeks to a couple of months for your cuttings to develop a good root system. You’ll know they’re rooting when they resist a gentle tug or you start to see new growth.
- Troubleshooting – Rot: The biggest enemy of succulent propagation is rot. If you see your cuttings turning mushy, black, or wilting dramatically at the base, it’s likely due to overwatering. Sadly, if rot sets in, it’s very difficult to save the cutting. This is exactly why the callus time and well-draining soil are so critical.
A Little Encouragement
See? It’s not so daunting, is it? Propagating Trichodiadema mirabile is a wonderful way to expand your collection and share these beauties with friends. Don’t get discouraged if your first try isn’t perfect. Gardening is an ongoing experiment, and each season brings new lessons. Just enjoy the process, be patient, and celebrate every little success. Happy propagating!
Resource: