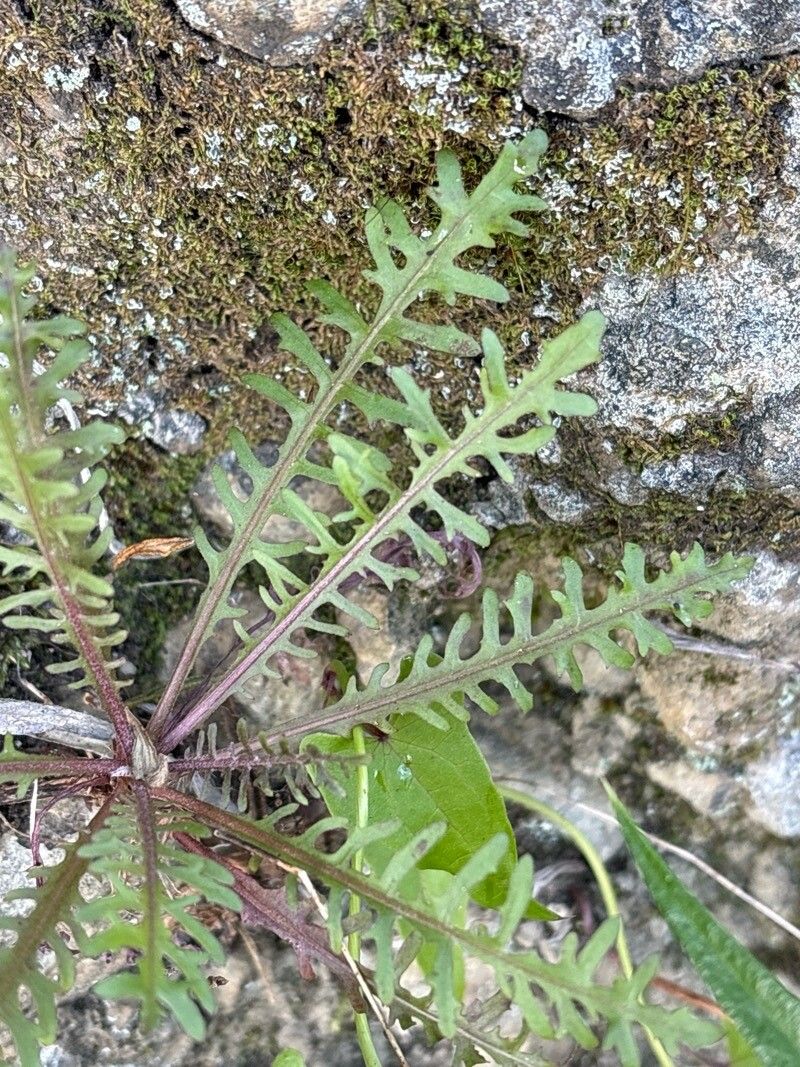
Hello, fellow garden enthusiasts! Today, I want to chat about a plant that brings a touch of sunny, cheerful sass to any garden: Tolpis coronopifolia. You might know it by its common name, Maltese Crosswort, or perhaps its delicate, daisy-like yellow flowers have captured your eye. Growing Tolpis is like having little bursts of sunshine peeking out from your flowerbeds, and propagating it yourself? Well, that’s incredibly rewarding. It’s not the most common plant you’ll find at every nursery, which makes having your own babies even more special. Good news for beginners: propagating Tolpis is generally quite forgiving, making it a wonderful plant to try your hand at!
The Best Time to Start
My favorite time to begin propagating Tolpis coronopifolia is in the late spring or early summer. This is when the plant is actively growing and has plenty of energy to put into developing new roots. You’re looking for stems that are firm but not woody – think of them as being in that sweet spot, just before they become tough. Waiting until after the main flush of flowering is also a good idea, as it allows the plant to focus its resources on vegetative growth.
Supplies You’ll Need
Gathering your supplies beforehand makes the whole process so much smoother. Here’s what I always have on hand:
- Sharp Pruning Shears or a Clean Knife: For making clean cuts.
- Potting Mix: A well-draining mix is crucial. I like to use a blend of equal parts peat moss or coco coir, perlite, and a bit of coarse sand.
- Small Pots or Seed Trays: Clean ones, of course! Even old yogurt containers with drainage holes poked in work a treat.
- Rooting Hormone (Optional but Recommended): Not essential for Tolpis, but it can give your cuttings a helpful boost.
- Watering Can or Spray Bottle: For gentle watering.
- Plastic Bag or Dome: To create a humid environment for your cuttings.
- Labels and a Marker: To keep track of what you’re growing!
Propagation Methods: Let’s Get Our Hands Dirty!
Tolpis coronopifolia is fairly cooperative when it comes to propagation, and stem cuttings are my go-to method.
Method: Stem Cuttings
- Take Cuttings: In late spring or early summer, select healthy, non-flowering stems. Using your sharp shears or knife, take cuttings that are about 4-6 inches long. Make a clean cut just below a leaf node (the point where a leaf attaches to the stem).
- Prepare the Cuttings: Gently remove the lower leaves, leaving just a few at the top. This is important to prevent them from rotting when buried in the soil. If your cuttings are long, you can pinch out the very tip to encourage bushier growth later on.
- Apply Rooting Hormone (If Using): Dip the cut end of each stem into your rooting hormone. Tap off any excess.
- Plant the Cuttings: Fill your small pots with your well-draining potting mix. Make a hole in the center of the mix with your finger or a pencil. Insert the prepared cutting into the hole, ensuring the leaf nodes you cleared are below the soil surface. Gently firm the soil around the stem.
- Create a Humid Environment: Water the soil gently. I like to place a clear plastic bag over the pot, securing it with a rubber band, or use a propagation dome. This traps moisture and mimics the humid conditions cuttings need to root. Place the pot in a bright spot, but out of direct sunlight.
The “Secret Sauce” (Pro Tips)
Now, for those little tricks that make all the difference!
- Don’t let the leaves touch the water: If you opt for a water propagation method (though soil is generally more reliable for Tolpis), make sure none of the leaves are submerged. They’ll rot in no time. Roots need to form on a clean stem.
- Bottom heat is your friend: If you have a heat mat, placing your pots on it can significantly speed up rooting. Tolpis loves a bit of warmth to encourage those new root cells to form.
- Mist regularly: Even with the plastic bag, the soil can dry out. Give your cuttings a gentle misting with your spray bottle every few days to keep things consistently moist.
Aftercare & Troubleshooting
Once you start to see signs of new growth, like tiny leaves emerging at the top, that’s a good indicator that roots are forming! You can gently tug on a cutting—if there’s resistance, you’ve got roots!
- Acclimatize: Once rooted, gradually remove the plastic bag or dome over a week or so. This allows the new plant to get used to the ambient humidity.
- Repot: When the new plant is strong enough (and the roots are filling the pot), you can transplant it into a slightly larger pot with fresh potting mix. Continue to provide bright, indirect light.
- Troubleshooting: Rot: The most common issue you’ll encounter is rot. If your cuttings look mushy, brown, or are wilting dramatically, it’s usually a sign of overwatering or poor drainage. Ensure your soil is airy and water only when the top inch of soil feels dry. If you catch it early, you might be able to salvage a healthy tip and try again.
A Little Patience Goes a Long Way
Growing new plants is such a joy, and watching a tiny cutting transform into a beautiful flowering specimen is incredibly satisfying. Remember, propagation is a process, and not every single cutting will succeed. Don’t get discouraged if some don’t make it! Be patient, keep an eye on your little charges, and enjoy the journey of nurturing new life right from your own garden. Happy propagating!
Resource:
https://identify.plantnet.org/k-world-flora/species/Tolpis%20coronopifolia%20(Desf.)%20Biv./data