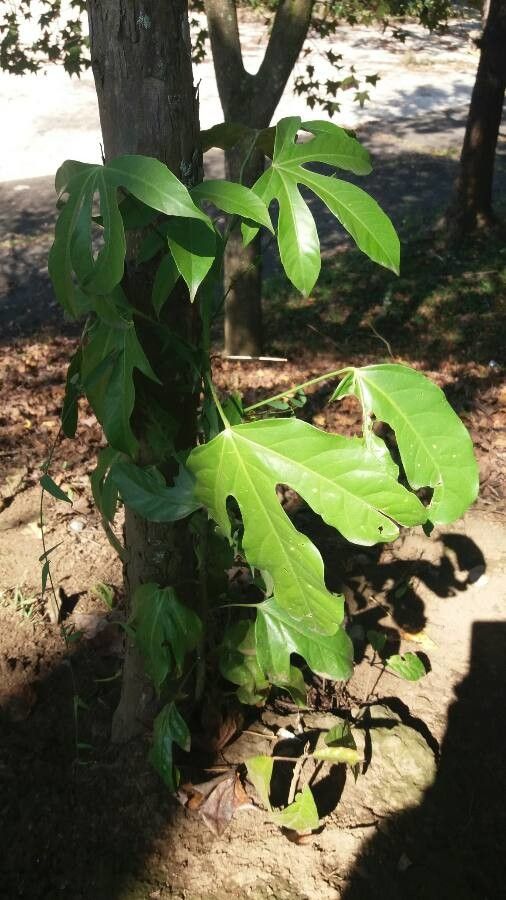
Ah, Sterculia kayae! If you haven’t had the pleasure, let me tell you, this is one of those plants that just makes you smile. With its wonderfully architectural leaves and often surprisingly delicate flowers that appear when you least expect them, it’s a real showstopper. And the best part? It’s not as tricky to propagate as you might think, making it a truly rewarding project for any gardener looking to expand their collection or share a bit of green magic with friends. For beginners, it’s a fantastic starting point; you’ll feel like a seasoned pro in no time!
The Best Time to Start
Honestly, the sweet spot for propagating Sterculia kayae is generally in the late spring or early summer. This is when the plant is really in a growth spurt, pushing out new energy and making it much more receptive to rooting. You’ll want to be working with healthy, vigorous new growth – not the old, woody stems. Think of it like children; they’re always more adaptable when they’re young and full of life!
Supplies You’ll Need
Gathering your tools before you begin is always a good idea. It keeps the process smooth and focused. Here’s what I usually have on hand:
- Sharp, clean pruning shears or a razor blade: For making clean cuts. Sterilize them with rubbing alcohol to prevent disease.
- Potting mix: A well-draining blend is crucial. I like to mix equal parts perlite and peat moss, or use a good quality cactus and succulent mix. You can even add a bit of orchid bark for extra aeration.
- Rooting hormone powder or gel: This isn’t strictly essential for Sterculia kayae, but it can definitely give your cuttings a little boost and speed up the process.
- Small pots or propagation trays: Clean pots are a must. Four-inch pots are usually a good size for individual cuttings.
- Plastic bags or a propagation dome: To create a humid environment for your cuttings.
- Watering can or spray bottle: For gentle watering.
- Labels and a marker: To keep track of what’s what, especially if you’re doing multiple plants!
Propagation Methods: Taking Cuttings
The most successful way I’ve found to propagate Sterculia kayae is through stem cuttings. It’s straightforward and yields great results.
- Select Your Cutting: Look for a healthy stem that has at least two or three leaf nodes. A node is where a leaf attaches to the stem. You want a piece that’s about 4-6 inches long.
- Make the Cut: Using your sterilized sharp tool, make a clean cut just below a node. This is where the magic of root development often happens.
- Prepare the Cutting: Gently remove the lower leaves from the cutting, leaving just a couple at the very top. This prevents them from rotting in the soil. If your cutting is very long, you can even remove the very tip of the top leaves to reduce water loss.
- Apply Rooting Hormone (Optional but Recommended): Dip the cut end of the stem into your rooting hormone, tapping off any excess.
- Plant Your Cutting: Fill your clean pots with your well-draining potting mix. Make a small hole in the center of the soil with your finger or a pencil.
- Insert the Cutting: Place the prepared end of the cutting into the hole, ensuring at least one node is buried under the soil surface. Gently firm the soil around the base of the cutting to provide support.
- Water Gently: Water the soil thoroughly but gently. You don’t want to dislodge your cutting.
- Create Humidity: Cover the pot with a clear plastic bag (poke a few small holes for ventilation) or place it under a propagation dome. This keeps the moisture around the leaves and helps prevent wilting.
- Provide Light and Warmth: Place the pot in a bright spot with indirect sunlight. Avoid direct sun, which can scorch the delicate cutting. A warm location, perhaps on a heat mat if you have one, truly speeds things along.
The “Secret Sauce” (Pro Tips)
Here are a couple of little tricks I’ve learned over the years that can make all the difference:
- Don’t let the leaves touch the water in the soil surface: If you’re doing water propagation (which can also work for Sterculia kayae, though I find soil better), ensure no leaves are submerged. They’ll just rot and invite trouble. In soil, this means trimming them back properly.
- Bottom heat is your best friend: Seriously, popping your pots on a gentle heat mat can dramatically improve rooting success. It mimics the warm soil that plants love and encourages root development from the bottom up.
Aftercare & Troubleshooting
Once you see signs of new growth – tiny leaves unfurling or a slight resistance when you gently tug the cutting – it’s a fantastic indicator that roots have formed!
At this point, you can gradually acclimate your new plant to slightly lower humidity. Start by opening the plastic bag for a few hours each day, and then remove it entirely after a week or so. Continue to water when the top inch of soil feels dry.
The most common culprit for failure is rot. If your cutting turns mushy, gooey, or develops black spots, it’s probably rotted. This is usually due to:
- Too much moisture: The soil stays soggy for too long.
- Poor drainage: The potting mix isn’t letting water escape.
- Lack of airflow: The humid environment becomes stagnant.
Don’t despair if your first attempt doesn’t work out. Gardening is a journey of learning and adapting. Sometimes, it just takes a tweak to your method or a little more patience.
A Little Patience, A Lot of Joy
Propagating Sterculia kayae is such a satisfying process. It’s a living testament to the plant’s resilience and your green-thumb talents. Be patient with your cuttings; they have their own timeline. Watch them closely, provide what they need, and celebrate each tiny sign of progress. Before you know it, you’ll have a beautiful new plant to call your own, and the immense joy that comes from nurturing life from a simple stem. Happy propagating!
Resource:
https://identify.plantnet.org/k-world-flora/species/Sterculia%20kayae%20P.E.Berry/data