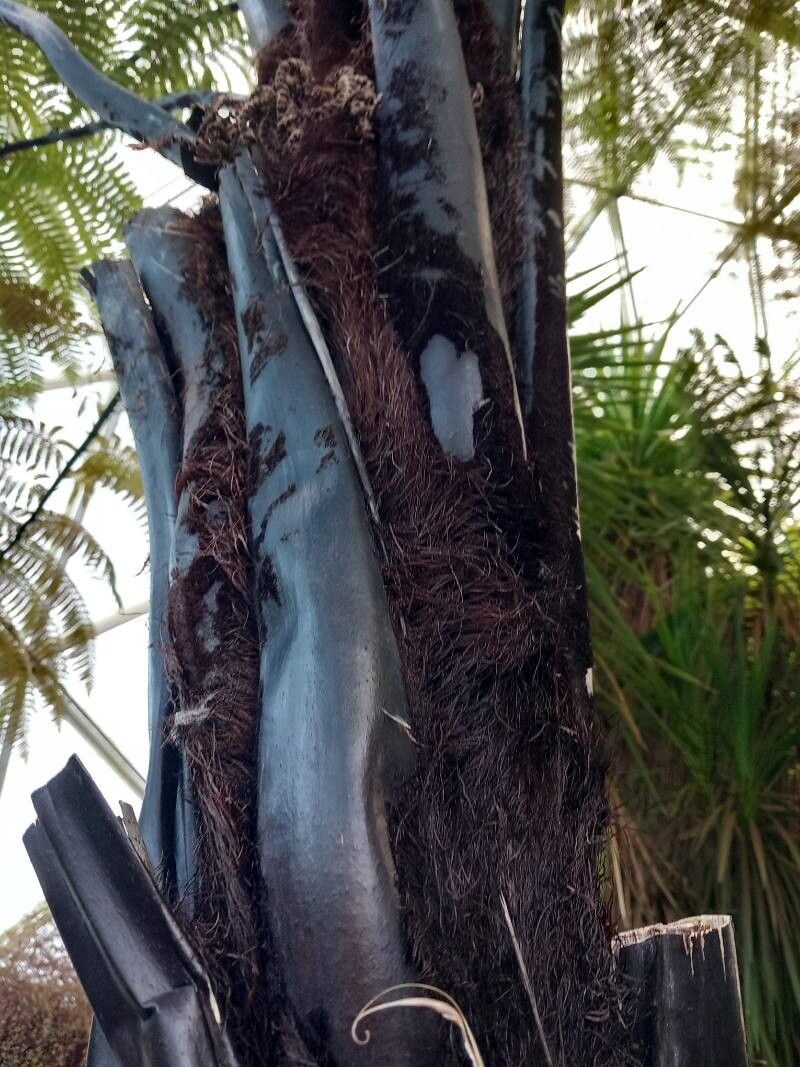
Hello fellow plant lovers! I’m so excited to dive into the wonderful world of propagating Sphaeropteris medullaris, also known affectionately as themamaku, or the black-tree fern. If you’ve ever seen one of these giants gracing a garden, you know the sheer prehistoric beauty they bring. Their fronds unfurl with such majestic grace, and the dark, fibrous trunk is simply stunning. Propagating them yourself is incredibly rewarding, like coaxing a little bit of ancient magic into your own space. Now, I’ll be honest, propagating mamaku isn’t always a walk in the park, especially for complete beginners. It requires a bit of patience and understanding, but with these tips, you’ll be well on your way to success.
The Best Time to Start
For the highest chance of success, I always recommend starting your mamaku propagation in late spring or early summer. This is when the plant is in its most vigorous growth phase. You’ll have lush, healthy fronds and plenty of energy reserves in the parent plant to draw from. Waiting until the weather is consistently warm and humid also helps considerably, mimicking the natural conditions these ferns thrive in.
Supplies You’ll Need
Gathering your supplies beforehand makes the whole process much smoother. Here’s what I usually have on hand:
- Sharp Pruning Shears or a Clean Knife: For making clean cuts.
- Well-Draining Potting Mix: I often use a 50/50 blend of peat moss and perlite, or a good quality fern-specific potting mix. Adding some orchid bark can also be beneficial for aeration.
- Small Pots or Trays: With drainage holes! This is crucial.
- Plastic Bags or a Propagator: To create a humid environment.
- Rooting Hormone (Optional but Recommended): A powder-based rooting hormone designed for cuttings can give you an extra boost.
- Watering Can with a Fine Rose: To water gently.
- Labels: To mark your propagation date and type.
Propagation Methods
Mamaku are primarily propagated from spores, which is quite like starting from seed, or by dividing the rhizome. While stem cuttings aren’t ideal for this particular fern, we’ll focus on the most successful methods for the home gardener.
1. Propagating from Spores (The “Seedling” Method)
This method requires a bit more patience, as you’re essentially growing from spores, similar to how other ferns reproduce.
- Harvesting Spores: Look on the underside of healthy, mature fronds. You’ll find clusters of dusty-looking structures called sori. When these sori are mature (often a brown or rust color), gently scrape them into a clean, dry paper envelope or dish. Be careful not to collect any green or immature material.
- Sowing the Spores: You can sow these spores on a sterile, moistened seed-starting mix or even just sterile sphagnum moss. Lightly press the spores onto the surface; don’t bury them.
- Creating Humidity: Cover the container with a clear plastic lid, plastic wrap, or a clear plastic bag. The goal is to maintain high humidity.
- Light and Temperature: Place the container in a bright spot that receives indirect light. Keep it warm, ideally between 65-75°F (18-24°C).
- Patience is Key: It can take several weeks to months for tiny fern prothallia (small, heart-shaped structures) to appear. These are the first signs of life. Eventually, new fernlets will emerge from the prothallia.
- Transplanting: Once the fernlets are large enough to handle (you’ll see tiny fronds), carefully transplant them into small pots filled with your well-draining potting mix. Continue to keep them humid and in bright, indirect light.
2. Division of the Rhizome
This is often the most straightforward method for getting larger plants quickly, but it requires a mature plant with a visible rhizome (the thick, creeping stem).
- Prepare the Parent Plant: Gently remove the mamaku from its pot. If it’s planted in the ground, carefully dig around its base.
- Inspect the Rhizome: You’re looking for sections of the rhizome that have small roots and a growing point (a bud or the start of a new frond).
- Make the Cut: Using your sharp, clean pruning shears or knife, carefully divide the rhizome. Ensure each division has at least one good root system and a growing point. It’s better to have a slightly smaller division with good roots than a large one with none.
- Potting the Divisions: Plant each division in its own pot filled with your well-draining potting mix. The rhizome should be just at or slightly below the soil surface.
- Water Gently: Water thoroughly but avoid waterlogging.
- Provide Humidity: Cover the pots with clear plastic bags or place them in a propagator to maintain high humidity. This is essential to prevent the new divisions from drying out.
- Location: Place them in a spot with bright, indirect light and stable temperatures.
The “Secret Sauce” (Pro Tips)
Here are a few tricks I’ve picked up over the years that can really make a difference:
- Think “Swampy, Not Soggy”: Ferns love humidity, but standing water is their enemy. Always ensure excellent drainage and never let your pots sit in a saucer full of water. The goal is consistently moist, not waterlogged, conditions.
- Embrace the Darkness (Initially): For spore propagation, while they need bright, indirect light, once you see those tiny prothallia, it’s okay to give them a bit of shade initially. As the baby ferns grow, they can handle more light. It’s all about a gentle transition.
- Bottom Heat is Your Friend: For both spore and division propagation, especially in cooler climates or during less-than-ideal seasons, a propagation mat or a warm windowsill can provide the gentle bottom heat that mimics a tropical environment and speeds up root development.
Aftercare & Troubleshooting
Once you see new growth emerging – tiny fronds from your sporelings or expanding fronds from divisions – you’re on the right track!
- Gradual Acclimation: As your new plants grow, gradually introduce them to less humidity. Start by opening the plastic bags for a few hours each day, slowly increasing the time until they are fully acclimated to your home’s humidity levels.
- Watering: Continue to keep the soil consistently moist but not soggy. You’ll notice they become more forgiving as they establish.
- Fertilizing: Wait until you see several healthy fronds before offering a very diluted liquid fertilizer occasionally. Young ferns are sensitive to overfeeding.
If you encounter problems:
- Rot: This is the most common issue and is usually caused by overwatering and poor drainage. If you see mushy stems or blackening, it’s often a sign of rot. Act quickly by removing affected parts and ensuring better airflow and drainage.
- Drying Out: Crispy, brown fronds, especially in new propagations, indicate they are drying out. Increase humidity immediately and check your watering routine.
A Little Patience Goes a Long Way
Propagating mamaku is a journey. There will be times you might wonder if anything is happening, but trust the process. Celebrate the small victories – the first tiny sprout, the new frond unfurling. Before you know it, you’ll have your own beautiful black-tree fern to cherish. Enjoy the magic of coaxing new life from these ancient wonders! Happy growing!
Resource: