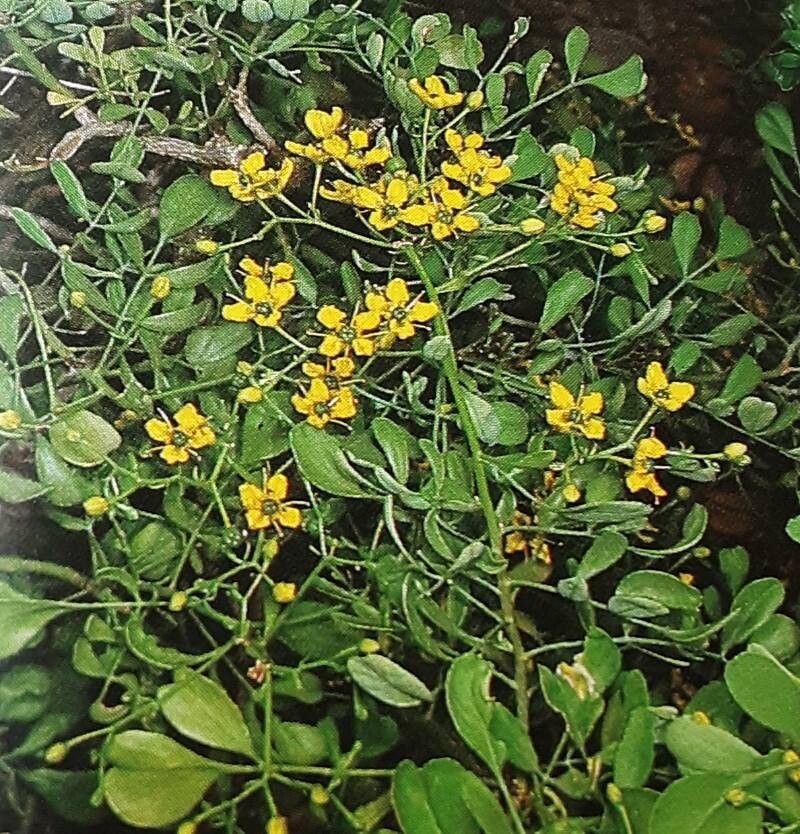
Hey there, fellow plant lovers! I’m so excited to chat with you today about a plant that brings a little bit of wild, feathery magic to any garden space: Ruta pinnata. If you haven’t met it yet, imagine delicate, fern-like foliage with a lovely, almost ethereal quality. It’s not just a pretty face, though. The real joy comes from creating more of this beauty yourself. Propagating Ruta pinnata can feel a tad tricky at first glance, but trust me, with a little patience and these tips, you’ll be well on your way to a whole new batch of these lovely plants.
The Best Time to Start
For the highest success rate with Ruta pinnata, I always recommend starting in late spring to early summer. This is when the plant is in its most vigorous growth phase. You’ll have plenty of healthy, new stems to work with, and the warmer temperatures are just what those cuttings need to get their roots going. Avoid trying to propagate during the dead of winter or when the plant is stressed from extreme heat.
Supplies You’ll Need
To get your propagation station set up, you’ll want to gather a few key items:
- Sharp Pruning Shears or a Craft Knife: Cleanliness is crucial for preventing disease.
- Rooting Hormone (Optional but Recommended): A good quality powder or gel can give your cuttings a helpful boost.
- Well-Draining Potting Mix: A blend of equal parts peat moss, perlite, and a little bit of coarse sand works wonders. You can also find specialized rooting mixes.
- Small Pots or Seed Trays: Clean pots are essential.
- Plastic Bags or Humidity Domes: To create a greenhouse effect.
- Watering Can with a Fine Rose: Gentle watering is key.
Propagation Methods
There are a couple of ways to go about making more Ruta pinnata. My favorite, and usually the most successful, is through stem cuttings.
Stem Cuttings
- Select Your Cuttings: Look for healthy, non-flowering stems from your mature Ruta pinnata. Choose stems that are about 4-6 inches long. You want them to be somewhat woody but not old and brittle.
- Make the Cut: Using your clean shears or knife, make a clean cut just below a leaf node. A leaf node is that little bump where a leaf emerges from the stem. This is where the magic of root formation really happens.
- Prepare the Cutting: Gently remove the lower leaves from the stem, leaving just a few at the top. This prevents them from rotting when buried in the soil.
- Apply Rooting Hormone (if using): Dip the cut end of the stem into your rooting hormone. Tap off any excess.
- Plant Your Cuttings: Fill your small pots with your well-draining potting mix. Make a small hole in the center of each pot with your finger or a pencil. Gently insert the cutting into the hole, pushing the soil around it to secure it.
- Water Gently: Give the soil a light watering until it’s evenly moist, but not soggy.
- Create Humidity: Cover the pot with a clear plastic bag or a humidity dome. Make sure the leaves aren’t touching the plastic. You can use stakes to prop up the bag if needed.
- Placement: Place your pots in a bright spot with indirect light. Avoid direct sun, which can scorch your delicate cuttings.
Water Propagation (Less Common for Ruta Pinnata but Possible)
While stem cuttings are my go-to, some gardeners find success with water propagation for similar plants.
- Follow steps 1-3 for stem cuttings.
- Instead of potting mix, place the prepared cuttings in a clean jar or glass of water.
- Ensure no leaves are submerged in the water. Submerged leaves will rot and can kill your cutting.
- Place the jar in a bright location with indirect light.
- Change the water every few days to keep it fresh.
- You should see roots emerge from the nodes within a few weeks. Once the roots are about an inch long, you can carefully transplant them into a pot with soil.
The “Secret Sauce” (Pro Tips)
Here are a couple of things I’ve learned over the years that make a big difference:
- Bottom Heat is Your Friend: While not strictly necessary, propagating cuttings over a gentle heat mat can significantly speed up root formation. Those roots just love a little warmth from below!
- Don’t Mist Too Much: It’s tempting to mist your cuttings, but over-misting can encourage fungal diseases. The plastic bag or humidity dome usually provides enough moisture. If your environment is exceptionally dry, a very light mist now and then is okay, but letting them breathe a bit is important.
Aftercare & Troubleshooting
Once your cuttings have developed a good root system (you’ll usually see new leaf growth, which is a good sign!), it’s time to transition them.
- Gradual Acclimation: Slowly remove the humidity covers over a few days to allow the plant to adjust to normal room humidity.
- Watering: Water your new plant when the top inch of soil feels dry. Avoid overwatering, as this is the most common culprit for root rot.
- Repotting: When the roots have filled the small pot, you can transplant your new Ruta pinnata into a slightly larger container filled with fresh potting mix.
Now, what if things don’t go according to plan? The most common issue you might face is rot. If your cuttings look mushy, black, or slimy, it’s usually due to too much moisture and not enough air circulation. If you catch it early, you might be able to salvage it by cutting away the rotten parts and repotting in fresh, drier soil. Sometimes, despite your best efforts, a cutting just won’t take. Don’t get discouraged! That’s just part of the gardening adventure.
A Encouraging Closing
Propagating Ruta pinnata is a wonderfully rewarding process. It’s about nurturing life and creating more of the beauty you love. Be patient with your new little starts, and celebrate every tiny sign of progress. Happy propagating – I know you’ve got this!
Resource:
https://identify.plantnet.org/k-world-flora/species/Ruta%20pinnata%20L.f./data