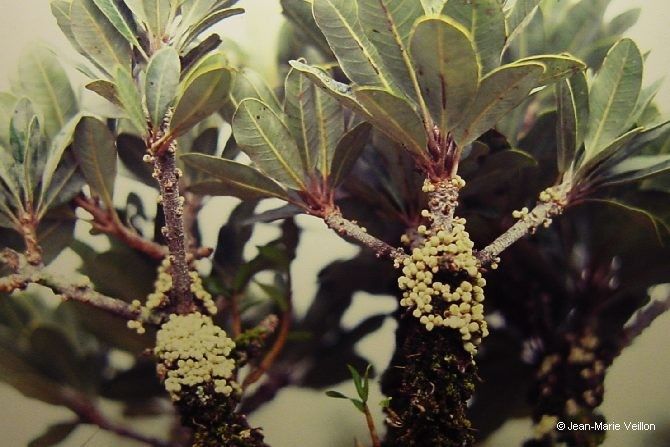
Hey there, fellow plant lovers! If you’ve ever admired the elegant, almost architectural beauty of Pycnandra cylindricarpa, you’re not alone. Those unique, cylindrical flower spikes are truly something special. And you know what’s even more rewarding than admiring one? Growing more of them yourself!
Propagating these beauties can feel a little intimidating at first, but I promise, with a little patience and a few key tricks, it’s absolutely doable. While not as fuss-free as some common houseplants, it’s a wonderful challenge for anyone looking to expand their collection and really get to know their plants on a deeper level.
The Best Time to Start
For Pycnandra cylindricarpa, the sweet spot for propagation is late spring into early summer. This is when the plant is actively growing, meaning it has more energy to put into producing roots. You’ll want to look for healthy, vigorous stems that aren’t in bloom or just finished blooming. Think of it as tapping into their peak energy reserves!
Supplies You’ll Need
To set yourself up for success, gather these essentials:
- Sharp pruning shears or a clean, sharp knife: For making clean cuts.
- Rooting hormone (optional but recommended): Look for one formulated for stem cuttings.
- Well-draining potting mix: A good blend is equal parts perlite, coco coir, and a bit of orchid bark. You want airflow around those roots!
- Small pots or propagation trays: Clean ones are a must to avoid any nastiness.
- Plastic bags or a clear propagation dome: To create a humid environment.
- Watering can or spray bottle: For gentle hydration.
- Labeling sticks: So you don’t forget what you’ve propagated!
Propagation Methods
We’ll focus on the most reliable method for Pycnandra cylindricarpa: stem cuttings.
- Choose Your Cuttings: Select healthy, non-flowering stems that are at least 4-6 inches long. Inspect for any signs of pests or disease – we only want the best!
- Make the Cut: Using your clean shears or knife, make a clean cut just below a leaf node. This is where the magic happens, where rooting hormones are concentrated.
- Prepare the Cutting: Gently remove the lower leaves, leaving just 2-3 at the top. This prevents them from rotting in the soil or water and directs the plant’s energy towards root formation.
- Apply Rooting Hormone (If Using): Dip the cut end of the stem into your rooting hormone powder or gel. Tap off any excess.
- Plant Your Cuttings: Fill your small pots with your well-draining mix. Make a hole in the center with your finger or a pencil, and gently insert the cutting. Firm the soil around it, making sure the node where you made the cut is covered.
- Create Humidity: Water the soil gently until it’s evenly moist, but not soggy. Now, cover the pot with a plastic bag (propped up so it doesn’t touch the leaves) or place it under a propagation dome.
- Find a Spot: Place your potted cuttings in a warm spot with bright, indirect light. Avoid direct sun, which can scorch the delicate cuttings.
The “Secret Sauce” (Pro Tips)
Here are a few things I’ve learned over the years that can really make a difference:
- Don’t Overwater! This is probably the biggest killer of cuttings. The soil should be consistently moist, not wet. If you can squeeze water out of it, it’s too wet. A good trick is to use pots with drainage holes and let the soil surface start to dry slightly between waterings.
- Bottom Heat is Your Friend: If you have a seedling heat mat, placing your pots on it can significantly speed up root development. It mimics the warmth from the soil surface that a parent plant experiences, giving those roots a real boost.
- Air Circulation Matters: While humidity is key, stagnant air can encourage fungal issues. If you’re using a plastic bag, “burp” it daily for a few minutes to allow for fresh air exchange.
Aftercare & Troubleshooting
Once you start to see new leaf growth at the top of your cutting, that’s a great sign! It means roots are forming. You can gently tug on the cutting – if there’s resistance, it’s starting to take hold.
- Gradually Acclimate: Once you see good growth, begin to slowly remove the plastic cover or dome over a week or so. This helps the new plant adjust to lower humidity.
- Watering: Continue to keep the soil consistently moist. As the plant grows, you can transition to a slightly less frequent watering schedule, allowing the top inch of soil to dry out.
- Signs of Trouble: The most common issue is rot, which often manifests as a black, mushy stem at the soil line. This is usually caused by overwatering and poor drainage. If you see this, it’s likely too late for that cutting. Another sign is wilting that doesn’t recover after watering – this can also be root rot or the cutting simply not taking.
A Little Patience Goes a Long Way
Propagating plants is a journey, and sometimes not every cutting makes it. Don’t get discouraged! Each attempt is a learning experience. Celebrate the wins, pay attention to what worked (and what didn’t), and most importantly, enjoy the process of bringing new life into your home. Happy growing!
Resource: