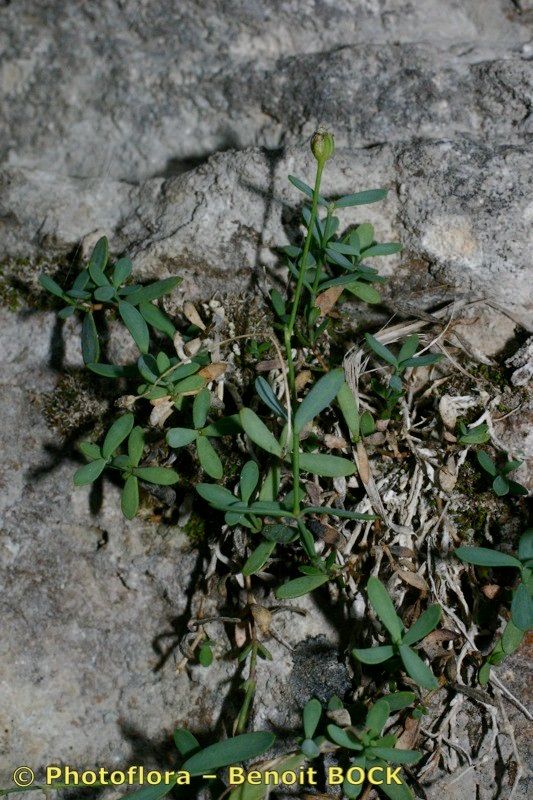
Hello, fellow garden lovers! Today, I want to chat about a real gem of a plant: Moehringia lebrunii. If you haven’t encountered it yet, imagine tiny, delicate rosettes of silver-dusted foliage, often adorned with a scattering of dainty white flowers. It’s like a miniature alpine wonderland gracing your garden. Propagating this little beauty is incredibly rewarding. While it might seem a bit niche, I’ve found Moehringia lebrunii to be quite forgiving, making it a lovely project even if you’re just dipping your toes into propagation.
The Best Time to Start
When it comes to getting the most success with Moehringia lebrunii, I always recommend spring. This is when the plant is actively growing and has the energy to focus on putting out new roots. Think of it as capturing that fresh burst of life. You can also take cuttings in early summer, but my best results are hands-down from spring propagation.
Supplies You’ll Need
Here’s what you’ll want to have on hand:
- Sharp pruning shears or a clean knife: For making precise cuts. Disinfecting them is key!
- Sterile potting mix: A blend that drains exceptionally well is crucial. I like to use a mix of equal parts perlite, sharp horticultural sand, and a good quality, peat-free potting compost.
- Small pots or trays: Clean ones, of course! Ensure they have drainage holes.
- Rooting hormone (optional but recommended): Especially helpful for encouraging quicker root development.
- Watering can with a fine rose or a mister: For gentle hydration.
- A clear plastic bag or propagation dome: To create a humid environment.
- A label and waterproof marker: Don’t forget to label what you’ve planted!
Propagation Methods
Let’s get our hands dirty with the most effective ways to multiply your Moehringia lebrunii.
Stem Cuttings
This is my go-to method.
- Select your cuttings: Look for healthy, non-flowering stems. You want pieces that are about 2-3 inches long.
- Make the cut: Using your clean shears or knife, make a sharp cut just below a leaf node. A leaf node is where a leaf attaches to the stem, and that’s where the magic for root growth happens.
- Remove lower leaves: Gently peel off the bottom few leaves. This prevents them from rotting when they’re in the soil.
- Apply rooting hormone (if using): Dip the cut end of the stem into the rooting hormone powder or gel. Tap off any excess.
- Plant the cuttings: Make small holes in your prepared, moist potting mix. Insert the cuttings, ensuring at least one leaf node is buried under the surface. Gently firm the soil around them.
- Water gently: Use your fine-rose watering can or mister to settle the soil around the cuttings. Don’t drench them; just moisten.
- Create humidity: Cover the pots with a clear plastic bag or a propagation dome. This will trap moisture and keep the humidity high, which is vital for the cuttings to root.
Division (for mature plants)
If you have a more established clump of Moehringia lebrunii, division is a fantastic, straightforward option.
- Gently unpot the plant: Carefully remove the entire plant from its container or dig it up from the garden.
- Gently tease apart the root ball: Look for where the plant naturally wants to split apart into smaller sections. You can use your fingers or a clean trowel. For tougher clumps, you might need to use a clean knife to cut through stubborn roots.
- Ensure each section has roots and some foliage: You’re aiming for viable pieces that can establish themselves.
- Replant immediately: Pot up each division into its own container with fresh, well-draining potting mix. Water them in well.
The “Secret Sauce” (Pro Tips)
Here are a couple of tricks I’ve picked up that really make a difference:
- This one is crucial for cuttings: Make absolutely sure that no leaves are touching the soil surface or sitting below the soil line when you plant your stem cuttings. Any foliage submersed can quickly start to rot, which can infect the whole cutting and doom your efforts before they even begin.
- For stem cuttings, bottom heat is a game-changer. If you can, place your pots on a heated propagator mat or near a warm, indirect light source. This gentle warmth encourages those roots to form much faster and more vigorously.
Aftercare & Troubleshooting
Once your cuttings have rooted – you’ll see new growth appearing, and they’ll feel firm when gently tugged – it’s time for a bit of pampering.
Gradually acclimatize them to normal air by opening the plastic bag or dome a little more each day over a week. Once they’re independent, keep them in bright, indirect light and water only when the top inch of soil feels dry. Avoid letting them get waterlogged.
The most common issue you’ll encounter is rot. If you see your cuttings turning black and mushy, it’s usually a sign of too much moisture and not enough airflow, or the soil wasn’t draining well enough. Don’t be discouraged; it happens to the best of us! Just remove the affected cuttings, clean up your pot, and try again with your adjusted mix and watering schedule.
A Encouraging Closing
Propagating plants, especially delicate treasures like Moehringia lebrunii, is a journey. Be patient with yourself and with your little green charges. It’s amazing to watch life begin from a tiny snippet. Enjoy the process, celebrate your successes, and learn from any setbacks. Happy propagating!
Resource:
https://identify.plantnet.org/k-world-flora/species/Moehringia%20lebrunii%20Merxm./data