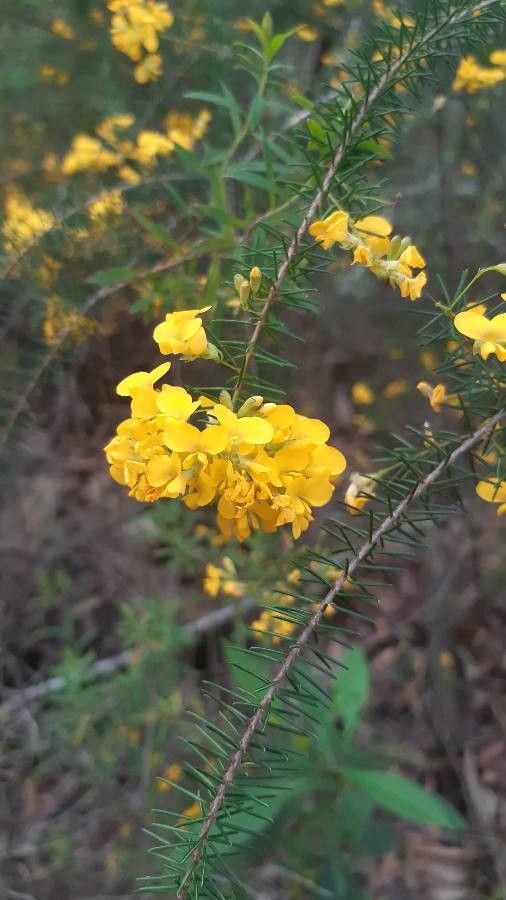
Oh, Pultenaea glabra! You’ve got yourself a real charmer there. I remember the first time I saw its delicate, pea-like yellow flowers carpeting a bush – it was pure magic. Bringing a bit of that sunshine into your own garden, or even just sharing it with a friend, by propagating your own plants? That’s incredibly rewarding. Now, I’ll be honest, Pultenaea glabra isn’t quite as straightforward as, say, a spider plant. It might take a little patience, but don’t let that deter you! I think even a keen beginner can have success with this one.
The Best Time to Start
For our Pultenaea glabra, the sweet spot for propagation is definitely late spring to early summer. This is when the plant is actively growing and has plenty of fresh, vigorous shoots to work with. You’re looking for stems that are semi-hardwood – they’re not floppy and green like new growth, but they haven’t turned woody yet. Think of it as that perfect stage between tender and tough.
Supplies You’ll Need
Gathering your tools beforehand makes the whole process so much smoother. Here’s what I usually have on hand:
- Sharp pruning shears or a clean knife: For taking clean cuttings.
- A good quality seed-raising mix or a well-draining potting mix: I often mix my own: one part peat, one part perlite, and one part coarse sand works wonders.
- Small pots or trays: Clean ones are essential to prevent disease. Four-inch pots are a good size to start.
- Rooting hormone powder or gel: This is a big helper for encouraging root formation, though some think it’s optional. I find it really boosts success rates.
- A plastic bag or propagator: To create a humid environment for your cuttings.
- Watering can with a fine rose: For gentle watering.
- Labels and a marker: So you don’t forget what you’ve potted!
Propagation Methods
While Pultenaea glabra can be grown from seed, I find stem cuttings to be the most reliable and rewarding method. It gives you a much greater chance of success and produces a plant identical to the parent.
Here’s how I do it:
- Take Your Cuttings: On a bright morning, select healthy, non-flowering shoots from your Pultenaea glabra. Using your clean secateurs, take cuttings about 10-15 cm long. Make the cut just below a leaf node (where a leaf attaches to the stem).
- Prepare the Cuttings: Gently strip off the lower leaves from the bottom half of the cutting. This prevents them from rotting when buried and encourages root growth from the nodes. If the leaves are large, you can even snip them in half to reduce water loss.
- Apply Rooting Hormone: Dip the cut end of each prepared cutting into your rooting hormone powder or gel, tapping off any excess.
- Pot Up: Fill your clean pots with your chosen potting mix. Make a small hole in the center of the mix with a pencil or your finger. Gently insert the cutting into the hole, ensuring the hormone-coated end is well-covered by the soil. Firm the soil gently around the base of the cutting.
- Water Gently: Water the pots thoroughly with your fine-rose watering can. You want the soil to be moist, but not waterlogged.
- Create Humidity: Place a clear plastic bag over the pot, securing it around the rim with a rubber band or tape. This creates a mini-greenhouse. You can also use a propagator lid.
The “Secret Sauce” (Pro Tips)
Here are a couple of things I’ve learned over the years that really make a difference:
- Bottom Heat is Your Friend: If you have an old heat mat or can place your pots on a warm windowsill (but out of direct, scorching sun), it can dramatically speed up root development. It mimics the warmth of spring and encourages those roots to get going faster.
- Don’t Be Afraid to Sterilize: Before you start, give your pots and cutting tools a quick soak or wipe down with diluted bleach or methylated spirits. It’s a small step, but it can prevent fungal diseases from taking hold of your precious cuttings.
Aftercare & Troubleshooting
Once your cuttings are potted and cozy under their plastic, the wait begins. Keep them in a bright spot out of direct sunlight. Check the soil moisture every few days and mist the leaves if they look a bit dry, but try to avoid getting the soil too soggy.
You’ll know your cuttings are rooting when you see new growth appearing or when you gently tug on a cutting and feel some resistance. This can take anywhere from 4 to 8 weeks, sometimes longer.
The biggest enemy here is rot. If you find your cuttings looking mushy, black, or collapsing, it’s usually a sign of too much moisture and not enough air circulation. You can try taking them out, wiping them clean, and repotting them in fresh, drier mix, and ensuring the bag isn’t sealed too tightly. If several cuttings go bad, check your watering routine and ventilation.
A Encouraging Closing
Propagating Pultenaea glabra is a journey. There will be times you might doubt yourself, but remember that every experienced gardener has had their share of failures. Trust the process, be patient, and celebrate every little sign of success. Soon you’ll be enjoying your own beautiful Pultenaea glabra, and maybe even sharing the joy with others! Happy gardening!
Resource:
https://identify.plantnet.org/k-world-flora/species/Pultenaea%20glabra%20Benth./data