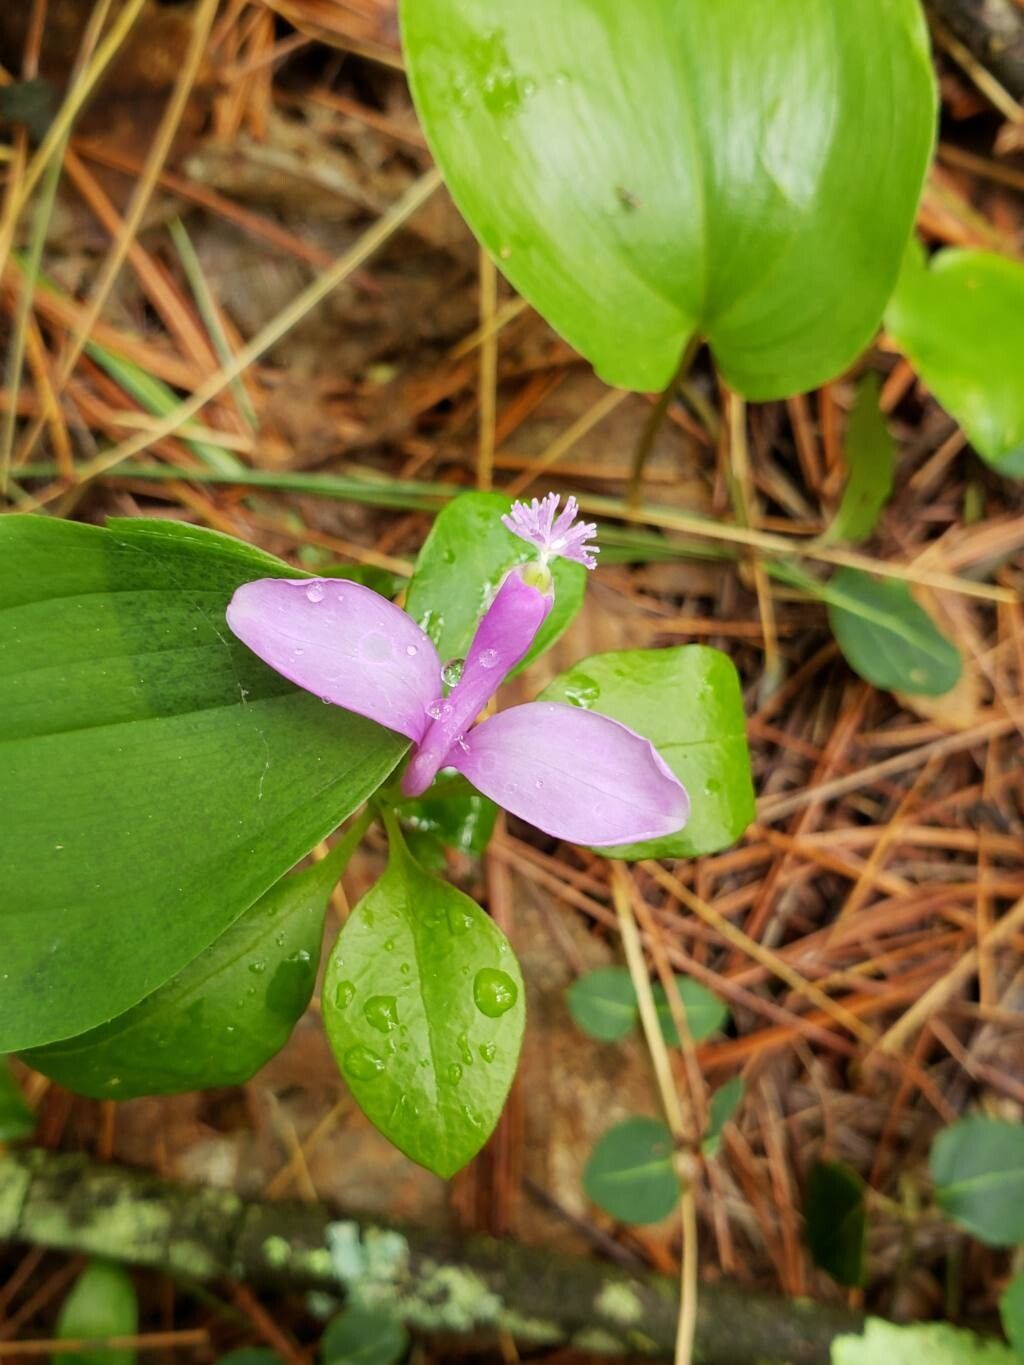
Oh, hello there! I’m so glad you’ve stumbled upon my little corner of the gardening world. Today, we’re going to talk about a real gem: Polygaloides paucifolia, or as many of us affectionately call it, Fringed Polygala. If you’ve ever seen this beauty gracing a woodland garden with its delicate, pea-like flowers and lovely evergreen foliage, you know exactly why it’s so captivating. It has this understated elegance that just makes you happy. And the best part? Bringing more of these charmers into your life through propagation is incredibly rewarding. Now, is it a beginner-friendly plant to propagate? Honestly, it leans a little more towards the “intermediate” side, but with a bit of patience and the right guidance, I truly believe anyone can succeed.
The Best Time to Start
For Polygaloides paucifolia, the winning ticket is usually late spring to early summer. You want to catch it when it’s actively growing. Think of it as giving your cuttings a good head start. This is when the plant is full of energy, and those new stems are more pliable and ready to put down roots. Avoid propagating when the plant is stressed, like during a heatwave or right after a really dry spell.
Supplies You’ll Need
Gathering your tools beforehand is half the battle, isn’t it? Here’s what I typically have on hand:
- Sharp Pruning Shears or a Craft Knife: Clean cuts are essential.
- Rooting Hormone: A powdered hormone works wonders for encouraging root development.
- Well-Draining Potting Mix: I like a blend of peat moss or coco coir, perlite, and a bit of sand. About a 2:1:1 ratio is a good starting point.
- Small Pots or Trays: Seedling pots or even small yogurt containers with drainage holes will do.
- Plastic Bags or a propagator lid: To create a humid environment.
- Watering Can with a Fine Rose: Gentle watering is key.
- Stake or label: To remember what you’ve planted!
Propagation Methods
Let’s dive into how we can create new Fringed Polygala plants. My preferred method is taking stem cuttings, as it’s reliable and gives you a good chance of success.
Stem Cuttings
- Select Your Cuttings: Look for healthy, non-flowering stems from your mature plant. You want stems that are about 4-6 inches long. They should be firm but still a bit flexible – not stiff and woody, and definitely not soft and brand new.
- Make the Cut: Using your sterilized pruning shears or knife, make a clean cut just below a leaf node (where a leaf attaches to the stem). This is where roots are most likely to form.
- Prepare the Cutting: Gently remove the leaves from the bottom half of your cutting. You can leave a couple of leaves at the very top to help with photosynthesis. If the remaining leaves are very large, you can even snip them in half to reduce water loss.
- Dip in Rooting Hormone: Lightly moisten the cut end of the stem and then dip it into your powdered rooting hormone, tapping off any excess. This step is like giving your cutting a little super-boost.
- Plant Your Cuttings: Fill your small pots with your prepared potting mix. Make a small hole in the center with a pencil or your finger. Gently insert the cutting into the hole, ensuring the hormone-coated end is fully covered by soil. Firm the soil gently around the stem.
- Water Gently: Water the potting mix thoroughly until you see water drain from the bottom of the pot.
- Create Humidity: This is crucial! You want to create a mini-greenhouse effect. You can do this by covering the pot with a clear plastic bag (make sure it doesn’t touch the leaves) or by using a propagator lid. Place the pots in a bright location but out of direct, harsh sunlight.
Water Propagation (An Alternative)
While I find stem cuttings in soil more fool-proof for Polygaloides paucifolia, some gardeners love water propagation.
- Select and Prepare Cuttings: Follow steps 1-3 from the stem cutting method.
- Place in Water: Fill a clean jar or glass with room-temperature water. Place the prepared cuttings in the water, making sure no leaves are submerged – this is key to preventing rot.
- Change Water Regularly: Change the water every few days to keep it fresh and oxygenated.
- Wait for Roots: Keep the jar in bright, indirect light. You should start to see small white roots emerging from the nodes after a few weeks.
- Plant When Ready: Once the roots are about an inch long, you can carefully transplant them into your well-draining potting mix. Be extra gentle with these root systems!
The “Secret Sauce” (Pro Tips)
Here are a couple of things I’ve learned over the years that can really make a difference:
- Bottom Heat is Your Friend: If you have a propagation mat, placing your pots on it can significantly speed up root formation. It mimics the warmth of spring soil and encourages those roots to get going.
- Don’t Be Impatient with the Water Method: With water propagation, it’s easy to get anxious waiting for roots. Resist the urge to poke and prod them too much. Just let them grow. Also, if you see any fuzz or slime developing in the water, change it immediately.
Aftercare & Troubleshooting
Once you see signs of new growth – tiny leaves unfurling or the cutting resisting a gentle tug (this indicates root formation!) – it’s time to start acclimating them.
- Gradually Reduce Humidity: Over a week or two, start lifting the plastic bag or lid for longer periods each day. This helps the new plant adjust to normal humidity levels.
- Watering: Keep the soil consistently moist but not waterlogged. Let the top inch of soil dry out slightly between waterings.
- Light: Continue to provide bright, indirect light. As the plant matures, you can gradually introduce it to more sunlight, depending on its needs.
- Repotting: Once the new plants have a good root system and are showing robust growth, you can transplant them into slightly larger pots.
Most common issues stem from overwatering or poor drainage, leading to rot. If your cutting turns black and mushy, or develops mold, it’s usually a sign that it’s gotten too wet and lacked sufficient air circulation. Scraping away the rot and trying again with fresh medium and careful watering is your best bet. Sometimes, even with the best care, a cutting just won’t take. It happens to all of us! Don’t get discouraged.
A Encouraging Closing
Propagating Polygaloides paucifolia is a journey, not a race. Be patient with your little cuttings; they’re working hard to establish themselves. Celebrate every new leaf and every tiny root you discover. The joy of watching a new plant grow from a simple stem is incredibly fulfilling. Happy propagating, and enjoy the beauty these plants bring to your garden!
Resource: