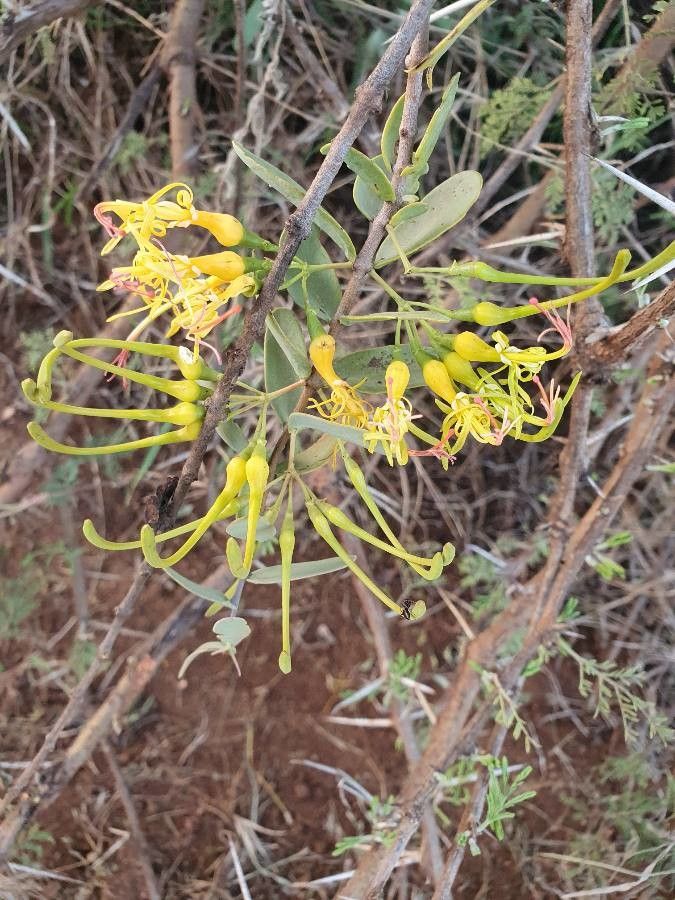
Oh, hello there! So, you’ve fallen in love with the elegance of Plicosepalus sagittifolius? Smart choice! This gorgeous plant, with its graceful, arrow-shaped leaves and often delicate blooms, brings such a beautiful touch to any space. And the best part? Sharing that beauty by propagating it yourself is incredibly satisfying.
Now, I won’t fib – Plicosepalus sagittifolius isn’t always the absolute easiest plant to start from scratch, especially for total beginners. It can be a tad particular. But with a little patience and the right know-how, you absolutely can coax new life from your favorite specimens. Think of it as a rewarding challenge that truly pays off.
The Best Time to Start
My top recommendation for propagating Plicosepalus sagittifolius is during its active growing season. For most gardeners, this means late spring through early summer. The plant is full of vigour then, meaning it’s better equipped to handle the stress of propagation and has all the energy it needs to develop new roots. Avoid trying this when the plant is dormant or overly stressed.
Supplies You’ll Need
Gathering your supplies beforehand makes the whole process much smoother. Here’s what I always have on hand:
- Sharp, clean pruning shears or a razor blade: For making clean cuts.
- Sterilizing agent: Like rubbing alcohol or a bleach solution to clean your tools.
- Rooting hormone powder or gel: This is a big help for encouraging roots. Look for one formulated for softwood or semi-hardwood cuttings.
- Well-draining potting mix: A good blend for me is 50% perlite and 50% high-quality potting soil. Some growers also like to add a bit of coco coir for moisture retention, but make sure it’s still airy.
- Small pots or trays: With drainage holes is crucial!
- Plastic bags or a propagator: To create a humid environment.
- Watering can with a fine rose: For gentle watering.
Propagation Methods
While there might be other ways, I’ve found the following methods to be the most reliable for Plicosepalus sagittifolius.
Stem Cuttings
This is probably my go-to for this plant.
- Take the cutting: Using your clean shears, take a 4-6 inch stem cutting from a healthy, non-flowering shoot. Make the cut just below a leaf node, as this is where roots are most likely to form. Remove the lower leaves, leaving just a couple at the very top.
- Apply rooting hormone: Dip the cut end of the stem into your chosen rooting hormone. Tap off any excess.
- Plant the cutting: Fill your small pot with your prepared, moist potting mix. Make a small pilot hole in the center with a pencil or your finger. Gently insert the cutting, ensuring the leaf nodes you removed are below the soil surface. Firm the soil around the stem.
- Create humidity: Water the soil gently. Then, cover the pot with a clear plastic bag (propping it up with stakes so it doesn’t touch the leaves) or place it in a propagator. This keeps the humidity high, which is vital for cuttings that can’t yet absorb water through roots.
Water Propagation
While a bit trickier for this specific plant to develop robust root systems quickly, it’s a visually rewarding way to start.
- Prepare the cutting: Similar to above, take a 4-6 inch cutting from a healthy stem, ensuring you have at least one leaf node submerged. Remove lower leaves.
- Place in water: Put the cutting in a clean glass jar or vase filled with room-temperature water.
- Location is key: Place the jar in bright, indirect light. Change the water every 3-4 days to keep it fresh and prevent bacterial growth.
The “Secret Sauce” (Pro Tips)
These are the little things that make a big difference:
- Bottom Heat is Your Best Friend: Especially for stem cuttings, placing your pots on a heating mat can significantly speed up root development. It mimics the warmth of spring soil and gives those roots a real boost.
- Don’t Drown Your Cuttings: When you do water your potted cuttings, make sure the soil is moist but never soggy. Overwatering is a fast track to rot, and nobody wants that! If using water propagation, make sure those leaves stay above the waterline at all times.
- Patience is a Virtue (Especially with Plicosepalus): Some plants root in a few weeks; others take a couple of months. Don’t get discouraged if you don’t see roots immediately. Gently wiggle a cutting (very, very gently!) to feel for resistance.
Aftercare & Troubleshooting
Once you see new growth or feel a good amount of resistance when gently tugging, your cutting has likely rooted!
- Acclimating: Gradually introduce your new plants to drier air by opening the plastic bag or propagator for short periods each day. Once they seem happy, you can remove the cover entirely.
- Potting Up: If your cuttings started in small pots, it’s time to move them to slightly larger ones with fresh potting mix when they are about 2-3 inches tall and have a good root system. Water them in well.
- Troubleshooting: The most common issue you’ll face is rot. This usually happens from overwatering or poor air circulation. If a cutting turns black and mushy, sadly, it’s time to compost it and try again. Yellowing leaves can sometimes indicate too much direct sun or overwatering. Brown, crispy edges might mean it’s too dry or the humidity is too low.
A Little Encouragement to End
Propagating Plicosepalus sagittifolius is a wonderful way to connect with your plants and expand your green collection without spending a fortune. Be patient with yourself and your little cuttings. Every time you try, you learn something new. And when that first little root appears, or you see that brand-new leaf unfurling, well, that’s a moment of pure gardening joy. Happy propagating!
Resource: