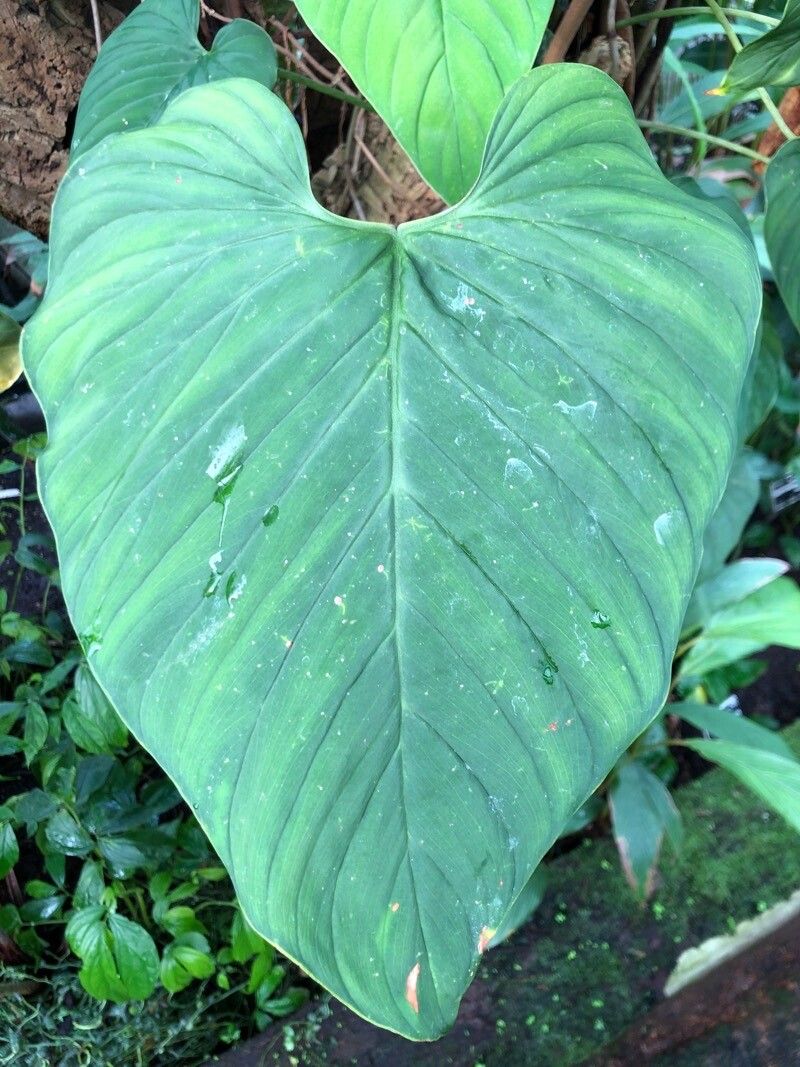
Hey fellow plant lovers! Today, we’re diving into the wonderful world of Philodendron brunneicaule. I’ve always been drawn to its unique, leathery leaves with that beautiful bronzy sheen. Seeing a new leaf unfurl on a brunneicaule is just something special. And the best part? Propagating them is incredibly rewarding. Even if you’re just starting out, don’t shy away from this one. With a little patience, you’ll have new babies in no time.
The Best Time to Start
For the highest success rate, spring is your best friend when it comes to propagating Philodendron brunneicaule. As the days get longer and warmer, your plant will naturally be putting out new growth. This vigorous energy is exactly what you want when you’re taking cuttings. Aim for when the plant is actively growing, not when it’s dormant in the cooler months.
Supplies You’ll Need
Here’s what you’ll want to have on hand before you get started:
- Sharp Pruning Shears or Scissors: Cleanliness is key!
- Rooting Hormone (Optional but Recommended): A little boost never hurt anyone.
- Potting Mix: A well-draining blend is crucial. I like to use a mix of orchid bark, perlite, and coco coir. A standard houseplant mix with added perlite works too.
- Small Pots or Propagation Trays: Whatever you have available for your new babies.
- Clear Plastic Bag or Propagation Dome: To create that essential humidity.
- Watering Can or Spray Bottle: For gentle watering.
- A Sunny Spot (but not direct sun): Bright, indirect light is perfect.
Propagation Methods
My favorite way to propagate Philodendron brunneicaule is by stem cuttings. It’s reliable and gives you a good chance of success.
Stem Cuttings:
- Locate a Healthy Stem: Look for a mature stem that has at least two or three leaves and, importantly, a node. A node is that little bump on the stem where a leaf grows from. This is where the roots will emerge.
- Make Your Cut: Using your clean pruning shears, make a cut just below a node. You want to leave at least one leaf on your cutting. If the stem has multiple leaves, you can trim them if they’re too large to prevent wilting.
- Apply Rooting Hormone (Optional): Dip the cut end of your stem into rooting hormone powder or gel. Tap off any excess. This isn’t strictly necessary, but it can speed things up.
- Plant Your Cutting: Fill your small pot with your well-draining potting mix. Make a hole in the center with your finger or a pencil. Gently insert the cutting, ensuring the node is buried in the soil.
- Water and Cover: Water the soil thoroughly but gently. Then, cover the pot with a clear plastic bag or a propagation dome. This isn’t about suffocating the plant; it’s about creating a humid microclimate to keep the cutting from drying out while it tries to root. Secure it loosely so there’s still some air exchange.
Another simple method is water propagation, which is super satisfying to watch.
Water Propagation:
- Prepare Your Cutting: Follow steps 1 and 2 from the stem cutting method. Make sure your cutting has at least one node.
- Place in Water: Get a clean jar or glass and fill it with room-temperature water. Place your cutting in the water, making sure the node is submerged. Crucially, try to keep the leaves out of the water. They’ll just rot.
- Find a Good Spot: Place the jar in a bright spot with indirect light.
- Change Water Regularly: This is important! Change the water every few days, or whenever it starts to look a bit cloudy. This prevents bacteria buildup and keeps things fresh.
The “Secret Sauce” (Pro Tips)
Here are a couple of things I’ve learned over the years that really make a difference:
- Don’t Be Afraid to Trim: If you have a cutting with a very long stem and only one leaf, I sometimes trim off the leaf to a more manageable size. This reduces water loss from the leaf surface, giving the stem more energy to focus on rooting. Just make sure there’s still some leaf surface for photosynthesis!
- Bottom Heat is Your Friend: For stem cuttings planted in soil, providing a little gentle warmth from below can significantly speed up root development. A cheap seedling heat mat placed under the propagation tray works wonders. It mimics the natural warmth of spring soil.
Aftercare & Troubleshooting
Once your cutting has rooted (you’ll see new roots emerging from the node in water propagation, or you can gently tug on the stem in soil and feel resistance), it’s time to treat it like a mini-grown plant!
- In Water: Once you have a good network of roots, about an inch or two long, you can pot it up into your well-draining potting mix. Water it well after planting.
- In Soil: If it was in soil, continue to keep it consistently moist, but not waterlogged. Once you see new leaf growth, you know it’s established. Gradually remove the plastic bag or dome over a few days to acclimate it to normal humidity.
What if things go wrong? The most common culprit is rot. This usually happens if the cutting is sitting in too much stagnant water or the soil is too wet. If you see your cutting mushy or black at the cut end, it’s probably a goner. Don’t get discouraged! Just clean your tools and try again with a fresh cutting. Another sign of failure is if the leaves start to yellow and drop off without any new growth appearing. This could be due to lack of light, too much or too little water, or just an unhappy cutting.
A Encouraging Closing
Propagating plants is a beautiful dance with nature. It takes a little observation, a dash of patience, and a whole lot of love. Don’t be afraid to experiment and learn from each attempt. Seeing those tiny roots appear on your Philodendron brunneicaule cutting is one of the most satisfying feelings for a gardener. So go ahead, get your hands dirty, and enjoy the journey of growing something new!
Resource: